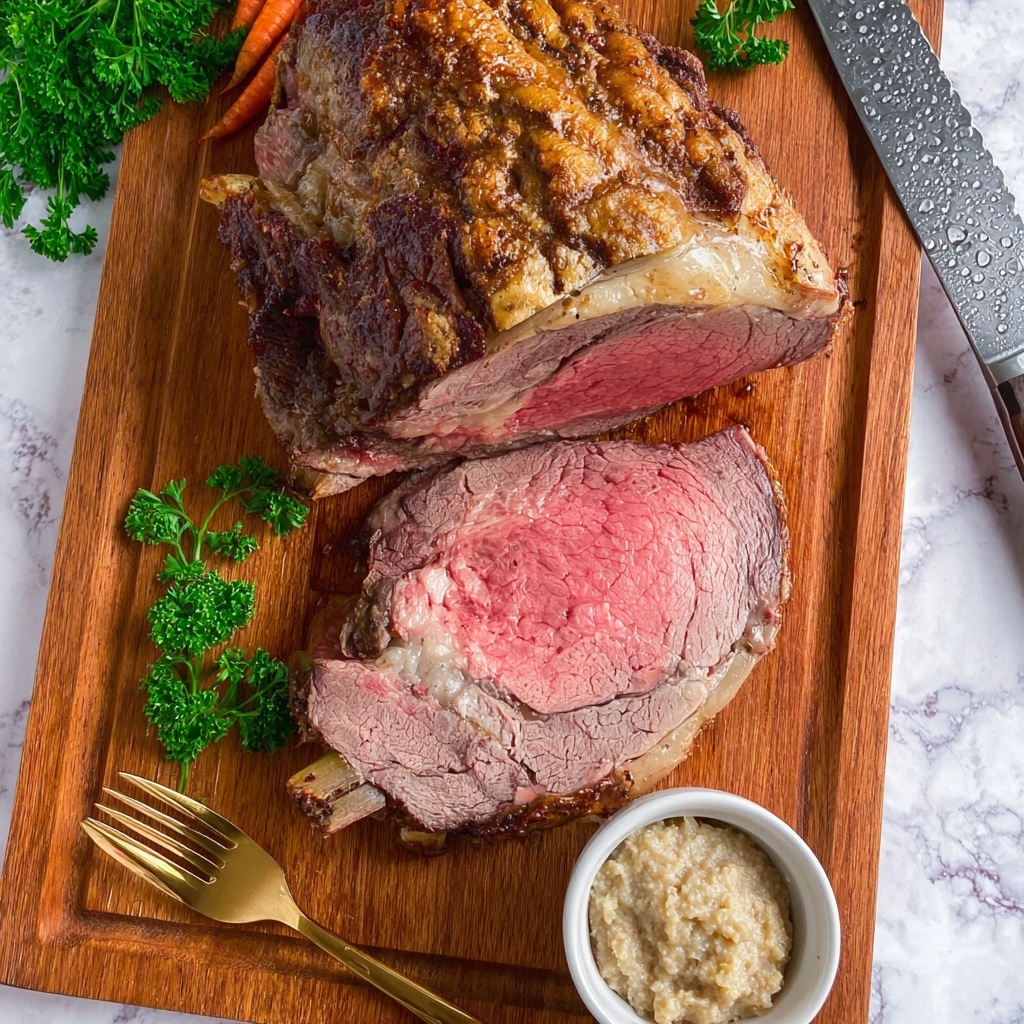
If you have ever dreamed of creating a show-stopping centerpiece for your next special meal, the Classic Prime Rib Recipe is the answer. This stunning roast not only boasts a tender, juicy interior but also has a beautifully caramelized crust that will have everyone asking for seconds. What makes this recipe truly special is its simplicity—using just a handful of quality ingredients and straightforward techniques, you can achieve restaurant-worthy results right at home. Whether you’re a seasoned cook or trying prime rib for the very first time, this Classic Prime Rib Recipe delivers on flavor, texture, and that unforgettable wow factor.
Ingredients You’ll Need
To make this Classic Prime Rib Recipe, you’ll only need a few essential ingredients, but each one plays a crucial role. From seasoning to texture, every component works together to create that perfect balance of savory and succulent flavors. Simple ingredients mean the natural taste of the beef shines through, making it the star of your table.
- 3-rib, 7 pound standing rib roast, trimmed and tied: This cut provides the perfect balance of marbling and tenderness, ensuring a juicy roast with rich flavor.
- Kosher salt: Essential for seasoning, kosher salt draws out moisture and enhances the meat’s natural flavors while helping to form that irresistible crust.
How to Make Classic Prime Rib Recipe
Step 1: Prepping the Roast
Start by removing your roast from the packaging and patting it dry with paper towels. This step is key to achieving a beautiful sear, so don’t rush it. Season the entire surface liberally with kosher salt. Once salted, cover the roast loosely with aluminum foil and let it rest at room temperature for 1 to 2 hours. This resting period helps the meat cook more evenly and allows the salt to penetrate, enhancing the overall flavor.
Step 2: Prepare Your Oven and Rack
While your roast is sitting, adjust your oven racks so they sit in the lowest position and preheat your oven to 250º F. Next, grab a sheet pan and place a wire rack inside it, or use a roasting pan that includes a built-in rack. Elevating the roast allows heat to circulate evenly underneath, which is essential for that perfect slow roast.
Step 3: Sear the Roast
Heating a large cast iron skillet or heavy-bottomed pan over medium-high heat until very hot is where magic starts. Place the roast into the skillet, searing for 2 to 3 minutes on each side. This process, which takes about 10 minutes total, is crucial to develop a flavorful, golden-brown crust and render some of the fat, contributing to the roast’s mouthwatering texture.
Step 4: Arrange the Roast for Roasting
Once it’s beautifully browned on all sides, transfer the roast fat side up onto your wire rack. This position allows the fat to baste the meat naturally during cooking, keeping every bite juicy and flavorful as it roasts slowly in the oven.
Step 5: Roast to Perfection
Place the roast in the preheated oven and let it cook slowly for 3 to 3½ hours. Using an instant-read thermometer is a game-changer here—pull your roast when it hits 125º for rare, 130º for medium-rare, or 140º for medium. Once out, tent the roast loosely with foil and allow it to rest for 20 to 30 minutes. Resting is crucial, as it helps redistribute the juices throughout the meat, making every slice tender and juicy.
Step 6: Carving the Classic Prime Rib Recipe
When it’s time to serve, carefully remove the twine tying the roast. Move it onto a sturdy cutting board. The trick to carving a prime rib is to start by making cuts perpendicular to the bones to separate the meat from them. Set the bones aside, then slice the meat into individual portions against the grain, ensuring every bite is tender and easy to enjoy.
How to Serve Classic Prime Rib Recipe
Garnishes
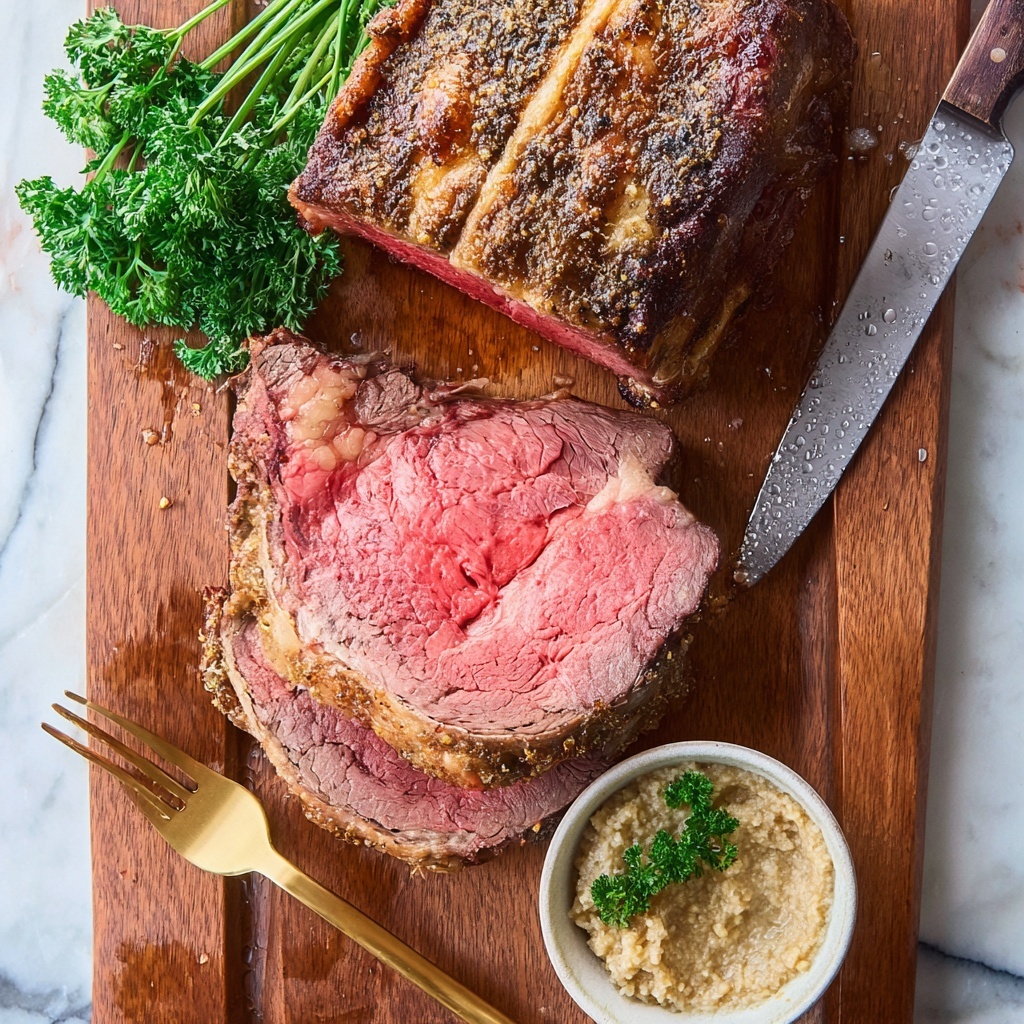
Simple garnishes can elevate the presentation of your Classic Prime Rib Recipe and introduce fresh flavors to contrast with the rich beef. Consider sprigs of fresh rosemary or thyme, coarse sea salt flakes, or a few dollops of horseradish cream—these add pops of color and complementary aromas that excite the senses.
Side Dishes
Classic accompaniments such as garlic mashed potatoes, roasted seasonal vegetables, or a creamy Yorkshire pudding make excellent partners to prime rib. The richness of the beef pairs perfectly with these hearty sides, while fresh salads or lightly dressed greens add a refreshing balance to the plate.
Creative Ways to Present
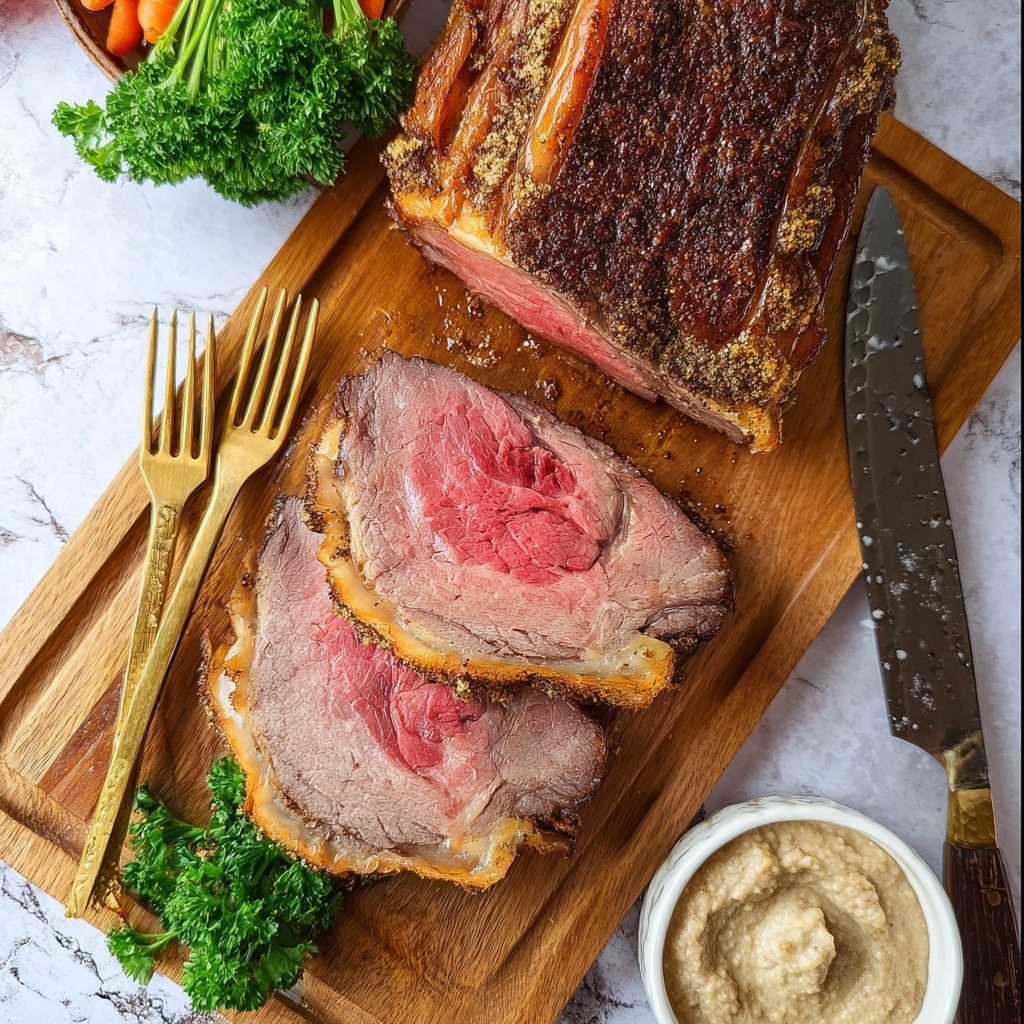
If you want to impress your guests visually, think about slicing the prime rib thick and layering it on a large wooden board or platter surrounded by your chosen garnishes and sides. Serving it family-style encourages sharing and creates a warm, inviting atmosphere. You might also accompany the roast with a homemade au jus or a rich red wine reduction for a touch of gourmet flair.
Make Ahead and Storage
Storing Leftovers
After your feast, wrap any leftover prime rib tightly in aluminum foil or plastic wrap and store it in the refrigerator. Properly stored, the meat will stay delicious for up to 3 days, making for easy, flavorful meals the following days.
Freezing
If you want to keep leftovers longer, freezing is an excellent option. Slice the meat into portions, wrap each piece in plastic wrap, and then place in an airtight freezer bag. Frozen prime rib can maintain its quality for up to 3 months. When you’re ready to enjoy, thaw overnight in the fridge.
Reheating
Reheating prime rib gently is key to preserving its tenderness. The best method is to warm it in a low oven (around 250º F) until just heated through, or to briefly warm slices in a covered pan on the stove over low heat. Avoid microwaving as it tends to dry out the meat and sacrifices texture.
FAQs
What is the best degree of doneness for prime rib?
Many experts recommend medium-rare (around 130º F) as the perfect temperature because it maximizes tenderness and flavor. Classic Prime Rib Recipe allows you to choose doneness, but medium-rare consistently pleases most palates.
Can I prepare the roast the night before?
Absolutely! Season your roast the night before and refrigerate it uncovered or loosely covered. This dry-aging overnight helps intensify flavor and promotes a better crust when you cook it.
Do I need to baste the prime rib while roasting?
Because the roast is positioned fat side up on a rack, the melting fat naturally bastes the meat, so additional basting is not necessary and may affect even cooking.
What’s the difference between a standing rib roast and prime rib?
They are essentially the same cut of beef from the rib section. The term “prime rib” refers to the cooking style and presentation. This Classic Prime Rib Recipe uses a standing rib roast, named for how it’s cooked standing on the ribs.
How long should I let the prime rib rest before carving?
Resting the roast for 20 to 30 minutes after cooking allows the juices to redistribute evenly within the meat, resulting in juicy slices without a messy pool of juices on your cutting board.
Final Thoughts
There’s something truly special about the Classic Prime Rib Recipe that brings joy to any dining experience with its rich flavor and tender texture. I hope you’ll give this recipe a try and impress your family or friends with a beautiful, buttery prime rib roast. Once you taste how simple ingredients and a bit of patience can transform a meal, you’ll be making it again and again for memorable gatherings.
Print
Classic Prime Rib Recipe
- Prep Time: 1 hour 30 minutes
- Cook Time: 3 hours 10 minutes
- Total Time: 4 hours 40 minutes
- Yield: 6 servings
- Category: Main Course
- Method: Roasting
- Cuisine: American
Description
Classic Prime Rib is a beautifully roasted standing rib roast, seasoned simply with kosher salt and cooked to perfection with a tender, juicy interior and a flavorful browned crust. This elegant roast is perfect for special occasions and family gatherings, delivering succulent, flavorful beef with minimal seasoning and expert technique.
Ingredients
Prime Rib Roast
- 1 (3-rib) 7 pound standing rib roast, trimmed and tied
- Kosher Salt, to taste
Instructions
- Prepare the Roast: One to two hours before cooking, remove the roast from its packaging, place it on a plate, and pat dry thoroughly with paper towels. Season generously with kosher salt on all sides. Loosely cover the roast with aluminum foil and let it sit at room temperature for 1 to 2 hours to ensure even cooking.
- Preheat the Oven: Adjust the oven racks to the lowest position and preheat your oven to 250ºF. Prepare a sheet pan with a wire rack or use a roasting pan equipped with a wire rack to support the roast during cooking.
- Sear the Roast: Heat a large cast iron skillet or heavy-bottomed pan over medium-high heat until very hot. Place the roast in the skillet, searing each side for 2 to 3 minutes, about 10 minutes total, until the entire exterior is browned and the fat begins to render. This step locks in flavor and juices.
- Transfer Roast to Rack: Move the seared roast fat side up onto the prepared wire rack in the sheet or roasting pan.
- Roast Low and Slow: Place the roast in the preheated oven. Cook for 3 to 3½ hours, or until an instant-read thermometer inserted into the thickest part of the roast registers 125ºF for rare, 130ºF for medium-rare, or 140ºF for medium. Once done, remove the roast from the oven and tent it loosely with aluminum foil. Allow it to rest for 20 to 30 minutes to retain juices and finish cooking internally.
- Carve and Serve: Remove the twine from the roast. Transfer to a cutting board. To carve, make a perpendicular cut close to the bones to separate them from the meat. Set bones aside and slice the meat into portions against the grain starting from the end. Serve promptly and enjoy your classic prime rib.
Notes
- Resting the roast after cooking is crucial to allow juices to redistribute for a juicy, tender result.
- Use an instant-read thermometer to monitor internal temperature accurately to achieve desired doneness.
- Searing the meat before roasting develops a beautiful crust and deep flavor through the Maillard reaction.
- Letting the roast come to room temperature before cooking helps it cook evenly.
- Adjust seasoning with salt immediately before roasting, as salt helps enhance natural beef flavors.


