
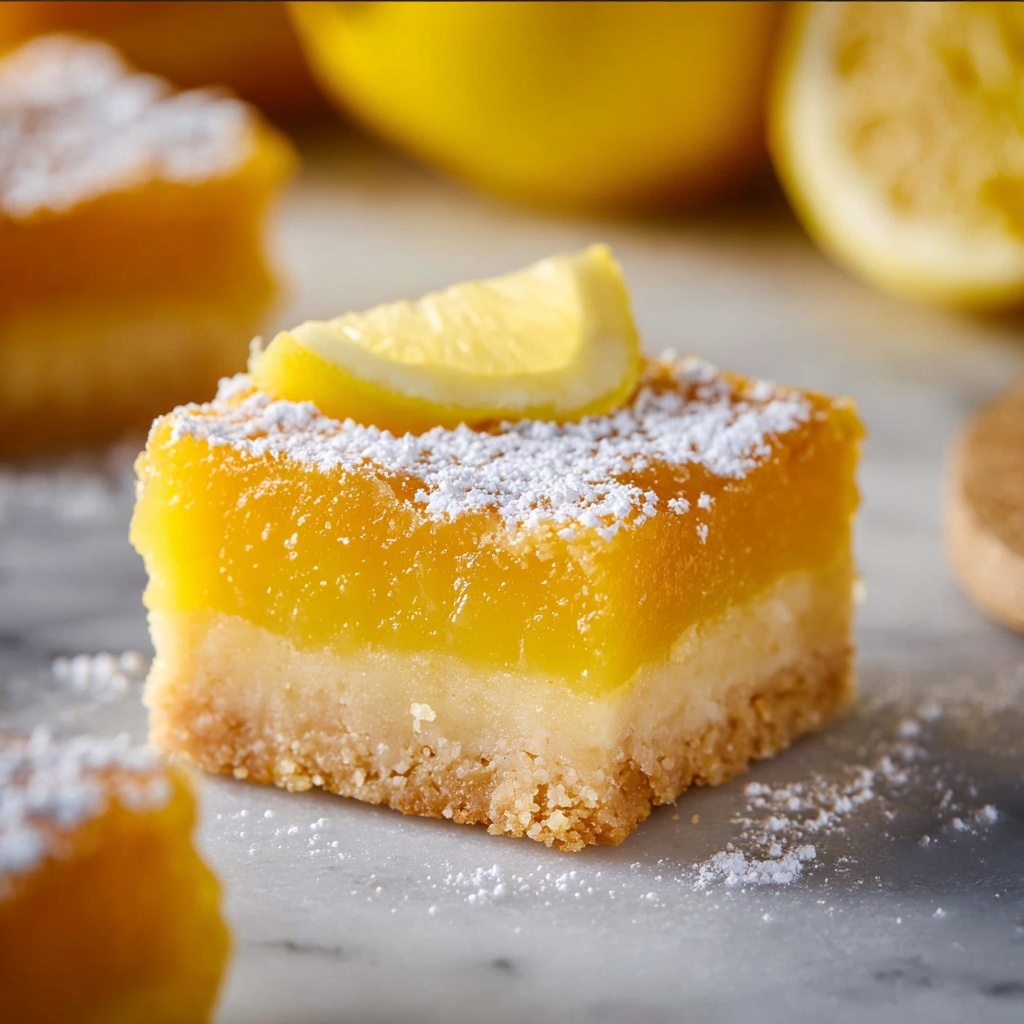
If you’re craving a dessert that perfectly balances bright, tangy citrus with a buttery, melt-in-your-mouth crust, look no further than this incredible Lemon Bars Recipe. These bars are a personal favorite and for good reason: the vibrant lemon custard topping is luxuriously smooth and tart, while the shortbread base offers the perfect amount of crumbly richness. Once you try this recipe, it will quickly become your go-to treat for any occasion, from casual afternoons to special celebrations.
Ingredients You’ll Need
The magic behind this Lemon Bars Recipe lies in a few simple yet essential ingredients that each play a crucial role. From the buttery crust that gives structure and texture, to the fresh lemon juice and zest that bring that unmistakable citrus zing, every component works together in harmony to create pure dessert bliss.
- All-purpose flour: The foundation for the crust and custard, providing structural stability while keeping the bars light.
- Cornstarch: Adds tenderness to the crust, helping it stay delicate and flaky.
- Powdered sugar: Sweetens the crust without adding graininess and creates a perfect dusting on top.
- Kosher salt: Enhances all the flavors, balancing the tartness and sweetness beautifully.
- Lemon zest: Bursting with oils, it intensifies the bright citrus flavor in both crust and custard.
- Cold butter: Essential for a flaky, tender crust that melts in your mouth.
- Large eggs: Bind the custard filling and provide richness for a smooth texture.
- Granulated sugar: Sweetens the custard and balances the tartness of the lemons.
- Fresh lemon juice: The star ingredient that delivers the vibrant and refreshing tartness.
How to Make Lemon Bars Recipe
Step 1: Prepare the Crust
Start by lining a 9×13 inch pan with parchment or greasing it well. This step ensures the bars release easily after baking, preserving their beautiful edges and perfect shape.
Step 2: Mix Dry Ingredients for the Crust
Whisk together the flour, cornstarch, powdered sugar, kosher salt, and lemon zest in a large bowl. This combination creates a flavorful base that will complement the tangy lemon layer perfectly.
Step 3: Cut in the Butter
Use a pastry cutter or a knife to incorporate the cold butter into the flour mixture until pea-sized bits form. The cold butter pockets create that sought-after flakiness and tenderness in your crust.
Step 4: Press and Chill the Crust
Pack the crumbly dough evenly into your prepared pan, pressing it firmly to form a compact layer. Then chill it in the freezer or fridge. This chilling step is crucial; when cold butter hits the hot oven, it produces a crust with the perfect flaky texture.
Step 5: Bake the Crust
Bake at 350°F until the edges turn golden and the crust loses its shine, about 24-25 minutes. Keep an eye out for those little craggy holes – they tell you the shortbread is marvelously flaky. Remove and cool completely.
Step 6: Prepare the Lemon Custard
Whisk together eggs, granulated sugar, flour, salt, lemon zest, and fresh lemon juice until smooth and fully combined. Be patient when mixing to ensure no egg whites remain unmixed, which helps the custard set perfectly.
Step 7: Bake the Lemon Custard Layer
Pour the lemon mixture over the cooled crust and bake for 30-35 minutes. The edges should be set but the center just a little wobbly. This slight jiggle means the custard will firm up to creamy perfection as it cools.
Step 8: Cool and Chill the Bars
Allow the bars to cool at room temperature before transferring to the fridge to chill for at least 2-3 hours. This final chill is the secret to getting the custard to set just right—cold, smooth, and totally irresistible.
Step 9: Slice and Dust
Use a sharp knife cleaned between cuts to slice the bars into small squares. Finally, dust with powdered sugar just before serving to add a touch of extra sweetness and a beautiful finish.
How to Serve Lemon Bars Recipe
Garnishes
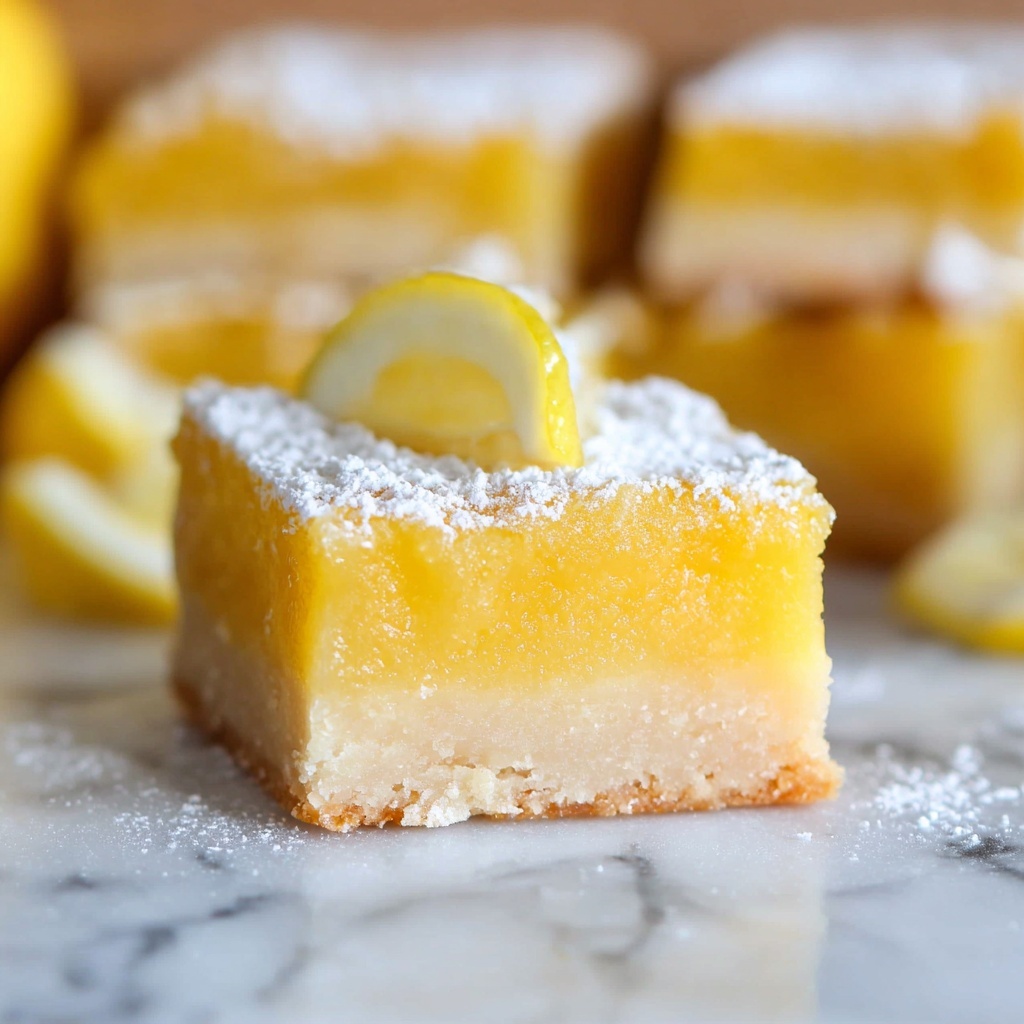
Simple is best when it comes to garnishes. A light dusting of powdered sugar adds elegance and sweetness without overshadowing the lemon’s bright flavor. If you want to get fancy, add a thin lemon twist or a tiny sprig of fresh mint for color and flair.
Side Dishes
Lemon bars are a delightful standalone dessert but pair wonderfully with a scoop of vanilla ice cream or a dollop of freshly whipped cream. Serve alongside a pot of hot tea or freshly brewed coffee for a refreshing afternoon treat.
Creative Ways to Present
For parties, arrange the lemon bars on a tiered dessert stand or serve them in mini individual portions inside pretty cupcake liners. You can even drizzle a hint of white chocolate over the top for an elegant twist that guests will adore.
Make Ahead and Storage
Storing Leftovers
Keep your lemon bars fresh by storing them in an airtight container in the refrigerator. They will stay delicious for up to 5 days, allowing you to enjoy this treat well beyond the first craving.
Freezing
These bars freeze beautifully, making them perfect for planning ahead. Wrap them tightly and freeze, then thaw in the fridge overnight before serving. This way, you’ll always have a batch ready whenever the lemon craving strikes.
Reheating
Typically served chilled, lemon bars rarely need reheating. However, if you prefer them slightly warmer, let them come to room temperature for about 20 minutes. Avoid microwaving to maintain the perfect custard texture.
FAQs
Can I use bottled lemon juice instead of fresh?
Fresh lemon juice is strongly recommended in this Lemon Bars Recipe as it offers the brightest, most vibrant flavor. Bottled juice can be more acidic or bitter, and it won’t give you that fresh, zesty pop essential to these bars.
Why is the crust flaky and not cakey?
The key to the flaky shortbread crust is the cold butter cut into the flour and cornstarch blend. When baked, pockets of butter create layers, resulting in a tender, crumbly texture rather than a dense or cakey base.
How do I prevent cracked lemon bars?
Overbaking or rapid cooling can cause cracks. Follow baking times closely and allow the bars to cool gradually at room temperature before chilling. This helps the custard set evenly and stay smooth.
Can I make this recipe gluten-free?
You can substitute the all-purpose flour with a gluten-free blend for both crust and custard, but results may vary slightly in texture. Be sure to use a blend designed for baking to maintain the right consistency.
What’s the secret to a tart but not overpowering lemon flavor?
Using both lemon zest and juice balances the citrus intensity. The zest provides aromatic oils that brighten flavor, while the juice delivers the tartness. Adjust the amount of zest and juice to suit your taste preferences.
Final Thoughts
Whether you’re baking for family, friends, or just treating yourself, this Lemon Bars Recipe offers a perfect combination of tangy, sweet, and buttery goodness that’s impossible to resist. Making these bars from scratch is straightforward and truly rewarding, and the smiles they bring are priceless. Dive in and enjoy the sunny, luscious flavor of homemade lemon bars—you won’t regret it!
Print
Lemon Bars Recipe
- Prep Time: 20 minutes
- Cook Time: 55 minutes
- Total Time: 1 hour 15 minutes plus chilling time
- Yield: 24 servings
- Category: Dessert
- Method: Baking
- Cuisine: American
Description
This classic lemon bars recipe features a tender, flaky shortbread crust topped with a bright and tangy lemon custard. Perfectly balanced between sweet and tart, these bars are dusted with powdered sugar for an elegant finish. Ideal for dessert or a refreshing snack, these bars are baked to perfection and chilled to set the luscious lemon filling.
Ingredients
For the Crust:
- 1 and 3/4 cups all-purpose flour (spooned and leveled)
- 1/4 cup cornstarch
- 2/3 cup powdered sugar
- 1/2 teaspoon kosher salt (use half the amount if using table salt)
- 1 teaspoon lemon zest (from 1 lemon)
- 1 cup (2 sticks) cold butter
For the Lemon Custard:
- 6 large eggs
- 2 and 1/4 cups granulated sugar
- 1/2 cup + 1 tablespoon all-purpose flour (spooned and leveled)
- 1/2 teaspoon kosher salt (use half the amount if using table salt)
- 2 tablespoons lemon zest (about 6–8 lemons)
- 1 cup + 2 tablespoons fresh lemon juice (about 6–8 medium lemons)
- Powdered sugar (for dusting before serving)
Instructions
- Prepare the crust: Line a 9×13 inch glass or ceramic pan with parchment paper or grease it with nonstick spray or butter to prevent sticking.
- Mix dry ingredients for crust: In a large bowl, whisk together 1 and 3/4 cups flour, 1/4 cup cornstarch, 2/3 cup powdered sugar, 1/2 teaspoon kosher salt, and 1 teaspoon lemon zest until evenly combined.
- Cut in the butter: Using a pastry cutter or butter knife, cut the cold butter into the dry mixture until pea-sized bits form, ensuring an even distribution for a flaky crust.
- Press crust into pan: Firmly press the butter-flour mixture into the prepared pan using a measuring cup to compact it tightly, forming an even layer.
- Chill the crust: Freeze for 20 minutes or refrigerate for 30 minutes to keep the butter cold, which helps create a tender crust after baking.
- Preheat oven: Set the oven to 350 degrees Fahrenheit while the crust chills.
- Bake the crust: Bake the crust for 24-25 minutes until the edges turn golden and the top loses its shine but remains pale, with craggy holes indicating flakiness.
- Cool the crust: Let the baked crust cool completely or nearly completely before adding the lemon custard to prevent cooking the eggs prematurely.
- Prepare the lemon custard: In a large bowl or stand mixer, combine 6 eggs, 2 and 1/4 cups granulated sugar, 1/2 cup plus 1 tablespoon flour, 1/2 teaspoon kosher salt, 2 tablespoons lemon zest, and 1 cup plus 2 tablespoons lemon juice.
- Beat custard mixture: Mix thoroughly for about 2 minutes until the eggs are fully incorporated and the mixture is smooth, scraping sides and bottom as needed.
- Pour custard over crust: Evenly pour the lemon custard mixture onto the cooled shortbread crust.
- Bake lemon bars: Return to the oven and bake for an additional 30-35 minutes. The edges should be set and browned, while the center remains slightly wobbly but not liquidy.
- Cool on wire rack: Allow the lemon bars to cool for 20-30 minutes to help firm the filling.
- Chill bars: Cover loosely with plastic wrap and refrigerate for at least 2-3 hours to fully set the custard and enhance flavor.
- Rest before serving: For best texture and flavor, let the bars sit for about 30 minutes outside the fridge before slicing.
- Slice the bars: Use a sharp chef’s knife, wiping it clean between cuts. Trim the edges for best presentation, cutting the bars into small squares as they are rich.
- Dust with powdered sugar: Just before serving, dust the top with powdered sugar using a sieve for a delicate finish. Avoid dusting too early as it will absorb into the custard.
- Store leftovers: Keep any uneaten lemon bars covered in the refrigerator for several days to maintain freshness.
- Freeze for longer storage: Lemon bars can be frozen. Thaw overnight in the fridge before serving for best results.
Notes
- Use cold butter to achieve a tender and flaky crust.
- Properly measuring flour by spooning and leveling prevents a dense crust.
- Lemon zest amount can be adjusted for tartness to your preference.
- Make sure the custard is slightly wobbly in the center after baking; it will firm up when chilled.
- Dust powdered sugar just before serving to maintain a fresh appearance.
- Cut the bars into smaller pieces due to their richness for better portion control.
- Chilling the crust before baking and the bars after baking is essential for best texture.
- Freezing extends storage life; thaw bars fully before serving.


