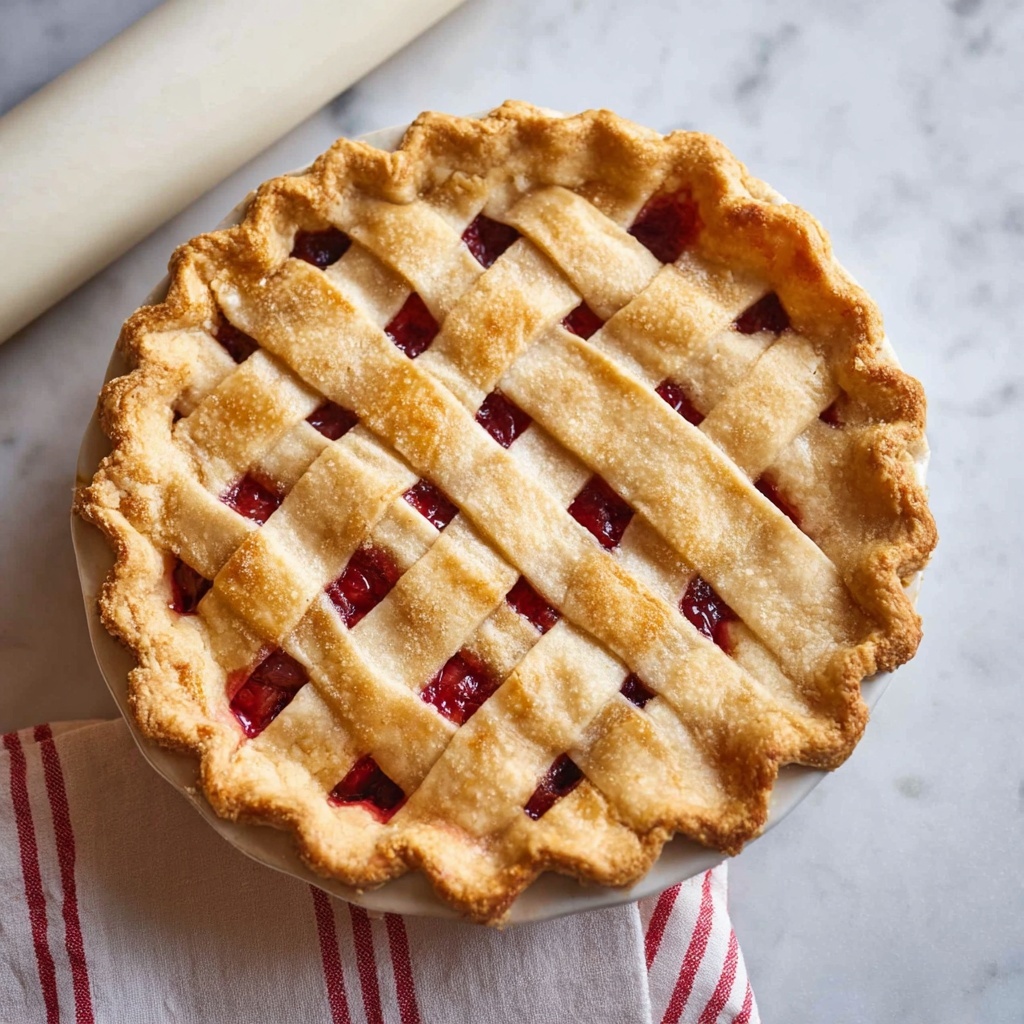
If you’ve ever admired those stunning pies with beautifully woven tops and wondered how they achieve that perfect decorative finish, you’re in the right place. Learning How to Make a Lattice Pie Crust Recipe is a game changer for anyone who loves baking or just wants to impress at their next family gathering. This technique combines simplicity and elegance, transforming a regular pie into a showstopper with its flaky, golden ribbons crisscrossing atop a luscious filling. Once you master this classic method, you’ll want to make lattice pies for every occasion!
Ingredients You’ll Need
Getting ready to create your lattice pie crust is refreshing because the ingredients are straightforward and few, yet each one plays a vital role in the final flaky, beautiful crust you’ll adore. Let’s break down what you’ll need to make this happen:
- Double pie crust (2 sheets of pie dough): The foundation of your lattice, providing both the base and the decorative top for your pie.
- Pie filling (room temperature, ideally cold or frozen): Keeps your crust firm and helps with easier lattice weaving, avoiding melting the butter in the dough.
- Patience: The secret ingredient to carefully weaving your dough strips without frustration or tears.
- Fridge or freezer: Essential for chilling dough to maintain its structure and prevent it from getting too soft to work with.
- Ice water: Handy to gently patch any cracks or tears during the weaving process.
- Flour: For dusting your workspace, ensuring your dough doesn’t stick and makes rolling and weaving a breeze.
How to Make How to Make a Lattice Pie Crust Recipe
Step 1: Chill and Prepare Your Pie Crust
Start with a well-chilled pie crust that has rested in your fridge for at least 30 minutes. Let it sit briefly at room temperature to soften slightly; this gives you the perfect balance for rolling it out without tearing. A cold crust means a flaky pie, and it’s the first step toward mastering How to Make a Lattice Pie Crust Recipe that bakes beautifully.
Step 2: Roll Out the Bottom Crust
Roll out your first pie dough into a roughly 13-inch circle, which will comfortably cover your 9-inch pie plate with some overhang. Transfer it carefully into the pan without greasing, and tuck the edges over the rim. Keep it cool by popping the pie back into the fridge or freezer while you prepare the filling.
Step 3: Fill the Pie With Cold Filling
Fill your crust with well-chilled pie filling, mounding it slightly in the center. Using cold or frozen filling is key to successful lattice weaving — warm filling will soften the butter in the dough, making it tough to work with and prone to tearing. Don’t rush this step; chilling the filling is part of the secret to perfect lattice perfection!
Step 4: Dust Your Work Surface and Prepare to Roll
Lightly flour your workspace to prevent sticking, and I highly recommend using a pastry cloth or parchment paper. This makes transferring your dough strips to the pie effortless and less stressful, especially if your kitchen is warm or your dough gets too soft.
Step 5: Roll Out the Top Crust for Lattice Strips
Roll the second pie crust into a circle about 10 inches across, slightly thicker than the first. Keep the thickness to ensure your strips stay sturdy during weaving. Remember, this dough won’t go up the pie sides; it only crosses over the top, so precision isn’t as critical as strength here.
Step 6: Cut Strips for the Lattice
Using a floured pizza cutter, slice the dough into evenly sized strips. For beginners, wider strips (about 1 1/4 inches) are easier to handle and weave. These thick ribbons make the lattice weaving less fiddly, helping you create that beautiful pattern with confidence.
Step 7: Keep the Dough Cool Throughout
Anytime the dough feels too soft, don’t hesitate to transfer it to the fridge or freezer for a few minutes. Raising the dough’s temperature makes it sticky and fragile, so chilling is your best friend during How to Make a Lattice Pie Crust Recipe. If you’re using a pastry cloth, you can lift the entire cloth and pop it in the freezer to chill all at once.
Step 8: Start Weaving Your Lattice
First, lay every other strip of dough evenly across the filled pie, leaving a small gap between each. Next, peel back every other strip halfway to the edge. This step sets up the weaving pattern and helps build the classic crisscross effect that makes the lattice so stunning.
Step 9: Add Perpendicular Strips and Weave
Place a strip of dough perpendicular to your laid strips, fitting it snugly against the pie’s edge. Then, fold the peeled-back strips over this new strip, creating the first wave of the weave. Repeat by peeling back the opposite strips and adding a new dough strip, keeping an eye on dough temperature throughout.
Step 10: Complete the Weave Across the Pie
Continue this back-and-forth peeling and layering action until your pie top is a beautifully woven lattice. If you spot any cracks or tears, gently moisten them with a dab of ice water and press together. This patching technique keeps the structure intact and professional looking.
Step 11: Shape and Crimp the Edges
Fold the hanging lattice edges onto the pie’s sides and gently mold them into a smooth, round edge—even if it looks a little cracked, you can play dough it back to shape! Use your fingers to crimp the edge for a neat, decorative finish. I like using three fingers to create a gentle curve, but knuckles work well, too.
Step 12: Chill Before Baking
Once your lattice is perfect, refrigerate or freeze the whole pie to ensure the crust goes into the oven cold. This chilling makes for that irresistibly flaky crust everyone swoons over.
Step 13: Final Touches Before Baking
Brush the lattice top with egg wash or a milk-and-egg mixture, then sprinkle generously with granulated or raw sugar for that sparkling, caramelized finish once baked. Halfway through baking, protect the edges of your pie with a foil shield to prevent burning and keep everything golden.
How to Serve How to Make a Lattice Pie Crust Recipe
Garnishes
When your lattice pie comes out of the oven, let it cool slightly before serving. A light dusting of powdered sugar or a dollop of whipped cream goes beautifully on top. Fresh fruit slices matching your filling can also add a pop of color and flavor, making each slice a delight to look at and enjoy.
Side Dishes
The warm, buttery lattice crust pairs wonderfully with vanilla ice cream or a scoop of rich custard. For a more decadent experience, serve alongside a drizzle of caramel or a handful of toasted nuts to add texture and contrast. This elevates the whole experience from just a slice of pie to a memorable dessert feast.
Creative Ways to Present
Don’t be shy about mixing up your lattice strips with wider or thinner ribbons or adding leaf-shaped dough cutouts for a seasonal twist. You can also sprinkle different sugars or coarse sea salt on sections of the lattice before baking to create eye-catching highlights. A unique lattice pattern can turn a traditional pie into a conversation starter at the table.
Make Ahead and Storage
Storing Leftovers
Leftover lattice pie crust keeps very well when wrapped tightly with plastic wrap or stored in an airtight container. Keep it refrigerated, and it will stay fresh and delicious for up to 3 days. The lattice holds its structure beautifully, so you can enjoy flaky bites even days later.
Freezing
If you want to prepare your lattice pie ahead of time, freezing is a fantastic option. Wrap the unbaked pie tightly with plastic wrap and foil before freezing. When you’re ready, bake it straight from the freezer—just add 10 to 15 minutes to the baking time to ensure the filling is warmed through and the crust perfectly golden.
Reheating
Reheat leftover lattice pie in a preheated oven at 350°F for about 15-20 minutes. This will refresh the crust’s flakiness and warm the filling without making it soggy. Avoid microwaving if you want to preserve that satisfying crispness of the lattice weave.
FAQs
Can I use store-bought pie dough for this lattice recipe?
Absolutely! Store-bought dough works perfectly, especially if you keep it well chilled before rolling and shaping. It’s a wonderful shortcut that still gives you beautiful results without sacrificing flakiness or flavor.
What should I do if my dough strips tear while weaving?
No worries at all. A tiny dab of ice water works like magic to patch small tears. Just press the dough back together gently, and it will hold during baking without issue.
Why is it important to keep the dough cold?
Cold dough keeps the butter in solid form, which is key to creating a flaky texture when baked. If dough gets too warm, it becomes sticky and hard to handle, and the resulting crust can be tough rather than tender.
Can I make lattice strips thinner or thicker?
Yes, you can customize strip width depending on your skill level and visual preference. Beginners often find thicker strips easier to work with, while thinner strips create a delicate, intricate appearance.
Should I pre-bake the crust before adding filling and lattice?
For this type of pie, you typically assemble the crust, filling, and lattice first, then bake everything together. Pre-baking (blind baking) is usually reserved for pies with no filling or very wet fillings, but it’s not required here.
Final Thoughts
There’s nothing quite like the satisfaction of pulling a golden lattice pie out of the oven, knowing you handcrafted every strip and every fold with care. Once you understand How to Make a Lattice Pie Crust Recipe, you’ll realize it’s not only approachable but also incredibly fun. Whether it’s your first lattice or your fiftieth, each pie is a masterpiece worth sharing. So grab your rolling pin, some dough, and that patient spirit — your next dazzling pie is waiting!
Print
How to Make a Lattice Pie Crust Recipe
- Prep Time: 30 minutes
- Cook Time: 45 minutes (estimated typical baking time for lattice crust pies; note not specified in article)
- Total Time: 1 hour 15 minutes
- Yield: 1 lattice-topped 9-inch pie
- Category: Dessert
- Method: Baking
- Cuisine: American
- Diet: Vegetarian
Description
Learn how to make a beautiful lattice pie crust with this step-by-step guide. Using a double pie crust and a cold or frozen filling, this method ensures your pie crust stays flaky and intact. The tutorial covers rolling out the dough, cutting and weaving the lattice strips, and finishing touches like crimping and brushing with egg wash for a golden-brown surface. Perfect for adding a classic decorative top to your favorite pies!
Ingredients
Pie Crust
- 1 double pie crust (2 sheets of pie dough)
- Flour (for dusting, quantity as needed)
- Ice water (to fix cracks, small amount)
Pie Filling
- Pie filling, cold or frozen (quantity to fill a 9-inch pie plate)
Other
- Granulated or raw sugar, for sprinkling on top
- 1 egg or milk (or a mixture), for brushing the top
Instructions
- Chill and soften dough: Start with a chilled pie crust that has been refrigerated for at least 30 minutes. Let it sit at room temperature for a few minutes until it softens slightly but remains cool enough to roll.
- Roll out bottom crust: Roll your first pie crust into a 13-inch circle. Place it in an ungreased 9-inch pie plate with the edges overhanging. Chill this crust in the fridge or freezer if there’s any delay before filling.
- Fill pie: Pour cold or frozen pie filling into the crust, mounding it in the center. Keep the pie in the fridge or freezer if not assembling immediately to maintain firmness.
- Prepare workspace: Lightly dust your work surface with flour. Using a pastry cloth or parchment paper is recommended to make it easier to transfer the lattice strips if they become soft.
- Roll out lattice dough: Roll the second pie crust into a 10-inch circle, thicker than the bottom crust. Thickness is important for ease of weaving and handling.
- Cut strips: Using a floured pizza cutter, cut the dough into even strips approximately 1 and 1/4 inches wide. Thicker strips are easier for beginners.
- Keep dough cold: If the dough starts softening, chill all dough strips in the fridge or freezer immediately to prevent tearing.
- Begin lattice weaving: Lay every other strip of dough across the filled pie, spaced evenly.
- Weave lattice strips: Peel back alternate strips, lay a perpendicular strip close to the edge, and fold back peeled strips over it. Repeat by peeling back the opposite strips and adding the next perpendicular strip.
- Continue weaving: Repeat the previous weaving process until the whole pie is covered with a woven lattice top. Use ice water to patch any tears in the dough.
- Fold and seal edges: Fold the lattice edges under and incorporate them into the bottom crust edges. Mold the edges to form a smooth, sealed border.
- Crimp edges: Use three fingers or knuckles to crimp the edges decoratively, creating a curved edge for a polished finish.
- Chill the whole pie: Refrigerate or freeze the assembled pie to ensure the dough is completely cold before baking for maximum flakiness.
- Brush and sugar topping: Brush the lattice top with beaten egg, milk, or a mixture to encourage browning. Sprinkle granulated or raw sugar evenly over the top.
- Protect edges during baking: Halfway through baking, cover the pie edges with a foil shield to prevent burning.
Notes
- Always use cold or frozen pie filling to prevent the butter in the crust from melting.
- Keep the dough cold at all times during preparation to maintain a flaky texture and prevent tearing.
- Using a pastry cloth or parchment paper can help transfer the lattice strips if the dough softens.
- Thicker lattice strips are easier to handle, especially for beginners.
- Use ice water sparingly to patch cracks in the dough.
- Crimping edges not only decorates but also helps seal the pie and retain juices.
- Chilling the assembled pie before baking is crucial for a flaky crust.
- Use a foil shield midway through baking to avoid over-browning the crust edges.


