
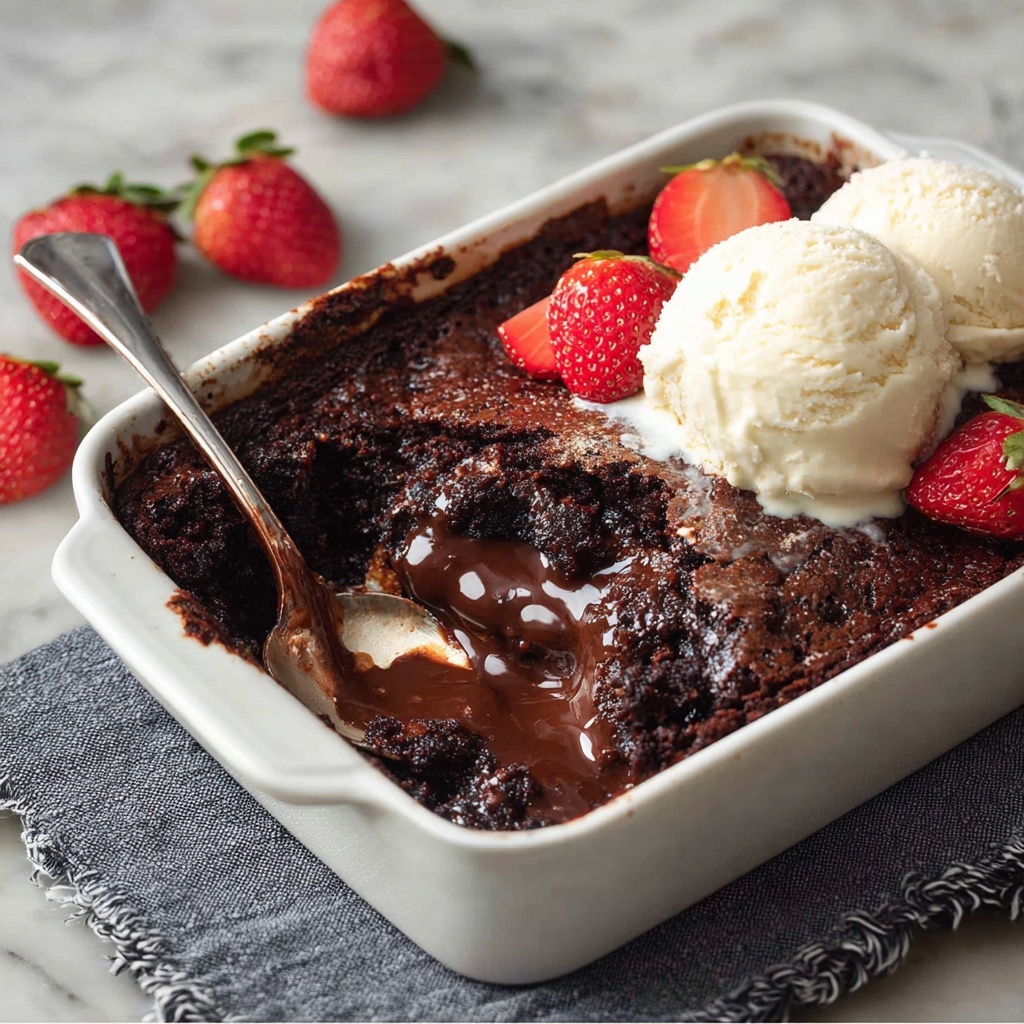
If you have a serious sweet tooth and love the idea of a dessert that magically transforms itself in the oven, then this Chocolate Self Saucing Pudding Recipe is your new best friend. Imagine a rich, moist chocolate cake with an irresistible, gooey sauce bubbling beneath the surface—without all the fuss of making separate components. This recipe brings warmth, comfort, and deep chocolate flavor all in one cozy bowl, making it perfect for sharing or indulging solo on a chilly evening.

Ingredients You’ll Need
Each ingredient in this Chocolate Self Saucing Pudding Recipe plays a crucial role, from creating that delicate cake texture to forming the luscious chocolate sauce underneath. The ingredients themselves are everyday pantry staples you probably have on hand, and they come together effortlessly to create something truly special.
- 1 cup (175g) brown sugar: Adds rich, caramel-like sweetness and moisture to the topping.
- 1/4 cup (30g) cocoa powder (unsweetened): Provides intense chocolate flavor, used both in topping and pudding.
- 1 1/4 cups (315ml) boiling water: This is key for creating the sauce beneath the cake as it bakes.
- 1 cup (150g) plain flour (all purpose): Forms the fluffy, cake-like base of the pudding.
- 2 1/2 tsp baking powder: Gives the pudding lift and lightness so it doesn’t feel too dense.
- 1/3 cup (70g) white sugar (caster or super fine preferred): Sweetens the cake batter without overpowering.
- Pinch of salt: Balances the sweetness and enhances chocolate depth.
- 1/2 cup (125ml) milk: Keeps the batter smooth and tender.
- 50 g / 4 1/2 tbsp butter (melted): Adds richness and a silky mouthfeel to the pudding.
- 1 egg: Binds everything together and adds moisture.
- 1 tsp vanilla extract: Introduces warmth and subtle complexity to the flavor profile.
How to Make Chocolate Self Saucing Pudding Recipe
Step 1: Preheat and Prepare Your Dish
Start by setting your oven to 170C/335F (standard) or 150C/305F if you have a fan-forced oven. Grease a baking dish that holds about 5 to 6 cups with butter—this helps ensure the pudding doesn’t stick and gets a perfect crust.
Step 2: Make the Topping
Whisk together the brown sugar and 1/4 cup cocoa powder in a small bowl, then set this aside. This mixture will sit on top and melt into the magical sauce that gives this dessert its signature character.
Step 3: Whisk the Dry Ingredients
In a larger bowl, combine the flour, baking powder, white sugar, the additional 1/4 cup cocoa powder, and a pinch of salt. This dry mix is the foundation of the cake batter and will balance sweetness with chocolate intensity.
Step 4: Mix the Wet Ingredients
In another bowl or jug, whisk the melted butter and milk together, then add the egg and vanilla extract. Whisk everything until it’s smooth and well incorporated—this adds richness and helps the pudding rise.
Step 5: Combine Wet and Dry Mixtures
Pour the wet ingredients into the dry ingredients and gently mix until combined. The batter will be quite thick—that’s exactly how it should be to give the pudding a nice crumb and texture.
Step 6: Build the Pudding
Spread the thick batter evenly into your prepared baking dish. Then sprinkle the brown sugar and cocoa topping mixture over the surface. Give the dish a gentle shake to spread the topping in a thin, even layer.
Step 7: Add the Magic Sauce
The secret to this recipe’s charm is here—carefully pour the boiling water over the back of a dessert spoon held just above the pudding. This creates the sauce that will bubble up as it bakes without disturbing the batter too much.
Step 8: Bake to Perfection
Place the pudding in the oven and bake for about 30 minutes. The top should spring back slightly when you poke it gently, and have a crust like a brownie. Be sure not to overbake, or you’ll lose that lovely saucy layer underneath.
Step 9: Serve Immediately
Once out of the oven, let the pudding stand for only a couple of minutes—just enough to cool slightly but still warm for serving. This is best enjoyed fresh while the sauce is still irresistibly gooey.
How to Serve Chocolate Self Saucing Pudding Recipe
Garnishes
This pudding is so delicious on its own, but when you add a scoop of vanilla ice cream or dollops of freshly whipped cream, it becomes something truly decadent. For an extra touch, sprinkle some grated chocolate or toasted nuts on top for texture and visual appeal.
Side Dishes
Pair it with fresh berries to balance the richness and add a pop of freshness, or savor it alongside a warm cup of coffee or tea to complete a cozy dessert experience.
Creative Ways to Present
Try serving this pudding in individual ramekins for a charming presentation that’s perfect for dinner parties. You can also drizzle caramel or a raspberry coulis over the top for a gourmet feel that will wow your guests.
Make Ahead and Storage
Storing Leftovers
If you find yourself lucky enough to have leftovers, cover the pudding tightly with plastic wrap or transfer it to an airtight container and refrigerate. It will keep well for up to 2 days, though it’s truly best enjoyed fresh.
Freezing
You can freeze this Chocolate Self Saucing Pudding Recipe once cooled completely. Wrap it tightly in foil and place in a freezer-safe container. Frozen pudding can last up to 2 months—just thaw overnight in the fridge before reheating.
Reheating
To bring back that fresh-baked magic, reheat leftovers in the microwave in short bursts or in a warm oven at 150C/300F until heated through. Add a splash of milk if the sauce seems too thick after chilling.
FAQs
What makes this a “self saucing” pudding?
The boiling water poured over the batter melts the sugar and cocoa mixture, which creates a rich chocolate sauce as the pudding bakes, meaning there’s no need to make a separate sauce. It’s like magic happening inside your oven.
Can I use regular sugar if I don’t have caster sugar?
Yes, ordinary white sugar can be used, though caster sugar dissolves more easily and helps create a smoother texture. If you only have regular sugar, consider pulsing it in a blender briefly to make it finer.
Is there a gluten-free version of this recipe?
Absolutely! Simply swap the plain flour for a gluten-free all-purpose flour blend. The texture might vary slightly, but the pudding will still be deliciously saucy and chocolatey.
How do I know when the pudding is done baking?
The top should feel springy to the touch and have a slightly crusty texture like brownies. If it’s too jiggly or wet on top, give it a few more minutes, but be careful not to overbake so the sauce remains luscious.
Can I make this recipe vegan?
Yes, by substituting dairy milk with plant-based milk, butter with vegan margarine, and the egg with a flax or chia egg alternative, you can enjoy a vegan version. The sauce and texture will still be wonderfully satisfying.
Final Thoughts
There’s something truly comforting about this Chocolate Self Saucing Pudding Recipe that keeps me coming back time and time again. It’s easy enough for weeknight cravings but special enough to serve at a gathering. I encourage you to try making it yourself—you’re only a few simple steps away from a bowl of chocolatey heaven that warms your heart and soul.
Print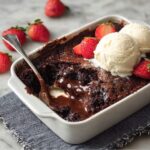
Chocolate Self Saucing Pudding Recipe
- Prep Time: 10 minutes
- Cook Time: 30 minutes
- Total Time: 40 minutes
- Yield: 5.5 to 6 servings
- Category: Dessert
- Method: Baking
- Cuisine: Australian
Description
Indulge in this rich and decadent Chocolate Self Saucing Pudding, a classic Australian dessert featuring a moist chocolate cake topping with a luscious, gooey chocolate sauce underneath. Easy to prepare and perfect for serving warm, this pudding is a chocolate lover’s dream come true.
Ingredients
Topping
- 1 cup (175g) brown sugar, loosely packed
- 1/4 cup (30g) unsweetened cocoa powder
Pudding
- 1 cup (150g) plain flour (all purpose flour)
- 2 1/2 tsp baking powder
- 1/3 cup (70g) white sugar, preferably caster/super fine but ordinary ok
- 1/4 cup (30g) unsweetened cocoa powder
- Pinch of salt
- 1/2 cup (125ml) milk
- 50 g / 4 1/2 tbsp butter, melted
- 1 egg
- 1 tsp vanilla extract
- 1 1/4 cups (315ml) boiling water
Instructions
- Preheat Oven: Preheat your oven to 170°C (335°F) for standard ovens or 150°C (305°F) if using a fan forced/convection oven to ensure even baking.
- Prepare Baking Dish: Grease a 5 to 6 cup capacity baking dish thoroughly with butter to prevent sticking and help with easy serving.
- Make Topping Mixture: In a bowl, whisk together the brown sugar and cocoa powder. Set this mixture aside for sprinkling later.
- Mix Dry Ingredients: In another bowl, whisk together plain flour, baking powder, white sugar, cocoa powder, and a pinch of salt to create the dry base of the pudding.
- Combine Wet Ingredients: In a separate bowl or jug, whisk the melted butter with milk, then add the egg and vanilla extract. Whisk until the mixture is smooth and combined.
- Form Batter: Pour the wet ingredients into the bowl of dry ingredients and mix until just combined. The batter will be thick and dense.
- Assemble in Dish: Spread the batter evenly into the prepared baking dish. Sprinkle the reserved brown sugar and cocoa topping mixture evenly over the top. Gently shake the dish to distribute the topping thinly and evenly.
- Add Boiling Water: Carefully pour the boiling water over the back of a dessert spoon held just above the surface of the batter to avoid disturbing it. This water will create the self-saucing effect as it bakes.
- Bake: Place the baking dish in the preheated oven and bake for 30 minutes, or until the top of the pudding springs back when lightly touched. The top will have a slightly crusty texture similar to brownies.
- Serve: Remove from oven and let stand for a few minutes — no more than that to maintain the warm gooey sauce underneath. Serve immediately, ideally with cream or ice cream.
Notes
- Use unsweetened cocoa powder for a rich chocolate flavor without added sweetness.
- Greasing the baking dish well is vital for the pudding to release easily after baking.
- Pouring boiling water gently over the back of a spoon helps keep the batter intact and creates the signature sauce as it bakes.
- Serving the pudding warm enhances the gooey self-saucing texture.
- The recipe yields 5.5 to 6 servings, perfect for a family dessert or sharing with friends.

