
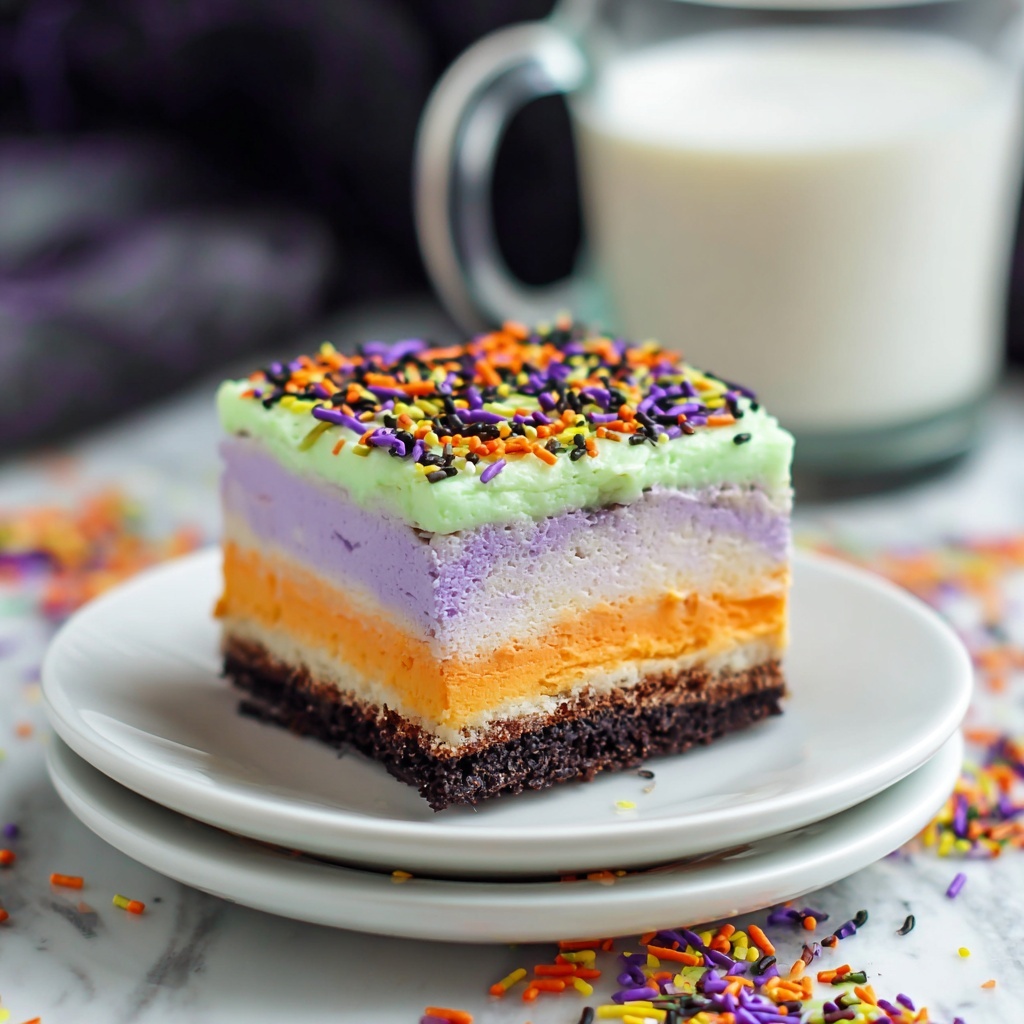
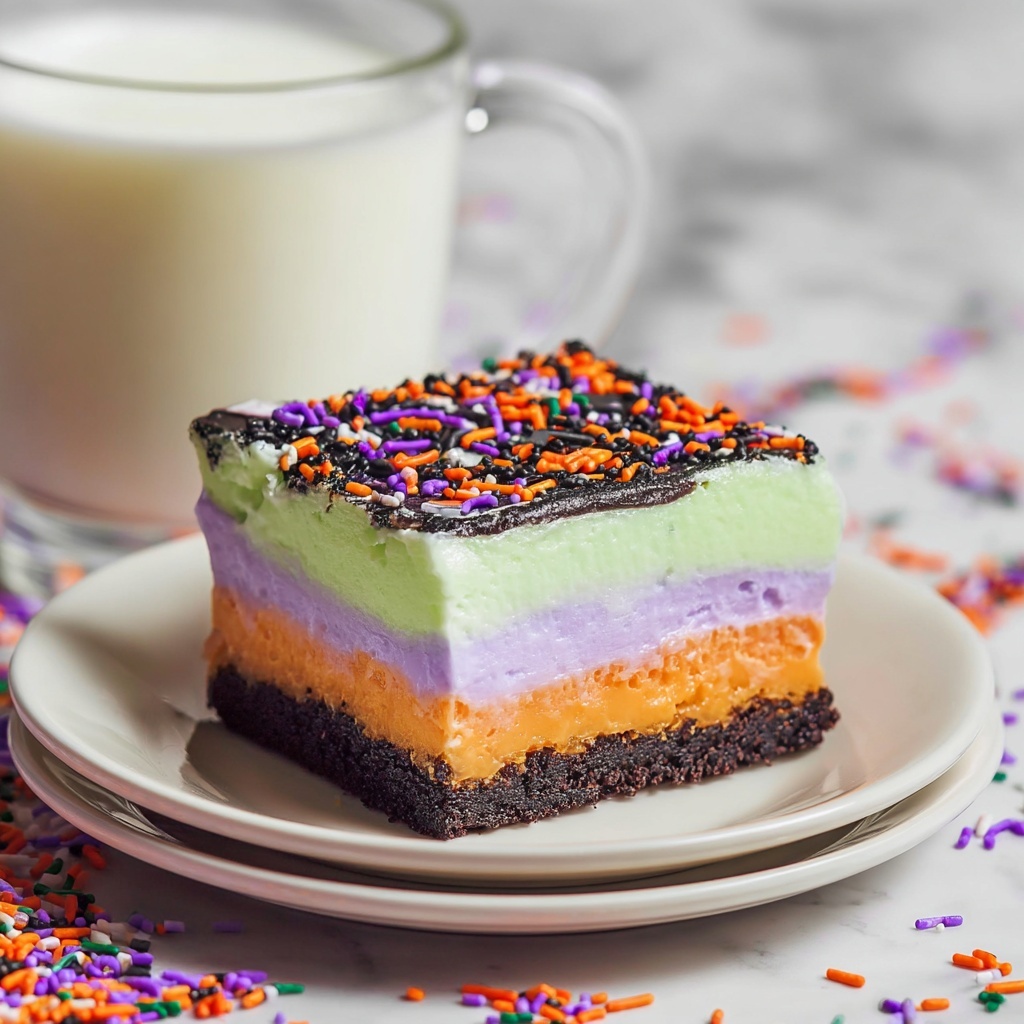
If you are looking for a festive and fun treat to celebrate the spooky season, this No Bake Halloween Dessert Recipe is an absolute must-try. It brings together layers of creamy vanilla pudding, bright orange gelatin, and vibrant purple and green whipped topping all on a crunchy chocolate cookie crust. With its colorful Halloween vibes and irresistible textures, this dessert is sure to be the star at your party or family gathering without requiring any oven time. Whether you’re a seasoned baker or just want an easy showstopper, this recipe delivers on taste, excitement, and convenience.
Ingredients You’ll Need
These simple ingredients each play a crucial role in delivering the perfect balance of flavor, texture, and that signature Halloween color pop. From the crunchy cookie base to the creamy layers and festive sprinkles, here’s what you need to create this magical dessert.
- Chocolate sandwich cookies: The base and foundation with rich chocolate crunch that contrasts perfectly with creamy layers.
- Butter (melted): Binds the cookie crumbs together to form a firm crust.
- Orange gelatin (2 boxes): Adds tangy sweetness and vibrant Halloween orange color.
- Boiling water: Essential to dissolve the gelatin fully for smooth texture.
- Vanilla instant pudding & pie filling mix (2 boxes): Creates a luscious creamy layer that complements the tart gelatin.
- Cold milk: Blends with the pudding mix to achieve perfect consistency.
- Cream cheese (softened): Adds a silky richness and slight tanginess to the dessert.
- Powdered sugar: Sweetens and smooths the cream cheese mixture.
- Whipped topping: Provides lightness and airy texture in multiple layers.
- Green and purple food coloring: Brings festive Halloween flair to the whipped cream layers.
- Halloween sprinkles: The fun final touch to decorate and add texture.
How to Make No Bake Halloween Dessert Recipe
Step 1: Prepare the Cookie Crust
Start by crushing all 36 chocolate sandwich cookies in a food processor or by placing them in a sealed bag and crushing with a rolling pin. Pour the crumbs into a large bowl and mix with 6 tablespoons of melted butter until well combined. Then press this mixture firmly into the bottom of a 9×13 glass baking dish to create a firm, chocolatey foundation.
Step 2: Make the Orange Gelatin Layer
In a small bowl, stir the two boxes of orange gelatin into ⅓ cup boiling water. Whisk continuously until most of the gelatin dissolves completely, ensuring a smooth and vibrant orange mix that will layer beautifully.
Step 3: Prepare the Vanilla Pudding Layer
In a separate medium bowl, whisk together the two boxes of vanilla instant pudding mix and 2 ½ cups cold milk until thickened and smooth. Carefully whisk in the dissolved orange gelatin until everything is fully combined, giving your dessert a unique bright orange vanilla layer.
Step 4: Create the Purple Cream Cheese Layer
In a large bowl, beat together the softened cream cheese and 1 cup powdered sugar until smooth and creamy. Fold in 2 cups of whipped topping, then add a few drops of purple food coloring until you reach your desired shade of spooky purple. Spread this colorful, creamy layer evenly over the chocolate crust.
Step 5: Add the Gelatin/Pudding Mixture
Pour and spread the orange gelatin and vanilla pudding mixture right on top of the purple cream cheese layer, forming a perfectly smooth, eye-catching orange section that contrasts marvelously with the purple beneath.
Step 6: Finish with the Green Whipped Topping
Mix the remaining whipped topping with green food coloring until you achieve the perfect hue. Gently spread this green whipped topping layer over the orange gelatin, creating a trifecta of Halloween colors. Finally, sprinkle Halloween-themed sprinkles generously over the top for a festive crunch.
Step 7: Chill and Serve
Place the dessert in the refrigerator for at least 4 hours to fully set the layers and let the flavors meld. When ready, slice and serve this colorful, luscious No Bake Halloween Dessert Recipe that is sure to impress every guest.
How to Serve No Bake Halloween Dessert Recipe
Garnishes
Add even more Halloween spirit by topping each slice with extra festive sprinkles, edible glitter, or small candies shaped like ghosts and pumpkins. Fresh mint leaves can also add a splash of green freshness that pairs delightfully with the creamy layers.
Side Dishes
This dessert pairs wonderfully with light beverages like sparkling cider, flavored milk, or even a simple hot cocoa for a cozy fall pairing. For a savory balance, consider serving alongside roasted nuts or spiced popcorn to keep the festive theme going strong.
Creative Ways to Present
For parties, serve the dessert in individual clear cups or cupcake liners layered with the colorful no bake mixture layered inside. You can also create a spooky “graveyard” scene on top using cookie crumbs, gummy worms, and candy tombstones for an unforgettable presentation that your guests will rave about.
Make Ahead and Storage
Storing Leftovers
Cover any leftover No Bake Halloween Dessert Recipe tightly with plastic wrap or store in an airtight container in the refrigerator. It will stay fresh and delicious for up to 3 days—enough time to enjoy its festive flair again or share with friends and family.
Freezing
You can freeze this dessert for longer storage by wrapping it securely with plastic wrap and placing it in a freezer-safe container. Freeze for up to 1 month. When ready to enjoy, thaw overnight in the refrigerator to maintain perfect texture without losing the vibrant colors or flavor.
Reheating
This is a no bake, cold dessert, so reheating is not recommended. Instead, enjoy it chilled straight from the refrigerator or after thawing from frozen for the best texture and flavor experience.
FAQs
Can I make this dessert gluten-free?
Yes! Simply substitute the chocolate sandwich cookies with a gluten-free cookie variety. Make sure the other ingredients, like pudding mixes and toppings, are also gluten-free for a safe Halloween treat.
How far in advance can I make the No Bake Halloween Dessert Recipe?
You can prepare this dessert up to 24 hours ahead of your event. Just cover and refrigerate it to let the layers set and flavors meld beautifully.
Can I use fresh gelatin instead of instant?
Instant gelatin works best here for smooth layering and quick preparation. Fresh gelatin would require adjustments in quantities and setting times, so sticking with instant gelatin as the recipe states ensures the easiest success.
What can I substitute for cream cheese if desired?
If you want a lighter option, Greek yogurt or mascarpone can be used instead of cream cheese, though this will change the texture and flavor slightly. Be sure to soften these alternatives and taste as you go for the best result.
Will this dessert hold up if left out for a party?
This dessert should be kept refrigerated until serving time because the gelatin and dairy layers need to stay cold to maintain their structure and safety. For short periods, it’s fine to leave it out, but always return leftovers promptly to the fridge.
Final Thoughts
This No Bake Halloween Dessert Recipe is a fantastic way to bring festive fun and delicious flavors to your celebrations without heating up the kitchen. Its easy preparation, stunning colors, and playful layers make it a guaranteed crowd-pleaser that you’ll want to make every year. Grab your ingredients, get ready to mix, and delight your guests with this irresistible Halloween treat!
Print
No Bake Halloween Dessert Recipe
- Prep Time: 30 minutes
- Cook Time: 0 minutes
- Total Time: 4 hours 30 minutes
- Yield: 16 servings
- Category: Dessert
- Method: No-Cook
- Cuisine: American
Description
This No Bake Halloween Dessert is a festive, colorful layered treat perfect for spooky celebrations. Featuring a crunchy chocolate cookie crust, vibrant orange gelatin blended with creamy vanilla pudding, and layers of purple and green whipped topping tinted with food coloring, this dessert is easy to make and requires no baking. Topped with fun Halloween sprinkles, it’s a fun, crowd-pleasing dessert ideal for parties and gatherings.
Ingredients
Crust
- 36 chocolate sandwich cookies
- 6 tablespoons butter, melted
Gelatin Layer
- 2 boxes orange gelatin (3 ounce each)
- ⅓ cup boiling water
Pudding Layer
- 2 boxes vanilla instant pudding & pie filling mix (3.4 ounce each)
- 2 ½ cups cold milk
Cream Cheese Layer
- 8 ounce cream cheese, softened
- 1 cup powdered sugar
- 16 ounce whipped topping, divided
- Green and purple food coloring
Toppings
- Halloween sprinkles
Instructions
- Crush Cookies: In your food processor, crush all the chocolate sandwich cookies into fine crumbs to create the base for the crust.
- Combine Crust Mixture: Transfer the cookie crumbs into a large bowl and add the melted butter. Stir well until fully combined and the crumbs are evenly coated.
- Press Crust: Press the cookie crumb mixture firmly into the bottom of a 9×13 inch glass baking dish, forming an even crust layer.
- Prepare Gelatin: In a small bowl, place the orange gelatin powder and pour in the boiling water. Whisk thoroughly until the gelatin is dissolved and smooth.
- Make Pudding: In a medium bowl, whisk together the dry vanilla pudding mixes and cold milk until thickened and smooth.
- Combine Gelatin and Pudding: Slowly whisk the prepared orange gelatin into the vanilla pudding mixture until fully incorporated.
- Mix Cream Cheese Layer: In a large bowl, use an electric mixer to beat the softened cream cheese and powdered sugar until smooth and creamy.
- Add Whipped Topping and Color: Fold in 2 cups of the whipped topping into the cream cheese mixture. Add a few drops of purple food coloring and gently mix until the desired purple color is achieved.
- Spread Purple Layer: Evenly spread the purple cream cheese layer over the cookie crust in the baking dish.
- Layer Gelatin Pudding: Spread the orange gelatin and pudding mixture gently over the purple cream cheese layer without disturbing the layers.
- Prepare Green Whipped Topping: Mix the remaining 14 ounces of whipped topping with a few drops of green food coloring until the color is uniform and to your preference.
- Spread Green Layer: Spread the green whipped topping over the orange gelatin/pudding layer evenly.
- Add Halloween Sprinkles: Sprinkle festive Halloween sprinkles over the top for decoration.
- Chill Dessert: Refrigerate the dessert for at least 4 hours to allow layers to set completely.
- Serve: Slice into 16 pieces and serve chilled for a fun, colorful no-bake Halloween treat.
Notes
- Make sure the cream cheese is softened to avoid lumps in the cream cheese layer.
- You can adjust the amount of food coloring to achieve your preferred shade of purple and green.
- For easier cutting, chill the dessert overnight.
- This dessert is best served cold and consumed within 2-3 days for freshness.
- Feel free to substitute Halloween sprinkles with any other festive toppings.


