
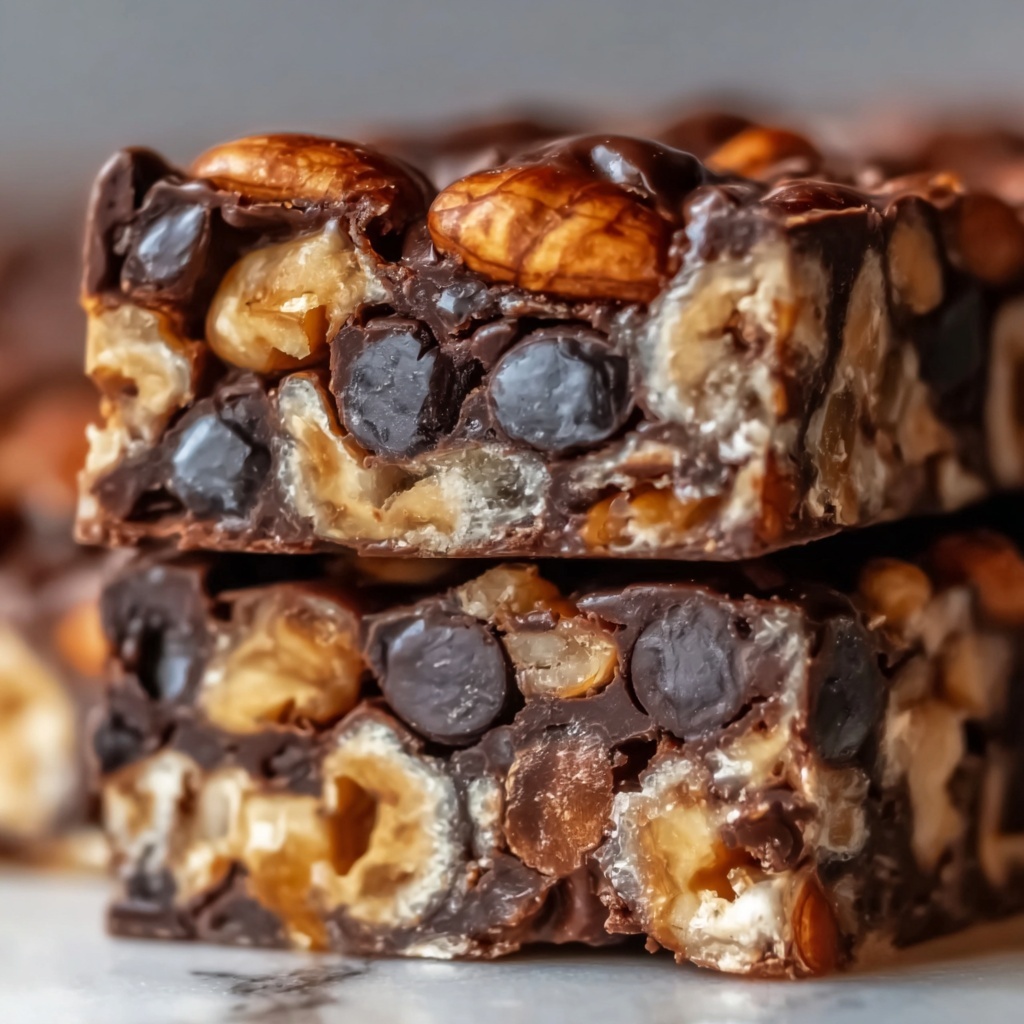
If you’ve ever craved a sweet treat that’s both delightfully crispy and decadently chocolatey, you’re in for a real treat with this Homemade Crunch Bars Recipe. Imagine the satisfying snap of crispy rice cereal wrapped in a luscious blend of semisweet and milk chocolate, with just a hint of buttery richness and optional peanut butter to make every bite irresistibly delightful. These bars strike the perfect balance between crunchy texture and smooth chocolate, making them a fantastic snack for any time of day or a crowd-pleasing dessert that everyone will love.
Ingredients You’ll Need
Gathering simple, wholesome ingredients is the first step to creating these irresistible bars. Each component plays a crucial role—whether it’s delivering crispness, creaminess, or a flavor boost—so pay attention to these essentials for the best results.
- 4 cups crispy rice cereal: Provides that signature crunch and airy texture.
- 2 cups semisweet chocolate chips: Adds rich chocolate depth with just the right sweetness.
- 1 cup milk chocolate chips: Brings a creamy, smooth sweetness that balances the semisweet chocolate.
- 1/4 cup unsalted butter: Melts everything into a silky, luscious coating and enriches flavor.
- 1/4 cup peanut butter (optional): Offers extra richness and a nutty twist that pairs beautifully with chocolate.
- 1 teaspoon vanilla extract (optional): Lifts the flavor profile with a warm, aromatic hint.
How to Make Homemade Crunch Bars Recipe
Step 1: Prepare Your Pan
Start by lining an 8×8-inch or 9×9-inch baking pan with parchment paper or lightly grease it. This simple step ensures your bars won’t stick and will come out perfectly shaped every time.
Step 2: Ready the Crispy Rice Cereal
Pour the crispy rice cereal into a large mixing bowl and set it aside. This creates the base for your bars—light, crunchy, and ready to be enveloped in chocolate.
Step 3: Melt the Butter and Chocolate
In a medium saucepan over low heat, melt the butter along with the semisweet and milk chocolate chips. Stir occasionally until the mixture is fully melted and silky smooth, forming a delectable chocolate sauce that coats every bite.
Step 4: Add Peanut Butter and Vanilla
If you’re including peanut butter and vanilla extract, stir them in now. These add layers of flavor and richness that elevate the classic crunch bars to something extraordinary.
Step 5: Combine Chocolate Mixture With Cereal
Pour the melted chocolate mixture over the crispy rice cereal. Gently fold everything together until every single piece of cereal is evenly coated in that glossy, chocolate goodness.
Step 6: Press Into the Pan
Transfer the mixture into your prepared pan, pressing it firmly and evenly to compact the bars tightly. This helps create that perfect chew and sturdiness when set.
Step 7: Chill Until Set
Place the pan in the refrigerator for at least 1 hour. This chilling step is essential—it lets the bars harden and the flavors meld together beautifully.
Step 8: Cut and Serve
Once your bars are set, remove them from the pan using the edges of the parchment paper, then cut into delightful squares or rectangles. Now they’re ready to enjoy or share!
How to Serve Homemade Crunch Bars Recipe

Garnishes
Enhance your bars with a sprinkle of crushed nuts, a drizzle of white chocolate, or even a dusting of sea salt. These touches add extra texture and flavor that makes presentation pop.
Side Dishes
Pair these bars with a glass of cold milk or a warm cup of coffee or tea for a perfectly balanced snack time. They also complement fresh fruit if you want to mix things up.
Creative Ways to Present
Try stacking the bars on a decorative plate and wrapping them individually in parchment paper tied with twine for a charming gift. You can also cut them into bite-sized pieces and serve them on a dessert platter alongside other treats for parties.
Make Ahead and Storage
Storing Leftovers
Keep your Homemade Crunch Bars Recipe fresh and crunchy by storing them in an airtight container at room temperature. They’ll maintain their texture and flavor wonderfully for up to a week.
Freezing
If you want to keep them longer, wrap individual bars tightly in plastic wrap and place them in a freezer-safe bag or container. Frozen bars stay delicious for up to 3 months, perfect for busy days or unexpected guests.
Reheating
These bars are best enjoyed chilled or at room temperature, but if you want a warm treat, microwave a bar for 10–15 seconds to soften the chocolate slightly—just enough to melt it without losing the crunch.
FAQs
Can I use different types of cereal?
Absolutely! While crispy rice cereal is classic, you can experiment with other cereals for different textures or flavors, but keep in mind it may change the final crunch.
Is peanut butter necessary in this recipe?
No, peanut butter is totally optional. It adds extra richness and a nutty flavor but the bars are delicious with just the butter and chocolates if you prefer plain chocolate bars.
How long do these bars last?
Stored properly in an airtight container, they last about a week at room temperature. Refrigerate to extend freshness by a few more days.
Can I make these bars vegan?
You can create a vegan version by using dairy-free chocolate chips, vegan butter, and skipping the peanut butter if unsure of its brand. Just keep textures consistent for the best crunch.
What is the best way to cut the bars?
Use a sharp knife and cut the bars after they have fully set in the fridge. For clean cuts, wipe the knife clean between slices to prevent sticking.
Final Thoughts
This Homemade Crunch Bars Recipe has everything you need for an easy-to-make, crowd-pleasing snack that’s bursting with chocolate-y goodness and crispy delight. Whether you’re treating yourself on a quiet afternoon or serving up something special at your next get-together, these bars are sure to bring smiles and happy munching all around. Go ahead, give them a try—you’ll wonder how you ever lived without this simple yet sensational recipe!
Print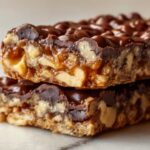
Homemade Crunch Bars Recipe
- Prep Time: 10 minutes
- Cook Time: 10 minutes
- Total Time: 1 hour 20 minutes
- Yield: 12 servings
- Category: Snack
- Method: Stovetop
- Cuisine: American
Description
These homemade crunch bars combine crispy rice cereal with a luscious blend of melted semisweet and milk chocolate chips, enhanced with optional peanut butter and vanilla extract for a rich, flavorful treat. Perfectly easy to prepare and set in the refrigerator, these bars offer a delightful crunchy texture paired with smooth chocolatey goodness, ideal for snacks or dessert.
Ingredients
Base
- 4 cups crispy rice cereal (such as Rice Krispies)
Chocolate Mixture
- 2 cups semisweet chocolate chips
- 1 cup milk chocolate chips
- 1/4 cup unsalted butter
- 1/4 cup peanut butter (optional for added richness)
- 1 teaspoon vanilla extract (optional for added flavor)
Instructions
- Prepare the Pan: Line an 8×8-inch or 9×9-inch baking pan with parchment paper or lightly grease it to prevent sticking and facilitate easy removal of the bars later.
- Set the Cereal: In a large mixing bowl, pour the crispy rice cereal and set aside, ready to be coated with the chocolate mixture.
- Melt Chocolate and Butter: In a medium saucepan over low heat, melt the unsalted butter, semisweet chocolate chips, and milk chocolate chips together. Stir occasionally until the mixture is completely melted and smooth, ensuring it doesn’t burn.
- Add Peanut Butter and Vanilla (Optional): Stir in the peanut butter and vanilla extract into the melted chocolate mixture until fully integrated, adding extra richness and flavor.
- Combine Chocolate with Cereal: Pour the melted chocolate mixture over the crispy rice cereal. Gently fold the ingredients together until all the cereal is evenly coated with the chocolate blend.
- Press into Pan: Transfer the coated cereal mixture into the prepared baking pan. Press it down evenly and compact it firmly to ensure the bars hold together once set.
- Chill to Set: Place the pan in the refrigerator for at least 1 hour, allowing the chocolate to harden and the bars to set properly.
- Cut and Serve: Remove the set crunch bars from the pan using the parchment paper edges. Cut into squares or rectangles, then serve and enjoy your homemade crunchy, chocolatey snack!
Notes
- You can customize by using all milk chocolate or all semisweet chocolate depending on your sweetness preference.
- Optional peanut butter adds extra creaminess and depth to the flavor but can be omitted for a peanut-free version.
- Pressing the mixture firmly into the pan helps the bars hold their shape after slicing.
- Store the bars in an airtight container in the refrigerator to keep them fresh and firm.
- For added texture, consider mixing in chopped nuts or mini marshmallows before pressing into the pan.


