
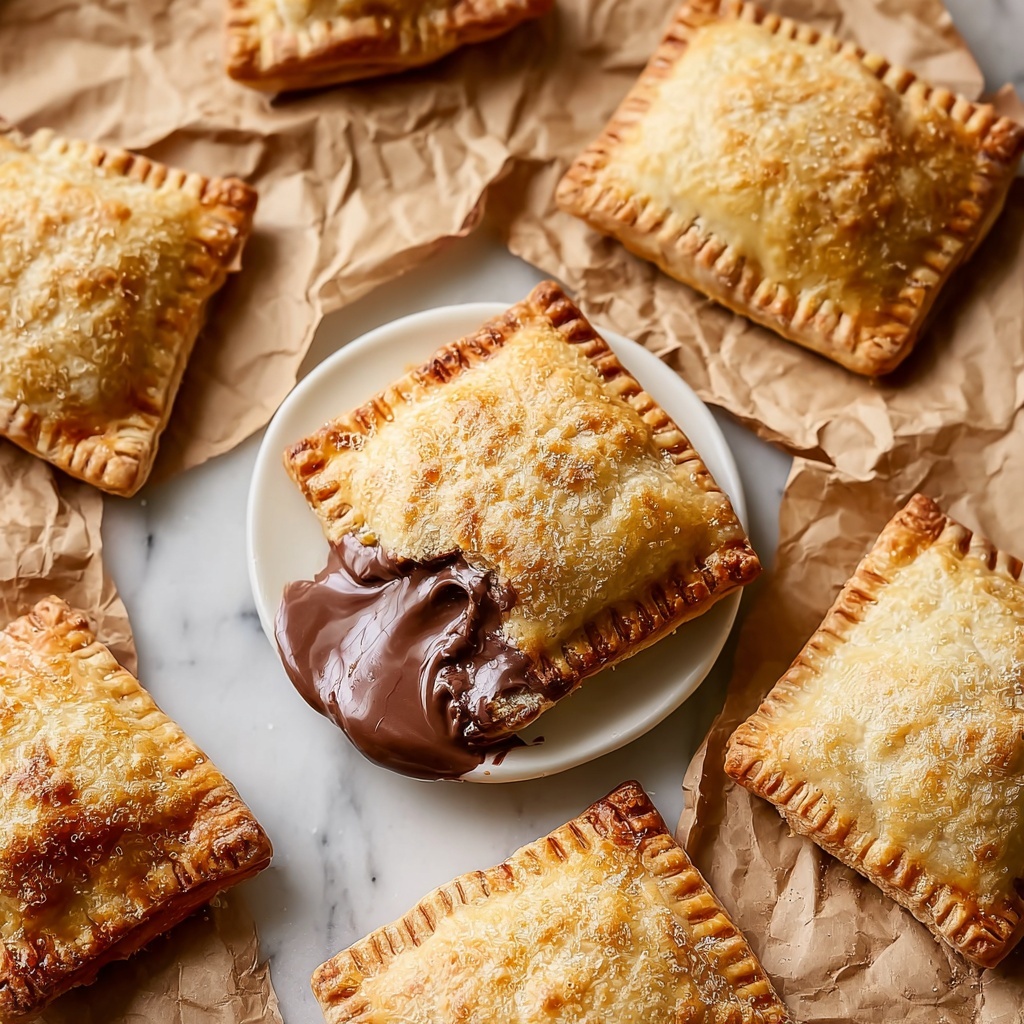
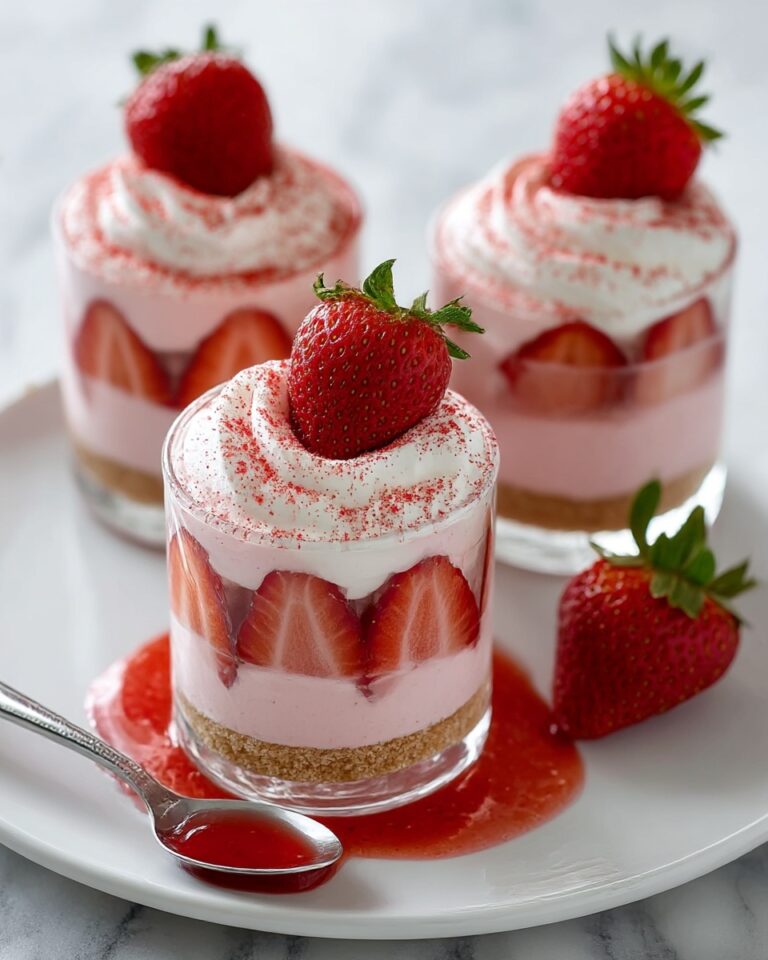
If you have ever dreamed of recreating that nostalgic toaster pastry magic at home, look no further, because this Homemade Frosted Brown Sugar Pop-Tarts: An Incredible Ultimate Recipe is about to become your new favorite baking adventure. Imagine biting into a flaky, buttery crust filled with a warm, cinnamon-spiced brown sugar filling and topped with a sweet, glossy frosting that perfectly balances every mouthwatering bite. This recipe brings together simple pantry staples with a little love, giving you those delightful pop-tarts you remember but better, fresher, and oh-so-satisfying.
Ingredients You’ll Need
The beauty of this recipe is in its simplicity—every ingredient plays an important role in creating the perfect balance of flaky pastry, rich filling, and smooth frosting. From the cold unsalted butter that delivers a tender crust to the cinnamon and brown sugar filling that infuses warmth and sweetness, each item contributes to the overall magic of these homemade treats.
- 2 1/2 cups all-purpose flour: The foundational ingredient providing structure to the crisp, flaky dough.
- 1 tablespoon granulated sugar: Adds just a touch of sweetness to the crust.
- 1 teaspoon salt: Enhances flavor and balances the sweetness.
- 1 cup unsalted butter, cold and cubed: Essential for that melt-in-your-mouth, flaky texture.
- 6 to 8 tablespoons ice water: Helps the dough come together without melting the butter.
- 1 cup packed light brown sugar: Gives the filling a deep, caramel-like sweetness.
- 1 tablespoon ground cinnamon: Adds a warm, spicy kick to the filling.
- 1 tablespoon all-purpose flour (for filling): Helps thicken the filling so it doesn’t ooze out while baking.
- 1 large egg, beaten: Used for sealing the pop-tarts and brushing over the crust for a golden finish.
- 1 cup powdered sugar: The base for the frosting that tops each tart with sweetness and shine.
- 1 to 2 tablespoons milk: Adjust to get the perfect frosting consistency.
- 1/2 teaspoon vanilla extract: Infuses the frosting with warm, fragrant notes.
How to Make Homemade Frosted Brown Sugar Pop-Tarts: An Incredible Ultimate Recipe
Step 1: Prepare the Dough
Start by whisking together the flour, granulated sugar, and salt in a large bowl. Cut the cold cubed butter into the flour mixture using a pastry cutter or your fingers until it resembles coarse crumbs—those little butter bits are the secret to flaky layers. Gradually add ice water, a tablespoon at a time, mixing just until the dough forms a cohesive ball. Divide the dough in two, shape each half into a disk, wrap in plastic, and chill in the refrigerator for at least an hour. This resting time helps relax the gluten and keeps the butter solid, which ultimately gives you that buttery, tender crust you crave.
Step 2: Make the Brown Sugar Filling
While your dough chills, mix together the packed brown sugar, cinnamon, and the tablespoon of flour in a small bowl. This simple blend provides a sweet, warmly spiced filling that will melt slightly during baking without making the crust soggy—perfect for that dreamy texture contrast.
Step 3: Roll and Cut the Dough
On a lightly floured surface, roll one disk of dough into a thin rectangle about 1/8 inch thick. Using a sharp knife or a pastry cutter, cut the dough into even rectangles. These will form the layers of your pop-tarts, so aim for uniform sizes so they bake evenly.
Step 4: Fill and Assemble Pop-Tarts
Place a spoonful of the brown sugar-cinnamon filling in the center of half of the rectangles, leaving a bit of space around the edges for sealing. Brush the edges with beaten egg, then place a plain dough rectangle on top of each filled one. Press the edges together gently, then use a fork to crimp and seal the sides, ensuring the filling stays inside and creates that classic pop-tart shape.
Step 5: Chill and Bake
Transfer the assembled pop-tarts to a baking sheet lined with parchment paper. Refrigerate them for 20 minutes to help the dough firm up once more before baking. Preheat your oven to 375°F (190°C). Brush the tops with the beaten egg to get that gorgeous golden sheen and poke a few small holes on top with a fork to allow steam to escape. Bake for 20 to 25 minutes until they’re puffed and golden brown, filling your kitchen with irresistible aromas.
Step 6: Frost the Pop-Tarts
Allow the pop-tarts to cool completely. Meanwhile, whisk together powdered sugar, milk, and vanilla extract until smooth and glossy. Spread this luscious frosting generously over the cooled pastries. Let the icing set for a few minutes before indulging—this step adds that sweet finishing touch you’ll fall in love with.
How to Serve Homemade Frosted Brown Sugar Pop-Tarts: An Incredible Ultimate Recipe

Garnishes
While these pop-tarts are absolutely delightful as is, adding sprinkles or a pinch of flaky sea salt on top of the frosting can bring a fun twist or balance sweetness with a little crunch and flavor contrast. Fresh sliced fruit on the side can also add a refreshing pop of color and brightness to your serving plate.
Side Dishes
Pair your pop-tarts with a creamy latte, bold black coffee, or a rich hot chocolate for an indulgent breakfast. Alternatively, a simple glass of cold milk never fails to complement these sweet, cinnamon-spiced treats and makes for a nostalgic, comforting combo.
Creative Ways to Present
Get creative by cutting your pop-tarts into smaller bite-sized squares for parties or breakfast buffets, incorporating fun shapes with cookie cutters before baking, or stacking them alongside bowls of whipped cream and fresh berries for extra decadence. Homemade Frosted Brown Sugar Pop-Tarts: An Incredible Ultimate Recipe also freeze beautifully, so consider serving warm ones fresh out of the oven alongside chilled versions for variety.
Make Ahead and Storage
Storing Leftovers
Once cooled, keep leftover pop-tarts in an airtight container at room temperature for up to three days. Make sure they are fully cooled before storing to prevent sogginess. They are excellent for quick grab-and-go breakfasts or snacks.
Freezing
You can freeze unbaked pop-tarts assembled and sealed by placing them on a baking sheet in the freezer until solid, then transferring to a freezer-safe bag. Bake them directly from frozen, adding a few extra minutes to the baking time for convenience and freshness whenever you crave them.
Reheating
For a freshly baked texture, reheat the pop-tarts in a toaster oven or regular oven at 350°F (175°C) for 5 to 7 minutes until warmed through and the frosting softens slightly. Avoid microwaving to keep the crust flaky and crisp.
FAQs
Can I use brown butter instead of cold butter in the dough?
While brown butter adds a delicious nutty flavor, cold butter is best for creating that flaky texture. If you use brown butter, the dough might turn out more tender but less flaky, so it’s not recommended for this recipe.
Is it possible to make this recipe gluten-free?
Yes! Substitute the all-purpose flour with a gluten-free flour blend that includes xanthan gum for structure. However, the texture might differ slightly, so adjust as needed and consider chilling the dough longer.
Can I swap the brown sugar filling for something else?
Absolutely! While the brown sugar cinnamon filling is classic and comforting, feel free to experiment with fruit jams, chocolate spreads, or even savory fillings for a fun twist on this Homemade Frosted Brown Sugar Pop-Tarts: An Incredible Ultimate Recipe.
How long does the frosting stay good on the pop-tarts?
The frosting will stay fresh for about 24 to 48 hours at room temperature. After that, it might start to dry out or become a little sticky. For best enjoyment, eat them within the first couple of days.
Do I have to brush the pop-tarts with egg wash?
Brushing with egg wash adds a beautiful golden color and slight sheen to the crust, but if you prefer not to use eggs, a milk or cream wash works as an alternative—though the color may be a bit lighter.
Final Thoughts
There is something truly special about making your own treats from scratch, especially when they turn out as delightful as this Homemade Frosted Brown Sugar Pop-Tarts: An Incredible Ultimate Recipe. The combination of flaky pastry, warm cinnamon filling, and luscious frosting is simply irresistible. Whether you’re making these for a fun breakfast, a cozy snack, or to impress friends and family, once you try this recipe, it will earn a permanent spot in your kitchen favorites. So go ahead, roll up your sleeves, and dive into this sweet, buttery world—you won’t regret it!
Print
Homemade Frosted Brown Sugar Pop-Tarts: An Incredible Ultimate Recipe
- Prep Time: 30 minutes
- Cook Time: 25 minutes
- Total Time: 1 hour 55 minutes
- Yield: 8 pop-tarts
- Category: Breakfast
- Method: Baking
- Cuisine: American
- Diet: Vegetarian
Description
This Homemade Frosted Brown Sugar Pop-Tarts recipe offers a delightful take on the classic toaster pastry. Made from scratch with a flaky buttery crust and a sweet cinnamon brown sugar filling, these pop-tarts are finished with a smooth vanilla glaze for the perfect breakfast treat or snack.
Ingredients
Dough
- 2 1/2 cups all-purpose flour
- 1 tablespoon granulated sugar
- 1 teaspoon salt
- 1 cup unsalted butter, cold and cubed
- 6 to 8 tablespoons ice water
Filling
- 1 cup packed light brown sugar
- 1 tablespoon ground cinnamon
- 1 tablespoon all-purpose flour
For Assembly and Glaze
- 1 large egg, beaten
- 1 cup powdered sugar
- 1 to 2 tablespoons milk
- 1/2 teaspoon vanilla extract
Instructions
- Mix Dry Ingredients and Cut in Butter: In a large bowl, whisk together the flour, granulated sugar, and salt. Cut in the cold cubed butter using a pastry cutter or your fingers until the mixture resembles coarse crumbs.
- Add Ice Water and Form Dough: Gradually add ice water one tablespoon at a time, mixing gently until the dough just comes together. Avoid overworking to keep it tender.
- Chill Dough: Divide the dough in half, shape each half into a disk, wrap tightly in plastic wrap, and refrigerate for at least 1 hour to firm up.
- Prepare Filling: In a small bowl, combine the packed brown sugar, ground cinnamon, and all-purpose flour, mixing well to make the filling.
- Roll and Cut Dough: On a lightly floured surface, roll out one dough disk into a rectangle about 1/8 inch thick. Cut into evenly sized rectangles.
- Assemble Pop-Tarts: Spoon the filling into the center of half the rectangles, leaving a small border around the edges. Brush edges with beaten egg, then top with the remaining dough rectangles. Press edges together with a fork to seal completely.
- Chill Assembled Pastries: Transfer the sealed pop-tarts to a lined baking sheet and refrigerate for 20 minutes to help them hold their shape.
- Preheat Oven: Preheat your oven to 375°F (190°C).
- Add Egg Wash and Vent: Brush the tops of the pop-tarts with beaten egg wash. Use a fork or skewer to poke small holes on the tops for ventilation during baking.
- Bake: Bake in the preheated oven for 20 to 25 minutes, or until the crust is golden brown and cooked through.
- Cool: Remove from the oven and allow pop-tarts to cool completely on a wire rack.
- Make and Apply Glaze: Whisk together powdered sugar, milk, and vanilla extract until smooth. Spread the glaze evenly over the cooled pop-tarts.
- Set Glaze: Let the glaze set fully before serving to ensure a perfect finishing touch.
Notes
- Keep the butter very cold to ensure a flaky crust.
- You can freeze unbaked pop-tarts and bake them directly from frozen, adding a few extra minutes to the baking time.
- Store finished pop-tarts in an airtight container at room temperature for up to 3 days.

