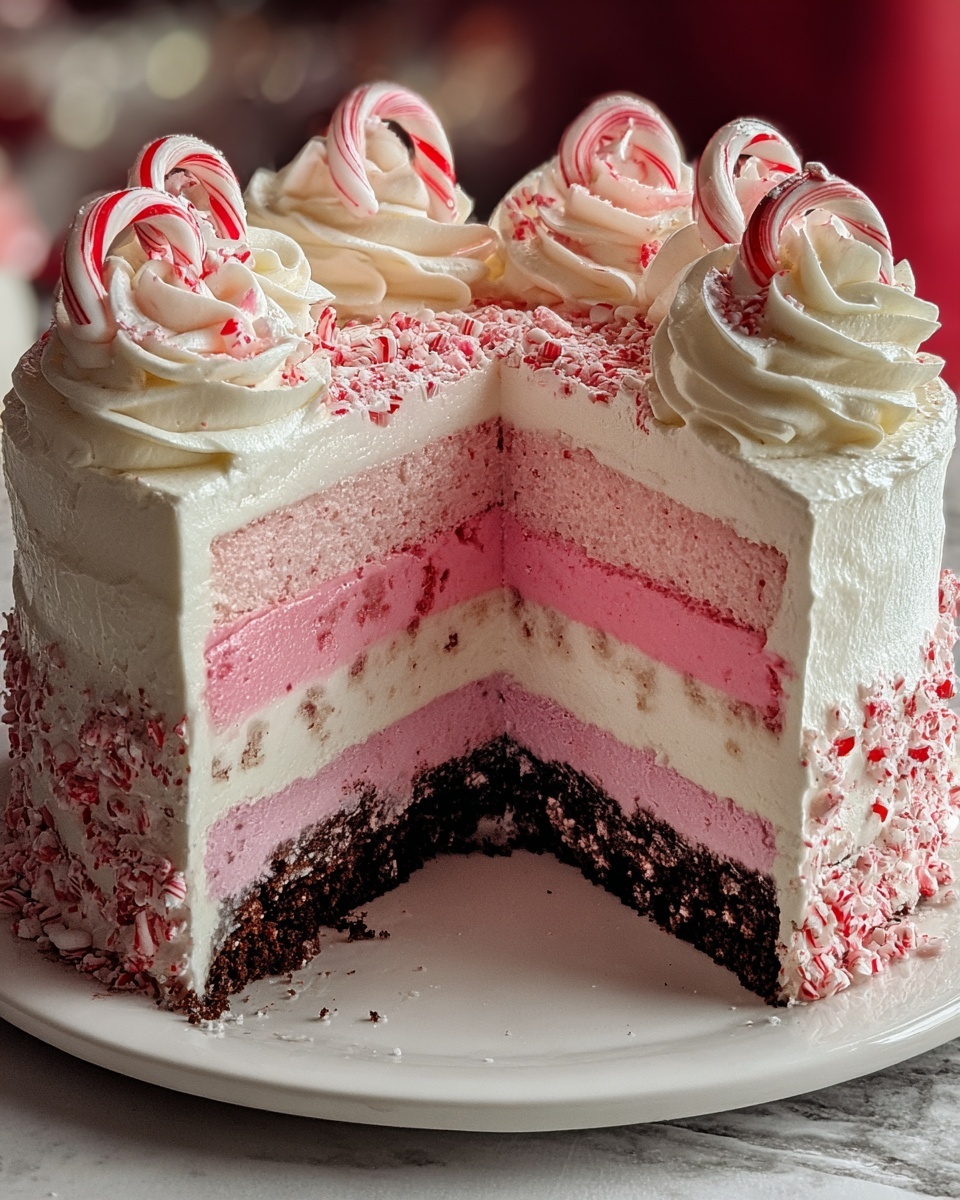
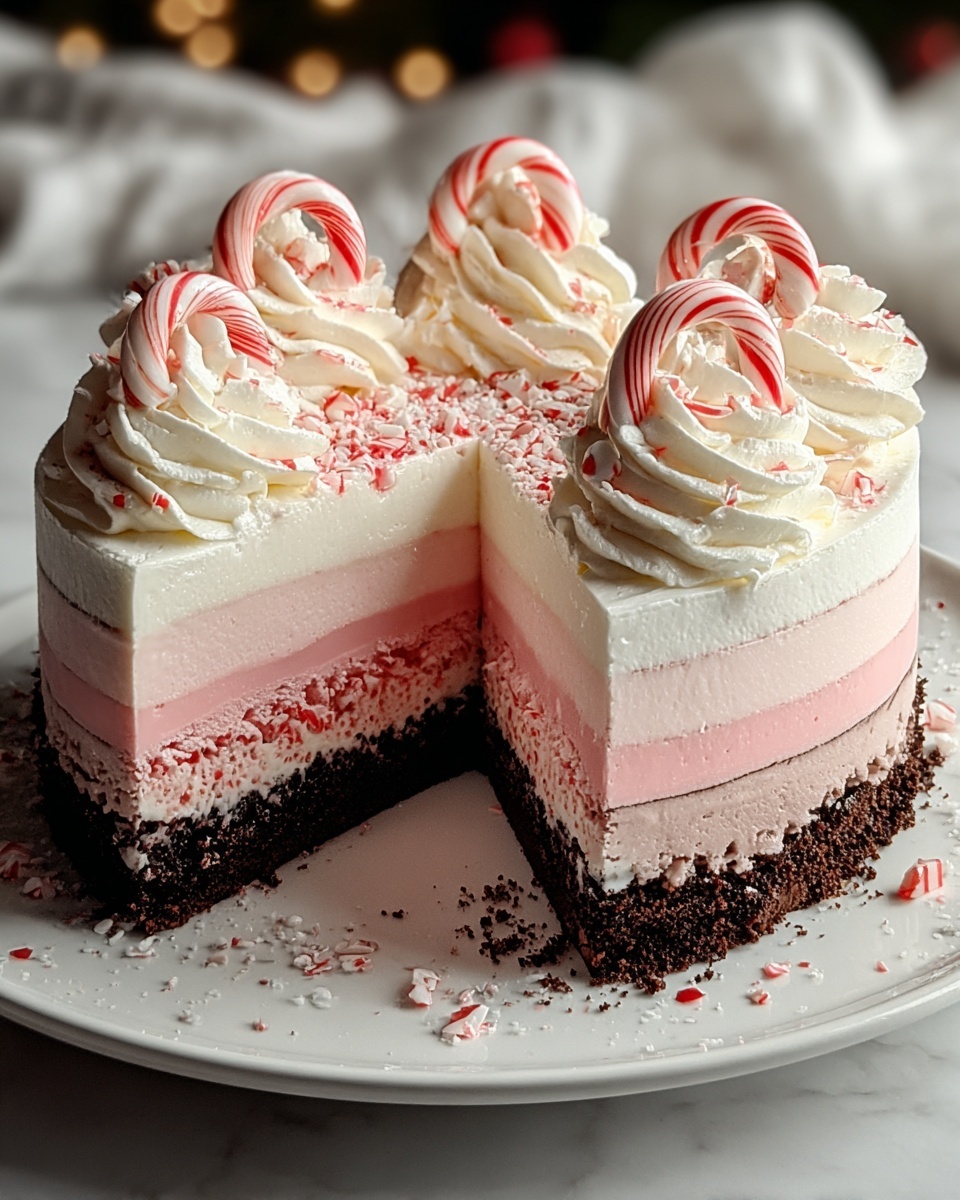
If you are looking for a show-stopping dessert that brings together the cool refreshment of peppermint and the rich decadence of chocolate, the Ultimate Festive Peppermint Ice Cream Cake Recipe is exactly what you need. This icy delight layers a crunchy chocolate cookie crust with creamy peppermint ice cream and light whipped cream, all topped with festive crushed candy canes and chocolate accents. Perfect for holiday gatherings or anytime you want to impress friends and family with a dazzling treat, this cake is as fun to make as it is to eat.
Ingredients You’ll Need
The magic behind the Ultimate Festive Peppermint Ice Cream Cake Recipe starts with a few simple, carefully selected ingredients. Each one plays a vital role: the chocolate cookie crumbs create a sturdy and flavorful base, peppermint ice cream offers that signature cool burst of flavor, and the whipped cream topping adds a fluffy, dreamy finish. Let’s break down exactly what you’ll need.
- 2 cups (200g) chocolate cookie crumbs: Use Oreos or similar chocolate cookies, make sure to remove the filling for a crisp crust.
- 6 tbsp (85g) unsalted butter, melted: This binds the cookie crumbs together, creating a firm yet tender base.
- 1 ½ quarts (1.4 liters) peppermint ice cream, softened: Softening makes spreading easier while ensuring a creamy layer full of minty freshness.
- ½ cup (50g) crushed peppermint candies or candy canes: Adds texture and an extra peppermint punch within the ice cream layer.
- 2 cups (480ml) heavy whipping cream: Whipped to soft peaks, this creates a luscious and light topping to balance the ice cream.
- 3 tbsp powdered sugar: Sweetens the whipped cream just enough without overpowering the peppermint flavor.
- ½ tsp vanilla extract: A subtle flavor enhancer that rounds out the whipped cream topping beautifully.
- Crushed candy canes or peppermint candies, chocolate shavings or mini chocolate chips: These festive garnishes make your cake look and taste extra special when served.
How to Make Ultimate Festive Peppermint Ice Cream Cake Recipe
Step 1: Prepare the Chocolate Cookie Crust
Start by mixing your chocolate cookie crumbs with the melted butter until everything is combined well and looks like wet sand. Press this mixture firmly into the bottom of a springform pan or pie dish. Refrigerate this crust for at least 30 minutes to help it set firmly so that it will hold together beautifully beneath the ice cream layers. This step ensures a crunchy, chocolatey foundation that makes every bite satisfying.
Step 2: Build the Peppermint Ice Cream Layer
Next, allow your peppermint ice cream to soften just enough at room temperature to be spreadable without turning soupy. Smooth the softened ice cream evenly over your chilled cookie crust. Immediately sprinkle the crushed peppermint candies or candy canes over the ice cream to add a wonderful crunch and festive sparkle. Pop the entire cake into the freezer for 3 to 4 hours until the ice cream is fully set—this layer is the heart of the Ultimate Festive Peppermint Ice Cream Cake Recipe.
Step 3: Whip the Cream Topping
While the cake chills, whisk together the heavy cream, powdered sugar, and vanilla extract until soft peaks form. The whipped cream should be airy but stable enough to spread nicely on top of the frozen ice cream layer. Gently smooth the whipped topping evenly over the cake, creating a pristine, cloud-like finish. This topping adds a light texture contrast and a creamy flavor that complements the cool peppermint brilliantly.
Step 4: Garnish with Festive Flair
For that picture-perfect presentation, sprinkle the whipped cream topping with crushed candy canes, peppermint candies, or mini chocolate chips. A few chocolate shavings scatter elegantly on top, adding a hint of richness and visual appeal. Freeze the cake for at least another 2 hours to firm up all the layers and fix the toppings in place, so every slice emerges beautifully.
Step 5: Serve and Enjoy
Before serving, allow the cake to sit out at room temperature for a few minutes so it slices smoothly without cracking or sticking. Cut into generous portions and serve chilled to enjoy the full, refreshing burst of the peppermint ice cream combined with the crunchy crust and whipped topping. This step completes the Ultimate Festive Peppermint Ice Cream Cake Recipe experience with perfect slices every time.
How to Serve Ultimate Festive Peppermint Ice Cream Cake Recipe

Garnishes
Enhance your cake’s festive charm by adding more crushed peppermint candies or a drizzle of chocolate syrup at the table. A few fresh mint leaves can also add a pop of green and fresh aroma. The garnishes not only make great additions for texture and flavor but also create a stunning visual that impresses your guests before they even take a bite.
Side Dishes
Pair this refreshing dessert with warm, spiced treats like gingerbread cookies or a small serving of hot cocoa to bring some cozy balance to the cool, minty cake. Seasonal fruit such as raspberries or a citrus compote can also add brightness and a pleasant contrast in acidity, making your dessert plate even more exciting.
Creative Ways to Present
If you’re serving this cake at a festive gathering, consider presenting individual slices atop decorative plates with a dusting of cocoa powder or crushed candy canes. You can also transform it into a layered dessert parfait by scooping portions into glasses and layering with additional crushed cookies and whipped cream for a showy twist on the classic cake form.
Make Ahead and Storage
Storing Leftovers
Wrap any leftover Ultimate Festive Peppermint Ice Cream Cake Recipe tightly with plastic wrap or store it in an airtight container in the freezer. This keeps the flavors fresh and prevents ice crystals from forming, so your next serving tastes just as amazing as the first.
Freezing
This cake is designed to be frozen and keeps well for up to 1 week. When freezing, make sure to cover it well to avoid any freezer odors. The texture and flavors remain wonderfully intact, making it a great dessert to prepare ahead of time before your holiday celebrations.
Reheating
Because this is an ice cream cake, reheating is not recommended. Instead, allow frozen slices to thaw slightly at room temperature for easier slicing and optimal texture before serving. This approach lets each slice maintain that perfect icy creaminess and festive flavor.
FAQs
Can I use a different flavor of ice cream in this recipe?
Absolutely! While peppermint is perfect for a festive touch, you can try chocolate, vanilla, or even a swirl of raspberry ripple for an exciting twist. Just keep the flavors complementary to chocolate and mint if you want to maintain the holiday theme.
What if I don’t have a springform pan?
No worries. A standard pie dish or any round baking pan will work just fine. Just ensure the crust is pressed firmly and the pan is freezer-safe to hold the cake as it sets.
Can I make this cake vegan or dairy-free?
Yes! Substitute dairy ice cream with a plant-based peppermint flavor and use vegan butter or coconut oil for the crust. You can whip coconut cream in place of heavy cream to top the cake. The texture and flavor will still be delightful with these swaps.
How far in advance can I prepare the cake?
You can assemble the entire cake up to 2 days before your event. Keep it tightly covered in the freezer and add the garnish fresh on the day you plan to serve for the best appearance and texture.
What’s the best way to slice the cake?
Use a sharp, warm knife to slice through the cake smoothly. To warm the knife, simply run it under hot water and wipe it dry before slicing. This helps prevent cracking or sticking for perfect, clean pieces every time.
Final Thoughts
The Ultimate Festive Peppermint Ice Cream Cake Recipe is truly a crowd-pleaser that combines simple ingredients into a stunning holiday dessert. Its layers of chocolate, peppermint, and fluffy cream create a flavor and texture experience that feels both festive and indulgent. I can’t wait for you to try this recipe and share it with those you love—it just might become your new seasonal favorite!
Print
Ultimate Festive Peppermint Ice Cream Cake Recipe
- Prep Time: 15 minutes
- Cook Time: 0 minutes
- Total Time: 6 hours 15 minutes
- Yield: 12 servings
- Category: Dessert
- Method: No-Cook
- Cuisine: American
Description
This Ultimate Festive Peppermint Ice Cream Cake is a delightful no-bake dessert perfect for holiday celebrations. Featuring a crunchy chocolate cookie crust, layers of refreshing peppermint ice cream, and a smooth whipped cream topping sprinkled with crushed candy canes and chocolate shavings, this cake combines festive flavors with a creamy texture that’s sure to impress your guests.
Ingredients
Crust
- 2 cups (200g) chocolate cookie crumbs (e.g., Oreos, without filling)
- 6 tbsp (85g) unsalted butter, melted
Ice Cream Layer
- 1 ½ quarts (1.4 liters) peppermint ice cream, slightly softened
- ½ cup (50g) crushed peppermint candies or candy canes
Whipped Topping
- 2 cups (480ml) heavy whipping cream
- 3 tbsp powdered sugar
- ½ tsp vanilla extract
Garnish
- Crushed candy canes or peppermint candies
- Chocolate shavings or mini chocolate chips
Instructions
- Prepare the Crust: In a medium bowl, combine the chocolate cookie crumbs with melted butter. Mix thoroughly until well blended. Press the mixture firmly into the bottom of a springform pan or pie dish to create an even crust layer. Place the crust in the refrigerator and chill for at least 30 minutes to allow it to set firmly.
- Make the Ice Cream Layer: Allow the peppermint ice cream to soften slightly at room temperature for a few minutes to make spreading easier. Evenly spread the softened ice cream over the chilled cookie crust using a spatula, smoothing the surface. Sprinkle the crushed peppermint candies or candy canes evenly over the ice cream layer. Place the cake in the freezer for 3 to 4 hours until the ice cream layer is fully frozen and set.
- Prepare the Whipped Topping: In a large mixing bowl, whip the heavy cream together with powdered sugar and vanilla extract until soft peaks form. Spread the whipped topping evenly over the frozen ice cream layer using a spatula, smoothing the surface to create a neat whipped cream layer.
- Garnish: Decorate the top of the whipped cream layer with additional crushed candy canes, peppermint candies, mini chocolate chips, and optionally chocolate shavings for festive decoration. Return the cake to the freezer and chill for at least 2 hours to ensure the topping sets firmly.
- Serve: Before serving, remove the cake from the freezer and allow it to sit at room temperature for a few minutes to soften slightly for easier slicing. Serve the cake chilled and enjoy the festive peppermint and chocolate flavors.
Notes
- For best results, use a springform pan to easily remove the cake after freezing.
- Make sure the ice cream is only slightly softened before spreading to maintain clean layers.
- You can substitute crushed candy canes with peppermint bark or other holiday candies.
- Store leftovers tightly covered in the freezer to maintain freshness.
- Allow the cake to sit at room temperature for 5-10 minutes before slicing to prevent cracking.


