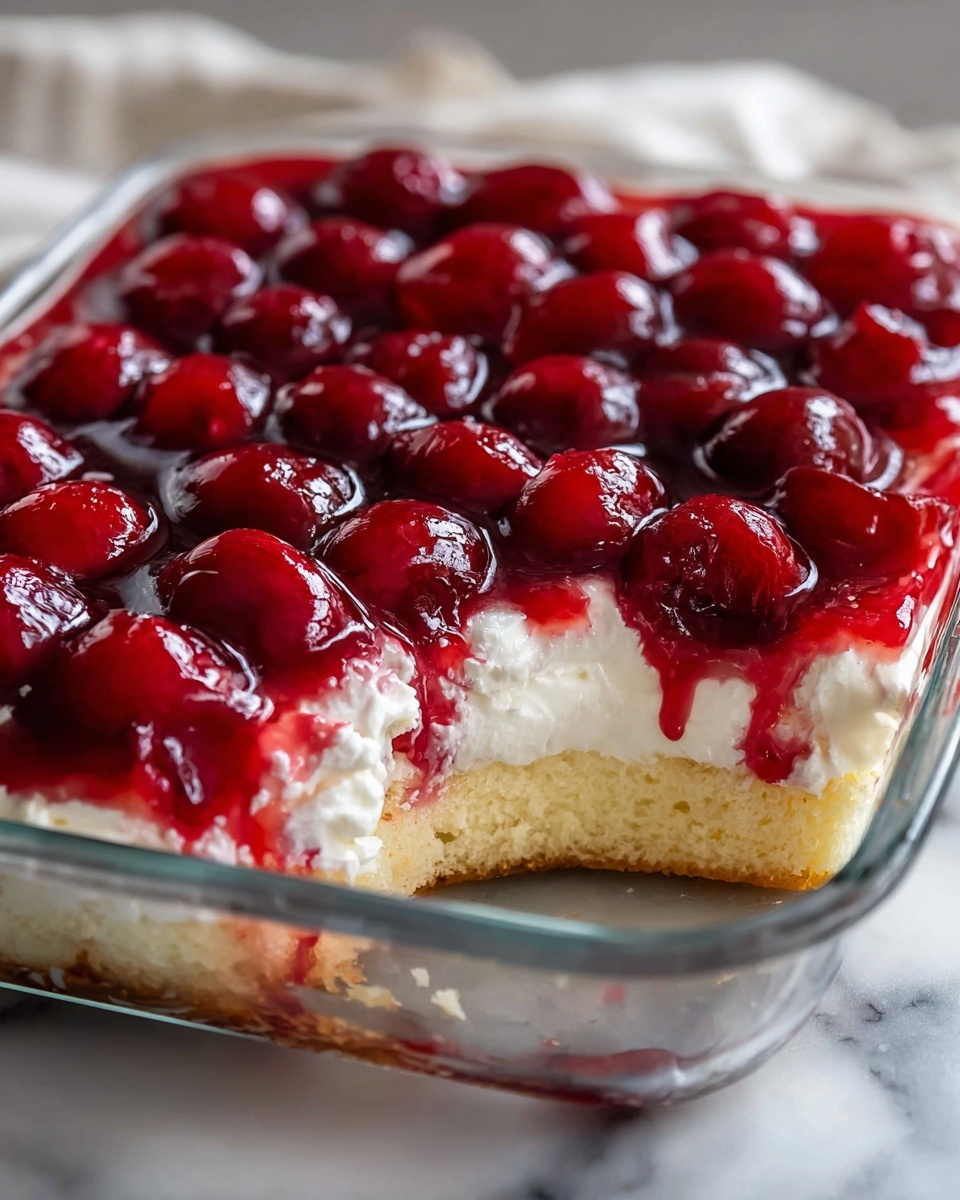
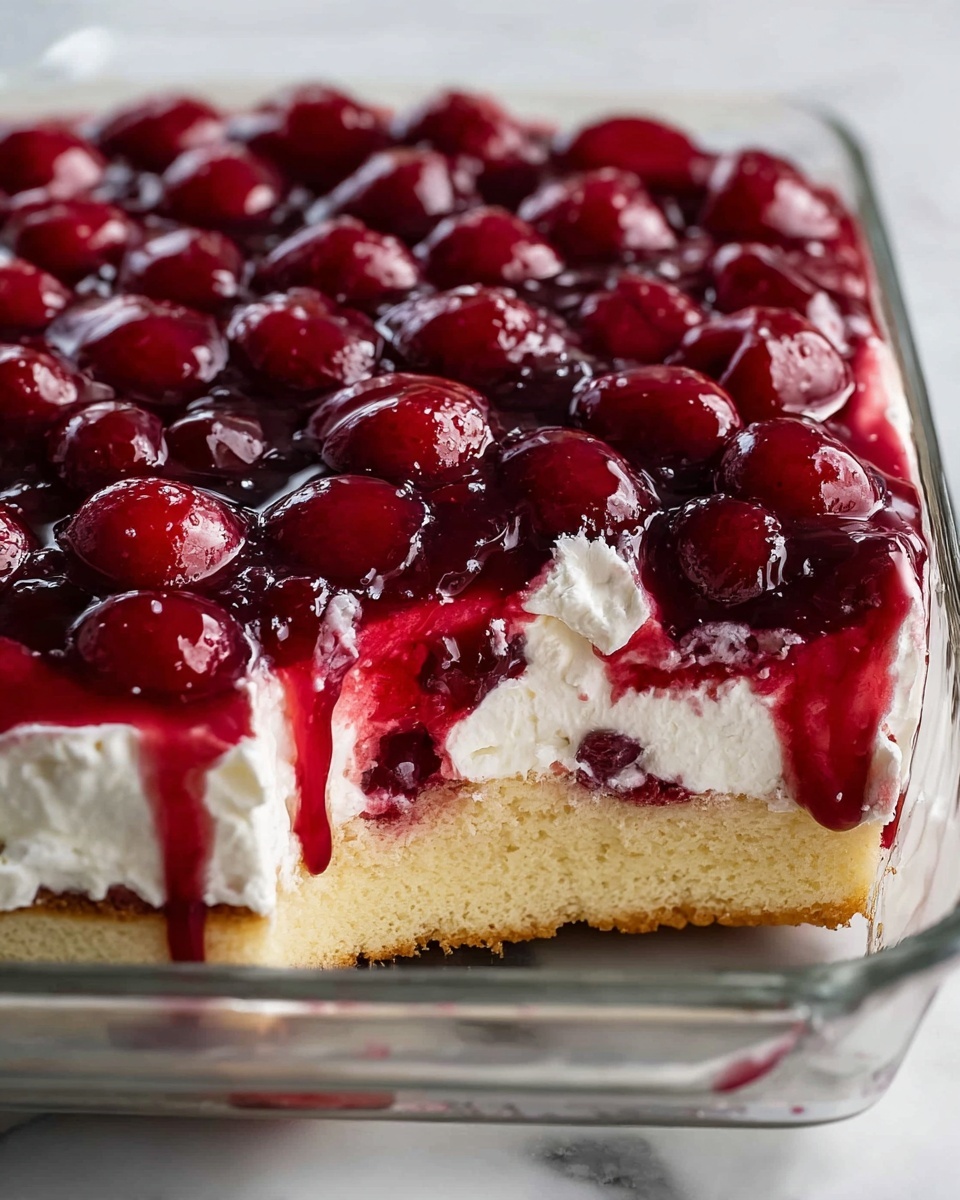
If you’re searching for a dessert that’s effortlessly impressive, delightfully light, and bursting with vibrant cherry flavor, the Cherries in the Snow Dessert Recipe is exactly what you need. This treat combines fluffy angel food cake, a creamy whipped topping mixture, and luscious cherry pie filling for a perfectly layered dessert that’s as charming to look at as it is to eat. It’s a crowd-pleaser for any occasion that comes together quickly yet feels like a special indulgence.

Ingredients You’ll Need
The beauty of the Cherries in the Snow Dessert Recipe lies in its simple ingredients, each playing a vital role to bring the dessert’s texture, flavor, and color to life. From the creamy base to the bright cherry topping, these essentials are easy to find and straightforward to combine.
- Cream cheese (8 ounces, room temperature): This adds a rich, tangy creaminess that balances the sweetness perfectly.
- Powdered sugar (1/2 cup): Sweetens the cream cheese mixture smoothly without any graininess.
- 2% milk (1/2 cup, divided): Adds moisture and helps create a smooth, spreadable filling.
- Cool Whip whipped topping (12 ounces, thawed): Ensures a light, airy texture that keeps the dessert from feeling heavy.
- Pre-baked angel food cake (1 9-inch): Provides a soft, fluffy base that soaks up the creamy mixture elegantly.
- Cherry pie filling (2 cans, 21 ounces each): Brings that classic bright cherry flavor and glossy, inviting red color to top the dessert beautifully.
How to Make Cherries in the Snow Dessert Recipe
Step 1: Whip the Cream Cheese Mixture
Start by softening the cream cheese and powdered sugar together with a hand mixer until you have a luxuriously smooth and creamy blend. Adding the milk in two stages helps achieve a perfectly smooth consistency, making the mixture luscious and easy to fold later on.
Step 2: Fold in the Cool Whip
Gently fold the thawed Cool Whip into the cream cheese base using a spatula. This is the crucial step to keep the mixture light and fluffy—mix just enough to combine without deflating that airy texture.
Step 3: Incorporate the Angel Food Cake Pieces
Break your angel food cake into bite-sized pieces and place them carefully into the creamy mixture. Folding the cake pieces in evenly ensures every spoonful of this Cherries in the Snow Dessert Recipe has a perfect balance of fluffy cake with creamy sweetness.
Step 4: Layer the Mixture in the Pan
Spoon the cake and cream cheese mixture into a 9×13-inch glass baking dish, spreading it out into an even layer. This sets the foundation for the cherry topping and creates smooth, defined layers once chilled.
Step 5: Add the Cherry Pie Filling Top
Generously spoon the cherry pie filling over the cake mixture, spreading it evenly to cover the entire surface. This bright layer adds a pop of color and that unmistakable sweet-and-tart cherry punch that makes this dessert so memorable.
Step 6: Chill and Set
Cover the pan and refrigerate your Cherries in the Snow Dessert Recipe for at least two hours. This chilling time lets all the flavors meld beautifully and the creamy layer firm up just right for slicing and serving.
How to Serve Cherries in the Snow Dessert Recipe
Garnishes
A handful of fresh cherries scattered on top bring freshness and a natural pop of color that makes this dessert feel even more festive. Alternatively, a sprinkle of toasted slivered almonds adds a delightful crunch that contrasts the softness beneath.
Side Dishes
This dessert shines beautifully on its own but pairs wonderfully with a simple cup of rich coffee or even a scoop of vanilla ice cream on the side. The cold sweetness of the ice cream complements the tangy cream cheese and cherry layers perfectly.
Creative Ways to Present
For a fun twist, serve this dessert in individual clear glasses or parfait dishes to showcase the beautiful layers. You can also add a drizzle of dark chocolate or a dusting of powdered sugar for a polished, restaurant-worthy presentation that will impress your guests.
Make Ahead and Storage
Storing Leftovers
Keep any leftover Cherries in the Snow Dessert Recipe covered tightly in the refrigerator for up to three days. The flavors actually deepen over time, so leftovers taste just as wonderful—if not better—after a day or two.
Freezing
While this dessert is best enjoyed fresh, you can freeze it for up to a month. Wrap the dish tightly with plastic wrap and aluminum foil to prevent freezer burn. Thaw thoroughly in the refrigerator before serving, though note that the texture may become slightly softer.
Reheating
This dessert is designed to be served chilled, so reheating isn’t recommended. Instead, simply let any thawed servings sit at room temperature for about 15 minutes before enjoying to take the chill off without losing that delightful creamy texture.
FAQs
Can I use fresh cherries instead of canned pie filling?
Fresh cherries are wonderful but lack the syrupy consistency of canned pie filling. If you prefer fresh, you might want to cook them down with sugar and a bit of cornstarch to mimic the pie filling texture for best results.
Is there a dairy-free version of this dessert?
Absolutely! Substitute dairy-free cream cheese, a non-dairy whipped topping, and plant-based milk to craft a delicious dairy-free rendition without sacrificing the creamy, dreamy texture.
How long does the dessert need to chill before serving?
A minimum of two hours in the refrigerator is key to let the layers set and flavors meld perfectly. For the best texture, chilling overnight is an excellent idea if you have the time.
Can I make this dessert gluten-free?
Yes! Just ensure the angel food cake you use is gluten-free or substitute with another light gluten-free cake to maintain the same fluffy texture in this Cherries in the Snow Dessert Recipe.
What’s the best way to serve this dessert at a party?
Prepare the dessert in a beautiful glass baking dish and bring it out chilled with a serving spatula. You can also portion it into individual cups beforehand for an elegant and mess-free option at gatherings.
Final Thoughts
The Cherries in the Snow Dessert Recipe is a true gem that feels special but could not be easier to make. With its airy texture and bright cherry topping, it’s the kind of dessert that instantly lifts the mood and brings smiles all around. I truly hope you try this at home and find it as much of a favorite as I do!
Print
Cherries in the Snow Dessert Recipe
- Prep Time: 20 minutes
- Cook Time: 0 minutes
- Total Time: 2 hours 20 minutes
- Yield: 15 servings
- Category: Dessert
- Method: No-Cook
- Cuisine: American
Description
Cherries in the Snow is a no-bake, creamy dessert featuring fluffy angel food cake pieces mixed with a sweetened cream cheese and Cool Whip blend, topped generously with cherry pie filling. It’s a light, refreshing treat perfect for gatherings and requires minimal preparation.
Ingredients
Cream Cheese Mixture
- 8 ounces cream cheese, room temperature
- 1/2 cup powdered sugar
- 1/2 cup 2% milk, divided
- 12 ounces Cool Whip whipped topping, thawed
Cake and Topping
- 1 (9-inch) pre-baked angel food cake
- 2 cans (21 ounces each) cherry pie filling
Instructions
- Prepare Cream Cheese Mixture: In a large bowl, use a hand mixer to whip the cream cheese and powdered sugar together until smooth and creamy. Mix in 1/4 cup of milk, then add the remaining 1/4 cup milk and blend again until the mixture is smooth and well-combined.
- Fold in Cool Whip: Gently fold the thawed Cool Whip into the cream cheese mixture using a spatula. Be careful not to overmix to retain the light and fluffy texture.
- Incorporate Cake Pieces: Break the pre-baked angel food cake into small bite-sized pieces. Add these pieces into the cream cheese and Cool Whip mixture, folding gently until all cake pieces are coated evenly.
- Assemble Base Layer: Spoon the cake mixture into a 9×13-inch glass baking pan. Spread it out evenly in the pan to form a uniform layer.
- Add Cherry Topping: Evenly spread the cherry pie filling over the cake mixture, ensuring the whole surface is covered with the luscious cherry topping.
- Chill Dessert: Cover the dessert and refrigerate until chilled, at least 2 hours or until ready to serve. Slice and enjoy directly from the pan.
Notes
- Ensure the cream cheese is at room temperature for easier mixing and smoother consistency.
- Do not overmix when folding in the Cool Whip to keep the dessert light and fluffy.
- Refrigerate for at least 2 hours to let flavors meld and the dessert to set properly.
- Can be made a day ahead and kept covered in the refrigerator.
- Substitute cherry pie filling with other fruit pie fillings for variation.


