
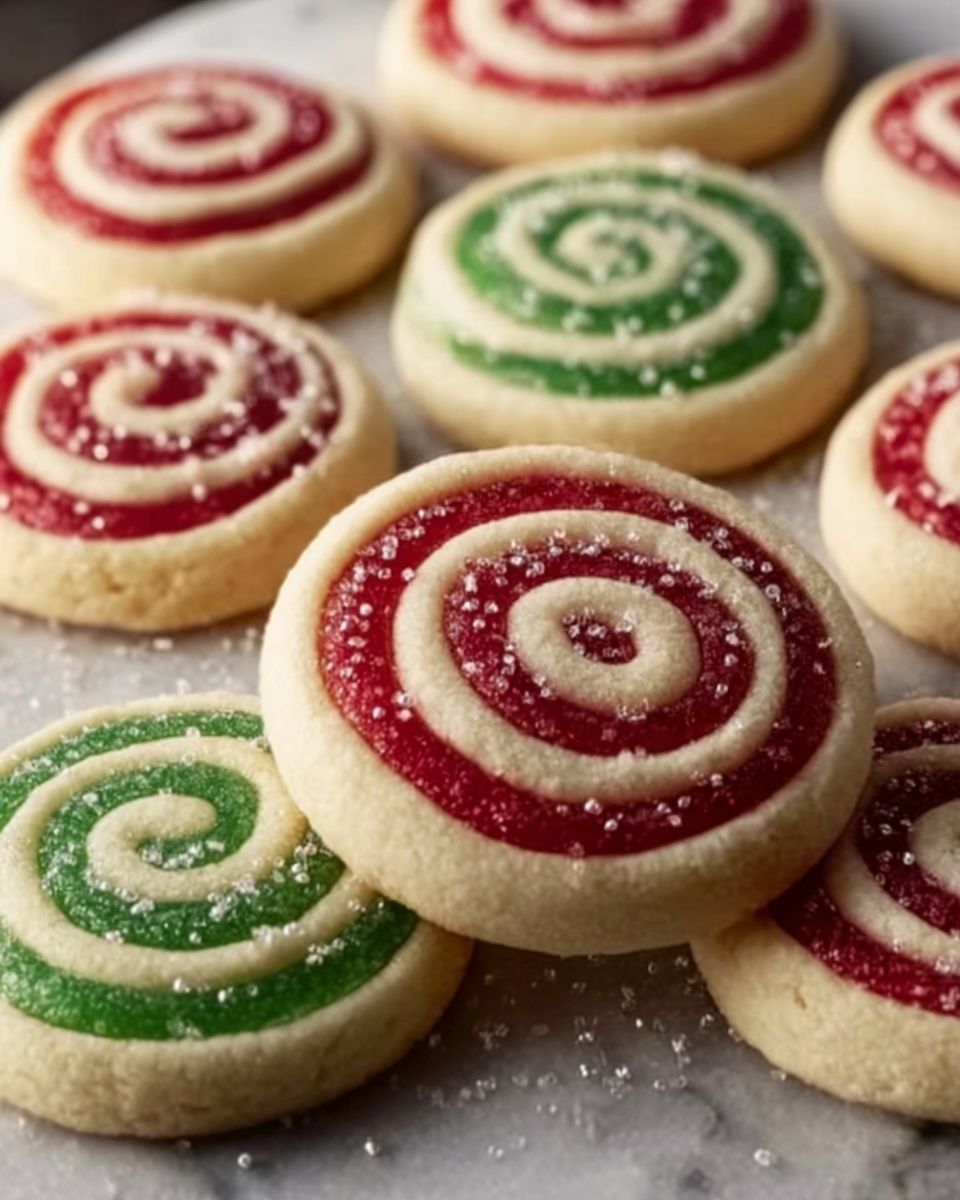
If you’re ready to spread some serious festive cheer in your kitchen, let me introduce you to the Christmas Swirl Butter Cookies Recipe. These delightful treats blend buttery richness with vibrant, holiday-inspired colors that dance on your plate. The swirl of red, green, and classic butter dough creates a stunning visual that matches their tender, melt-in-your-mouth texture, making them perfect for gifting or sharing at your holiday gatherings. Every bite bursts with just the right balance of sweetness and a whisper of almond, making these cookies an instant favorite for all ages during the most wonderful time of the year.
Ingredients You’ll Need
These ingredients are straightforward but essential to achieving the perfect texture, flavor, and festive look of the Christmas Swirl Butter Cookies Recipe. Each element plays a key role, from the flour’s structure foundation to the gel coloring that brings the holiday spirit alive in every swirl.
- All-purpose flour (2¾ cups): The base that gives the cookies their tender crumb and structure.
- Baking powder (1 teaspoon): Helps the cookies rise just enough for a light texture.
- Salt (½ teaspoon): Balances sweetness and enhances flavor depth.
- Unsalted butter, softened (1 cup): Offers a rich, creamy texture and buttery taste fundamental to classic butter cookies.
- Granulated sugar (1 cup): Adds sweetness and helps create that delightful crisp edge.
- Egg (1 large): Binds the ingredients and adds moisture for the perfect dough consistency.
- Vanilla extract (1 teaspoon): Introduces a warm, comforting flavor that complements the buttery dough beautifully.
- Almond extract (½ teaspoon): Adds a unique nutty aroma that sets these cookies apart from ordinary butter cookies.
- Red and green gel food coloring: Provides vibrant hues for the festive swirl without altering the dough’s texture.
How to Make Christmas Swirl Butter Cookies Recipe
Step 1: Prepare the Dry Ingredients
Start by whisking together your flour, baking powder, and salt in a medium bowl. This step ensures even distribution and helps your cookies achieve that perfect lightness.
Step 2: Cream the Butter and Sugar
In a large bowl, beat the softened butter with granulated sugar until the mixture is light and fluffy—this aerates the dough and gives the cookies their tender texture. Then add the egg, vanilla, and almond extracts, mixing until smooth and beautifully fragrant.
Step 3: Incorporate the Dry Ingredients
Slowly add the dry mix into your wet ingredients, stirring just until a soft dough forms. Overmixing at this stage can make your cookies tough, so stop as soon as everything is combined.
Step 4: Divide and Color the Dough
Divide your dough into three equal parts. Leave one plain to highlight the buttery base, then knead red and green gel colors into the other two portions. Gel colors work best because they provide vibrant hues without affecting the dough’s consistency.
Step 5: Roll the Dough
Roll each color portion into rectangles about ¼ inch thick. Placing each on wax paper prevents any sticking and makes the layers easy to handle.
Step 6: Stack the Layers
Carefully stack your dough rectangles—plain first, followed by red, then green. Gently press them together to create a unified block that will form the signature swirl pattern.
Step 7: Form the Swirl Log
Roll the stacked layers from one long edge into a log shape. This technique creates those beautiful swirling stripes inside every cookie. Wrap the log in plastic wrap and refrigerate it for at least an hour to firm up the dough for slicing.
Step 8: Preheat the Oven
While your dough chills, preheat your oven to 350°F (175°C) and line baking sheets with parchment paper to prevent sticking and promote even baking.
Step 9: Slice and Bake
Once chilled, slice your swirl log into thin ¼-inch rounds. Place them on your prepared baking sheets, leaving about 2 inches between each cookie to allow for gentle spreading. Bake for 10-12 minutes until the edges are just turning golden brown.
Step 10: Cool and Serve
Let your cookies cool on the baking sheet for five minutes post-baking to set their shape, then transfer them to a wire rack to cool completely. This step ensures the perfect balance of crispness and chewiness.
How to Serve Christmas Swirl Butter Cookies Recipe
Garnishes
For an extra festive touch, dust your cookies lightly with powdered sugar or sprinkle finely chopped nuts along the edges after baking for added texture and flavor contrast. A drizzle of white chocolate can also enhance their festive appeal.
Side Dishes
These cookies pair wonderfully with a warm cup of spiced tea, hot cocoa, or even a glass of chilled milk, creating a cozy companion for festive gatherings or quiet moments by the fire.
Creative Ways to Present
Arrange your Christmas swirl butter cookies on a beautiful holiday-themed platter, perhaps nestled between sprigs of pine or holly. Alternatively, stack them in clear cellophane bags tied with red and green ribbons to make charming homemade gifts that friends and family will treasure.
Make Ahead and Storage
Storing Leftovers
Store these cookies in an airtight container at room temperature for up to a week. Proper storage keeps them fresh and preserves their buttery texture and vibrant colors wonderfully.
Freezing
If you want to prepare in advance, the sliced dough log can be frozen before baking. Wrap it tightly in plastic and foil, then thaw overnight in the fridge before slicing and baking as usual. Baked cookies can also be frozen in airtight containers for up to three months.
Reheating
To bring frozen or day-old cookies back to life, warm them in a 300°F oven for 5 minutes. This gently revives their crisp edges and that freshly baked aroma we all love.
FAQs
Can I use natural food coloring instead of gel colors?
Natural food coloring can work, but it may affect the dough’s texture and produce less vivid hues. Gel colors are preferred for maintaining consistency and vibrant color in this Christmas Swirl Butter Cookies Recipe.
What if I don’t have almond extract?
You can omit almond extract if needed, or substitute it with an additional ½ teaspoon of vanilla extract. However, the almond adds a special depth that really makes this cookie shine during the holidays.
Can I make these cookies gluten-free?
Yes, by replacing all-purpose flour with a gluten-free baking flour blend designed for cookies, you can enjoy a gluten-free version. Just be sure to check the blend for any necessary adjustments in baking powder or other ingredients.
How thick should I slice the dough log?
Slicing the dough log into ¼-inch rounds is ideal to achieve that perfect balance between a crisp edge and a tender center. Thicker slices might bake unevenly, while thinner could be too fragile.
Can these cookies be decorated after baking?
Absolutely! While they look stunning plain with the swirl design, you can add royal icing, sprinkles, or edible glitter after baking for an extra festive flair that kids and adults alike will enjoy adding.
Final Thoughts
This Christmas Swirl Butter Cookies Recipe is a delightful way to bring color, flavor, and holiday cheer into your kitchen. Its classic buttery base combined with swirling festive hues creates a cookie that’s just as fun to make as it is to eat. Whether you’re baking for a crowd or gifting these beauties, they’re sure to become a treasured part of your holiday tradition. Give it a try—you’ll be so glad you did!
Print
Christmas Swirl Butter Cookies Recipe
- Prep Time: 20 minutes
- Cook Time: 12 minutes
- Total Time: 42 minutes
- Yield: 24 servings
- Category: Dessert
- Method: Baking
- Cuisine: American
Description
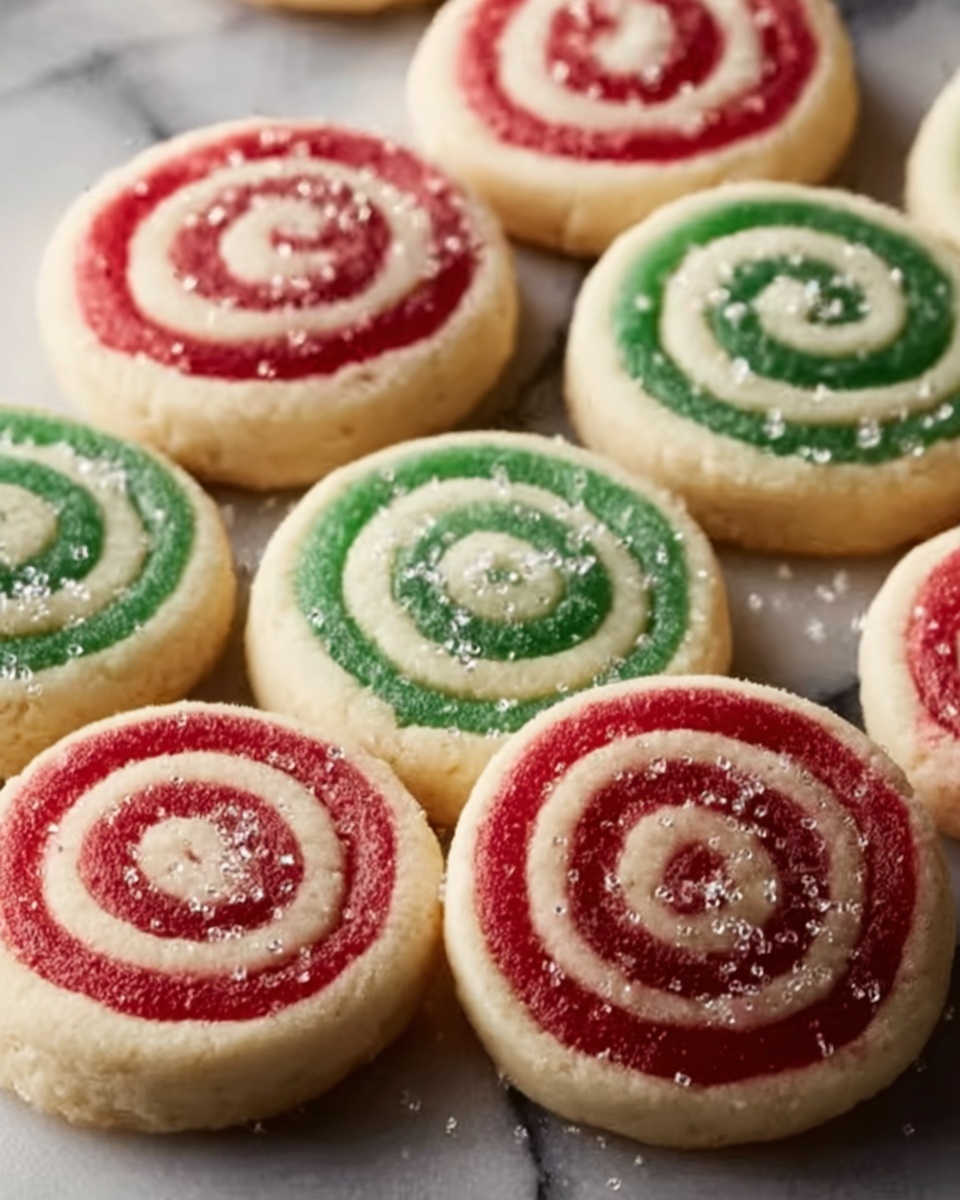
These festive Christmas Swirl Butter Cookies combine classic buttery sweetness with vibrant red and green swirls, perfect for holiday celebrations. Soft, flavorful, and beautifully layered, these cookies bring a cheerful touch to your cookie platter while being delightfully simple to make from scratch.
Ingredients
Dry Ingredients
- 2¾ cups all-purpose flour
- 1 teaspoon baking powder
- ½ teaspoon salt
Wet Ingredients
- 1 cup unsalted butter, softened
- 1 cup granulated sugar
- 1 large egg
- 1 teaspoon vanilla extract
- ½ teaspoon almond extract
Coloring
- Red gel food coloring
- Green gel food coloring
Instructions
- Prepare the Dry Ingredients: In a medium bowl, whisk together the all-purpose flour, baking powder, and salt until evenly combined. Set this mixture aside for later incorporation.
- Cream the Butter and Sugar: In a large bowl, beat the softened unsalted butter and granulated sugar together using an electric mixer until the mixture becomes light and fluffy, indicating it has incorporated plenty of air. Add the egg, vanilla extract, and almond extract, and continue mixing until the batter is smooth and well combined.
- Incorporate the Dry Ingredients: Gradually add the dry flour mixture to the wet butter mixture, mixing gently until a soft dough forms. Avoid overmixing to keep the cookies tender.
- Divide and Color the Dough: Divide the dough evenly into three portions. Leave one portion plain, and add red gel food coloring to one portion and green gel food coloring to the other. Knead each colored dough well until the color is fully integrated and uniform.
- Roll the Dough: On separate pieces of wax paper, roll each dough portion into a rectangle approximately ¼ inch thick. The wax paper prevents sticking and helps with handling the dough.
- Stack the Layers: Carefully stack the three dough rectangles—plain, red, then green—on top of each other, gently pressing them together to adhere without squashing the layers.
- Form the Swirl Log: Starting from one long edge, roll the stacked layered dough gently into a log shape to create a swirled pattern within. Wrap the dough log tightly in plastic wrap and refrigerate it for at least 1 hour to allow it to firm up for slicing.
- Preheat the Oven: When ready to bake, preheat your oven to 350°F (175°C). Line baking sheets with parchment paper to prevent sticking and facilitate easy cleanup.
- Slice and Bake: Remove the chilled dough log from the refrigerator and slice it into ¼-inch thick rounds. Place these cookies on the prepared baking sheets spaced about 2 inches apart to allow for slight spreading. Bake the cookies for 10–12 minutes, or until the edges turn lightly golden.
- Cool and Serve: Allow the cookies to cool on the baking sheets for 5 minutes, then transfer them to a wire rack to cool completely before serving or storing.
Notes
- Using gel food coloring helps achieve vibrant colors without adding extra moisture to the dough.
- Make sure the butter is softened, not melted, for the best texture in the cookies.
- Chilling the dough log before slicing ensures clean, uniform cookies with defined swirl patterns.
- Store cooled cookies in an airtight container at room temperature for up to one week.
- For a nut-free version, ensure almond extract is omitted or substituted with vanilla extract.
