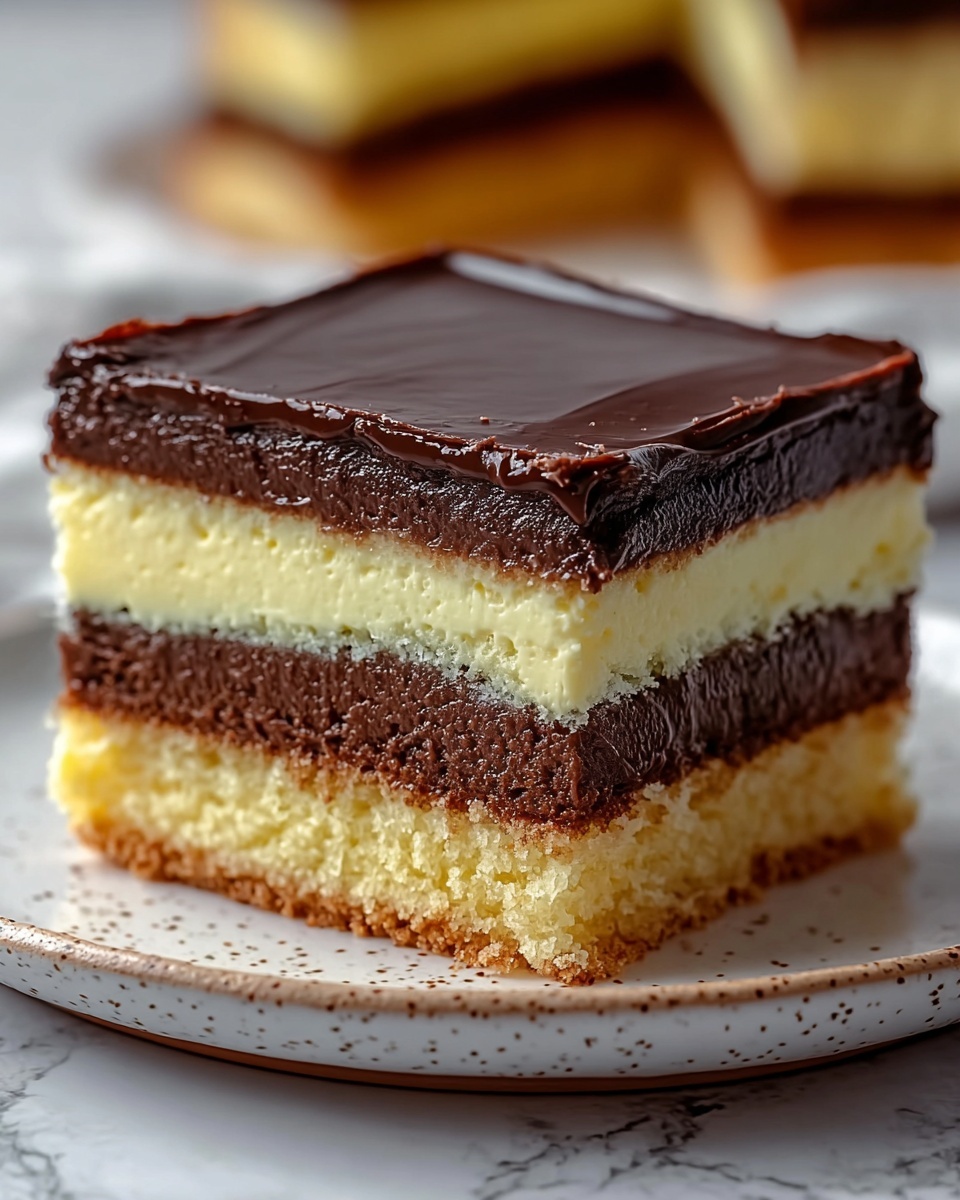
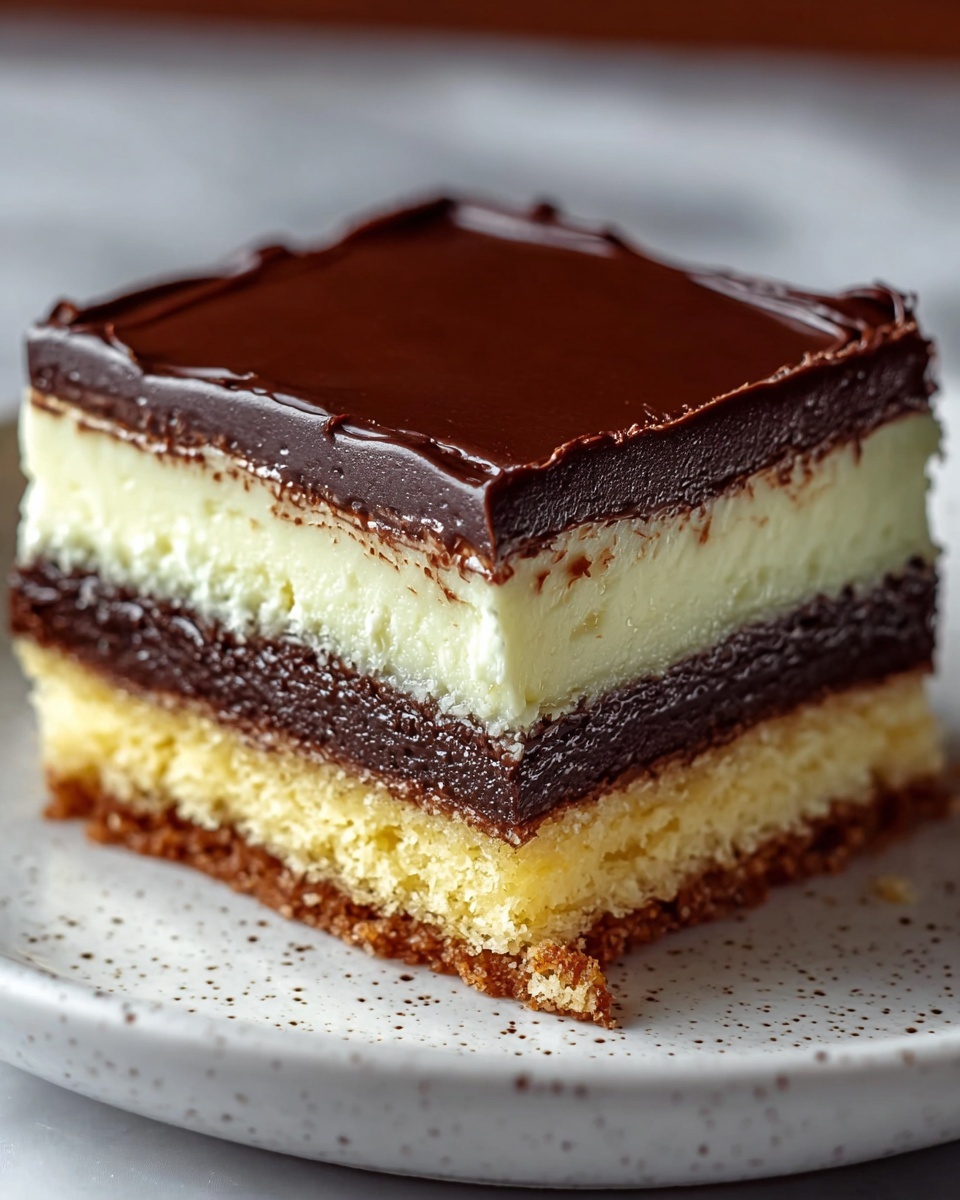
There is nothing quite like sinking your fork into a slice of the Classic Boston Cream Pie Recipe, a delightful American dessert that masterfully combines fluffy vanilla cake, creamy custard, and a glossy chocolate glaze. Despite its name, this is not really a pie but a cake that offers a perfect balance of textures and flavors that feel both comforting and indulgent. Whether you’re baking for a special occasion or simply treating yourself, this recipe brings a timeless favorite to your kitchen table with ease and joy.
Ingredients You’ll Need
Ingredients You’ll Need
Gathering the right ingredients for the Classic Boston Cream Pie Recipe is simple, yet each one plays a key role in building the cake’s signature flavor and texture. From flour to butter to chocolate, every element ensures that each bite is moist, creamy, and richly satisfying.
- All-purpose flour: The foundation for the cake, providing structure and tenderness.
- Baking powder: Helps the cake rise beautifully with a light crumb.
- Salt: Balances sweetness and enhances overall flavor.
- Unsalted butter, softened: Adds richness and a tender crumb to the cake.
- Granulated sugar: Sweetens perfectly while helping create a fluffy texture.
- Large eggs: Bind ingredients together and add moisture and lift.
- Pastry cream or custard (for filling): The creamy heart of the Boston Cream Pie.
- Chocolate glaze: Adds a glossy, luscious finish that contrasts with the creamy filling.
How to Make Classic Boston Cream Pie Recipe
Step 1: Prepare Your Oven and Pans
Start by preheating your oven to 350°F (175°C) and thoroughly greasing and flouring two 9-inch round cake pans. This step ensures your cakes bake evenly and release easily once done, setting a smooth foundation for the rest of the process.
Step 2: Mix Dry Ingredients
In a medium bowl, whisk together the flour, baking powder, and salt to evenly distribute the rising agents and seasoning. Setting this mixture aside allows you to effortlessly incorporate it in the next steps without overmixing, which keeps the cake tender.
Step 3: Cream Butter and Sugar
In a separate, larger bowl, beat the softened butter and granulated sugar until the mixture becomes light and fluffy. This aeration creates a delicate crumb in your cake and helps achieve that classic Boston Cream Pie texture that feels light yet rich.
Step 4: Add Eggs One at a Time
Introduce the eggs individually, beating well after each addition. This careful step ensures they combine smoothly into the batter, offering moisture and structure needed for a perfectly balanced cake.
Step 5: Incorporate the Dry Ingredients
Sift the dry ingredients gradually into the wet butter and egg mixture, folding gently until just combined. Avoid overmixing here to maintain a soft and tender crumb that melts in your mouth.
Step 6: Bake the Cake Layers
Divide the batter evenly between the two prepared pans and smooth out the tops. Bake for 20-25 minutes or until a toothpick inserted into the center comes out clean. This step will deliver those perfectly golden, fluffy layers essential for your Boston Cream Pie.
Step 7: Cool and Assemble
Allow the cakes to cool in their pans for 10 minutes before transferring them to a wire rack to cool completely. This cooling period is crucial before spreading the luscious pastry cream between the layers, which creates the dessert’s signature creamy center.
Step 8: Add Filling and Top with Chocolate Glaze
Once cooled, spread a thick layer of pastry cream over one cake layer then gently place the second layer on top. Pour over a rich chocolate glaze that adds a beautiful shine and rich chocolate flavor, completing this classic dessert.
How to Serve Classic Boston Cream Pie Recipe
Garnishes
To elevate this dessert’s presentation, consider dusting the edges with powdered sugar or topping with a few fresh berries for a pop of color and freshness that brightens the rich chocolate and custard flavors.
Side Dishes
Serve your Classic Boston Cream Pie Recipe alongside a cup of strong coffee or a glass of cold milk. These pairings help balance the sweetness and enhance the overall creamy experience of the cake.
Creative Ways to Present
For a modern twist, try making individual mini Boston Cream Pies using cupcake pans or layering the cake slices with fruit compote and whipped cream for a beautifully layered parfait-style dessert that delights the eye as well as the palate.
Make Ahead and Storage
Storing Leftovers
Keep any leftover Boston Cream Pie covered tightly with plastic wrap or stored in an airtight container in the refrigerator to preserve freshness and prevent the cake from drying out. It will stay delicious for up to 3 days.
Freezing
You can freeze the cake layers (without filling or glaze) by wrapping them well in plastic wrap and placing them in a freezer bag. Freeze for up to 2 months, then thaw completely before assembling to maintain the best texture.
Reheating
Since this dessert is best enjoyed chilled, reheating is not recommended. Instead, allow any refrigerated slices to sit at room temperature for about 15 minutes before serving to soften the cake and enhance flavors.
FAQs
What makes the Boston Cream Pie a ‘pie’ when it is actually a cake?
The name comes from the use of the word “pie” historically to refer to various kinds of layered pastries. In this case, the Boston Cream Pie is a cake layered with custard and glazed with chocolate, but the traditional name stuck.
Can I use homemade pastry cream instead of store-bought?
Absolutely! Homemade pastry cream will add the freshest, creamiest texture to your Boston Cream Pie. It’s easy to make and really elevates the dessert’s flavor.
What type of chocolate is best for the glaze?
For the richest, shiniest glaze, use high-quality semi-sweet chocolate combined with a bit of cream or butter. This creates a perfect balance of sweetness and smoothness.
Is it possible to make this recipe gluten-free?
Yes, you can substitute the all-purpose flour with a gluten-free blend designed for baking. Just be sure it contains xanthan gum or another binder for the best texture.
How far in advance can I assemble the cake?
You can assemble the Classic Boston Cream Pie Recipe up to one day in advance. Just keep it refrigerated and covered to maintain freshness until serving.
Final Thoughts
There is a special delight that comes with making and sharing the Classic Boston Cream Pie Recipe, a true celebration of classic American desserts. It’s approachable for any home baker and endlessly satisfying, promising smiles with every bite. I wholeheartedly encourage you to dive into this recipe and enjoy making a timeless treat your own.
Print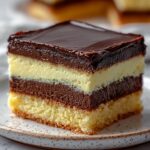
Classic Boston Cream Pie Recipe
- Prep Time: 20 minutes
- Cook Time: 25 minutes
- Total Time: 45 minutes
- Yield: 8 to 10 servings
- Category: Dessert
- Method: Baking
- Cuisine: American
Description
This Classic Boston Cream Pie recipe features two soft, fluffy vanilla cake layers sandwiched with smooth, creamy pastry cream and topped with a rich chocolate glaze. A timeless dessert that’s perfect for special occasions or any day you crave a luscious treat.
Ingredients
Cake Ingredients
- 1 cup all-purpose flour
- 1 1/2 teaspoons baking powder
- 1/2 teaspoon salt
- 1/2 cup unsalted butter, softened
- 1 cup granulated sugar
- 2 large eggs
Pastry Cream and Glaze
- Pastry cream or custard, quantity as desired for filling
- Chocolate glaze, quantity as needed for topping
Instructions
- Preheat and Prepare Pans: Preheat your oven to 350°F (175°C). Grease and flour two 9-inch round cake pans to ensure the cakes release easily after baking.
- Mix Dry Ingredients: In a medium bowl, whisk together the all-purpose flour, baking powder, and salt. Set this mixture aside for later use.
- Cream Butter and Sugar: In a large bowl, beat the softened unsalted butter and granulated sugar together until the mixture is light and fluffy, creating a smooth base for the cake batter.
- Add Eggs: Incorporate the eggs one at a time into the creamed butter and sugar, mixing thoroughly after each addition to maintain a smooth batter.
- Combine Dry and Wet Ingredients: Gradually add the dry flour mixture to the wet ingredients, mixing gently just until fully combined to ensure a tender cake texture.
- Fill Cake Pans: Pour the batter evenly into the prepared cake pans, smoothing out the tops for even baking.
- Bake the Cakes: Bake for 20 to 25 minutes, or until a toothpick inserted into the center of the cakes comes out clean, indicating they are fully baked.
- Cool the Cakes: Allow the cakes to cool in their pans for about 10 minutes before transferring them to a wire rack to cool completely, avoiding condensation buildup.
- Assemble the Cake: Once fully cooled, spread a generous layer of pastry cream or custard over one cake layer, then place the second layer on top.
- Add Chocolate Glaze and Serve: Finish by topping the assembled cake with a rich chocolate glaze. Chill before serving for the best flavor and texture.
Notes
- Ensure the butter is softened to room temperature to achieve a smooth and fluffy batter.
- Use a toothpick test to check the cakes for doneness to avoid over or under baking.
- Pastry cream can be homemade or store-bought; ensure it is chilled before assembling the cake.
- The chocolate glaze should be poured over the cake once completely cooled to prevent melting.
- Chill the assembled cake for at least an hour before serving for optimal flavor and texture.

