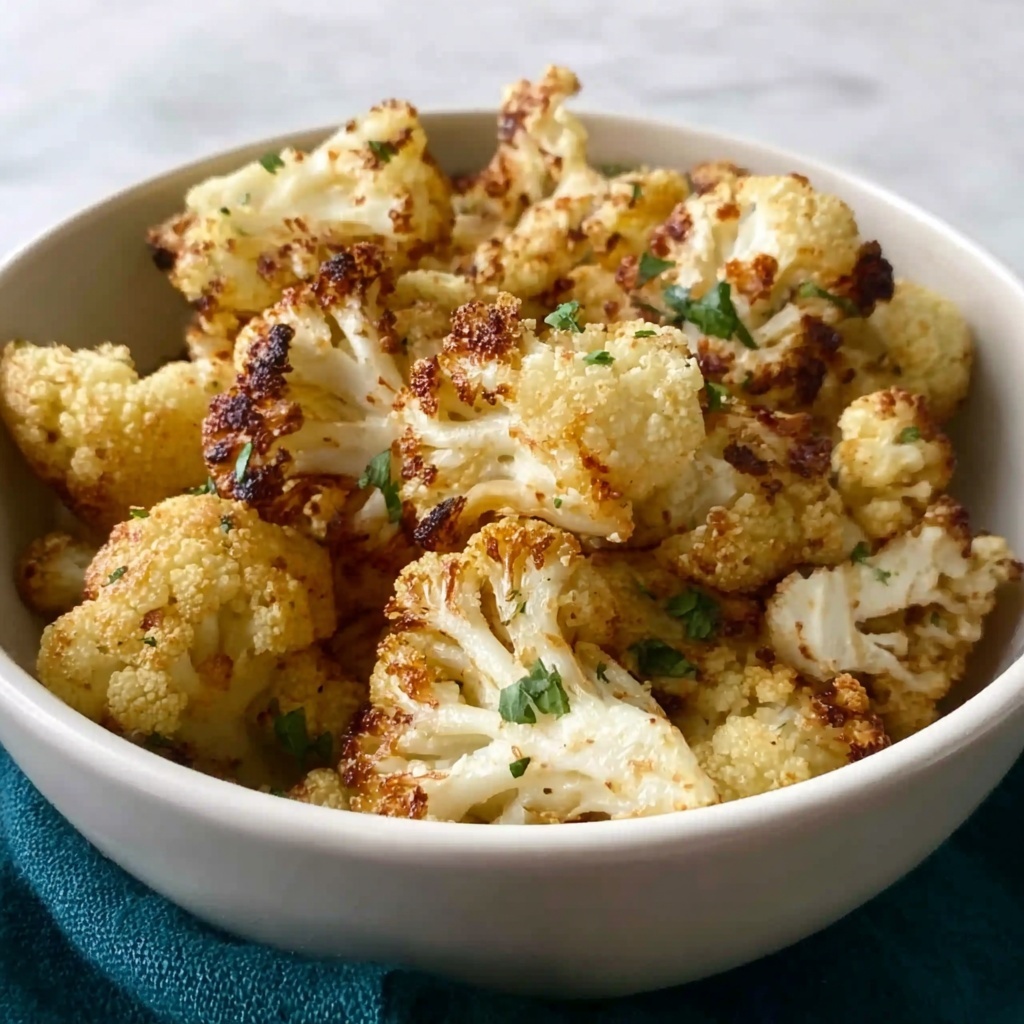
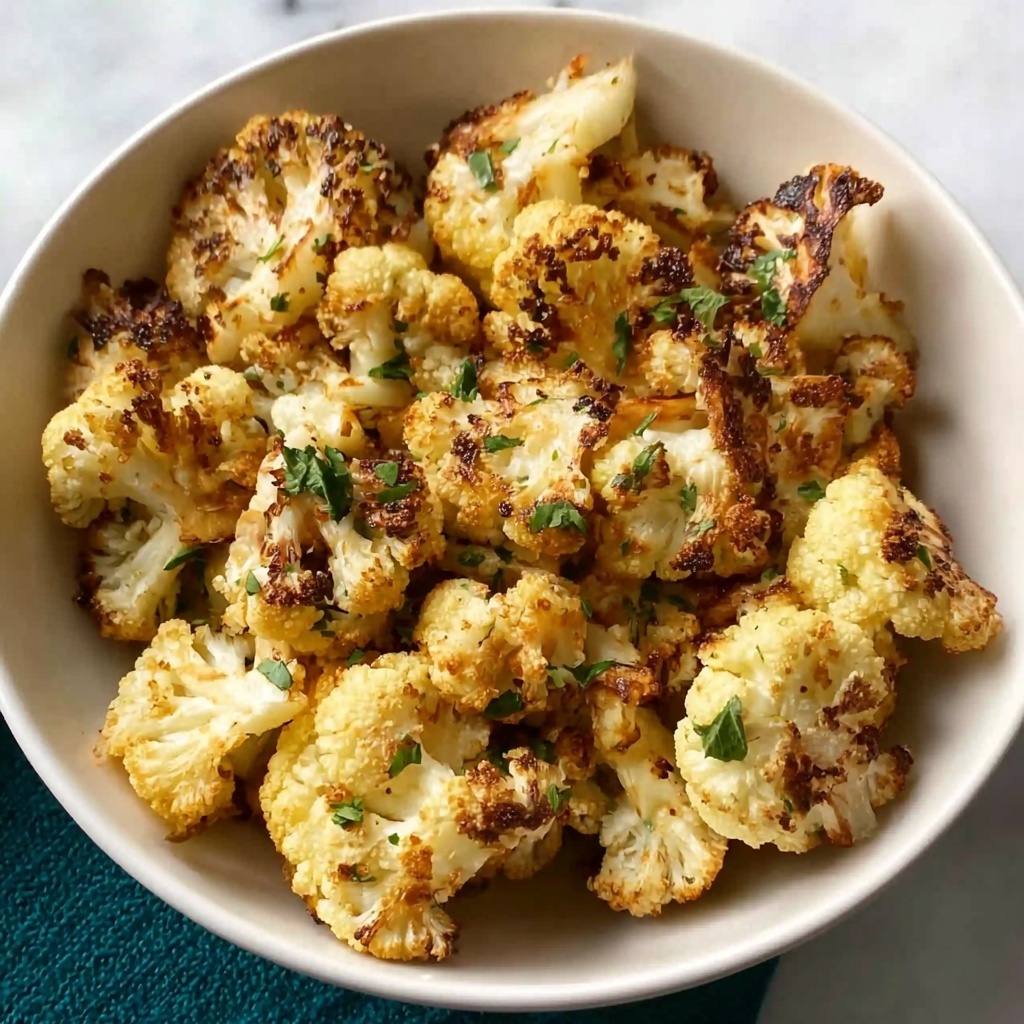
If you’re looking for a dish that combines irresistible crunch with vibrant flavors, then the Crispy Roasted Cauliflower with Garlic and Herbs Recipe is going to become your new best friend in the kitchen. This dish is a perfect celebration of simple ingredients coming together in a way that feels both comforting and sophisticated. With each bite, you’ll enjoy cauliflower florets that are tender on the inside but boast a wonderfully crispy, golden exterior, all enhanced by the aromatic garlic, fresh herbs, and a zesty hint of lemon. It’s truly one of those recipes that transforms humble vegetables into a show-stopper that everyone will ask for again and again.
Ingredients You’ll Need
Making this Crispy Roasted Cauliflower with Garlic and Herbs Recipe is all about using straightforward, wholesome ingredients that bring out the best in each other. Each component plays a role in creating those crispy edges, bold flavors, and bright, fresh notes that make this dish so special.
- 1 large head of cauliflower: The star ingredient, providing a mild and nutty base that crisps beautifully in the oven.
- 2 tablespoons olive oil: Helps the cauliflower roast to golden perfection while adding a smooth richness.
- 3 cloves garlic, minced: Infuses the cauliflower with that warm, fragrant punch that makes every bite deliciously savory.
- 1 teaspoon sea salt: Enhances all the natural flavors and balances the richness of the oil.
- 1/2 teaspoon freshly ground black pepper: Adds a gentle heat that complements the garlic and herbs.
- 1/2 teaspoon smoked paprika (optional): Introduces a subtle smoky depth for those wanting an extra layer of flavor.
- 1 tablespoon fresh lemon juice: Brightens the dish with a fresh, citrusy zing that cuts through the richness.
- 2 tablespoons chopped fresh parsley: Offers a fresh, green note to finish the dish with color and herbaceousness.
- Grated Parmesan or vegan Parmesan (optional): A savory topping that adds an indulgent, salty finish.
How to Make Crispy Roasted Cauliflower with Garlic and Herbs Recipe
Step 1: Preheat and Prepare Your Baking Sheet
Start by heating your oven to 425°F (220°C) and lining a large baking sheet with parchment paper. This step is key because a hot oven ensures the cauliflower crisps up nicely, and the parchment keeps everything from sticking while making clean-up a breeze.
Step 2: Toss Cauliflower with Seasonings
In a big bowl, combine the bite-sized cauliflower florets with olive oil, minced garlic, sea salt, black pepper, and smoked paprika if you’re using it. Toss everything well so each piece is coated in that fragrant, flavorful mixture. This essential step not only seasons the cauliflower but also helps develop those crispy edges you’ll love.
Step 3: Arrange Cauliflower in a Single Layer
Spread the cauliflower evenly across your baking sheet, making sure there’s enough space between pieces. Avoid overcrowding because it can cause the florets to steam rather than roast, which means you’ll miss out on that gorgeous crunch.
Step 4: Roast Until Golden and Crispy
Pop the baking sheet into the oven and roast for 25 to 30 minutes. Halfway through, flip the cauliflower to ensure it browns evenly on all sides. You’ll know it’s done when the florets are golden brown and crispy around the edges while still tender inside—that perfect balance everyone craves.
Step 5: Finish with Lemon, Parsley, and Parmesan
Once roasted, remove the cauliflower from the oven and immediately drizzle with fresh lemon juice. Then, sprinkle the chopped parsley and, if desired, a generous handful of grated Parmesan or its vegan alternative. This finishing touch adds brightness, color, and a savory richness that takes the dish to the next level.
How to Serve Crispy Roasted Cauliflower with Garlic and Herbs Recipe

Garnishes
To elevate your Crispy Roasted Cauliflower with Garlic and Herbs Recipe even further, consider adding a few creative garnishes. Toasted pine nuts or slivered almonds can introduce a delightful crunch, while a sprinkle of chili flakes offers a hint of heat. Fresh lemon zest adds a burst of aromatic freshness that complements the herbs beautifully.
Side Dishes
This dish shines on its own as a light main or pairs wonderfully with a range of sides. Serve alongside grilled chicken or fish for a well-rounded meal, or accompany it with quinoa or couscous to keep the menu vegetarian but hearty. A simple green salad with a lemon vinaigrette complements the roasted cauliflower’s flavors perfectly too.
Creative Ways to Present
Think beyond the plate to impress your guests. Arrange the roasted cauliflower on a rustic wooden board with small bowls of dipping sauces like tahini or yogurt-herb dressing. Or toss the roasted florets into a warm grain bowl topped with avocado and cherry tomatoes for a vibrant, healthful bowl meal.
Make Ahead and Storage
Storing Leftovers
Leftover Crispy Roasted Cauliflower with Garlic and Herbs Recipe can be stored in an airtight container in the fridge for up to 3 days. Keeping it chilled preserves the flavors well, although the crispiness may soften slightly.
Freezing
Freezing roasted cauliflower is possible but not recommended if you want to maintain that signature crisp texture. If needed, allow the cauliflower to cool completely, then freeze in a single layer on a baking sheet before transferring to a freezer-safe bag. Use within 1 month for best quality.
Reheating
To revive your leftovers, reheat in a preheated oven at 400°F (200°C) on a baking sheet for about 10 minutes. This method helps restore much of the original crispiness that microwaving simply cannot replicate.
FAQs
Can I use frozen cauliflower for this recipe?
While fresh cauliflower works best for roasting, you can use frozen. Just make sure to thaw and pat it dry thoroughly to avoid sogginess, which prevents crisping.
How do I make this dish vegan?
Simply skip the Parmesan or use a vegan alternative. Nutritional yeast sprinkled on top is a great substitute that provides a cheesy flavor without dairy.
Is smoked paprika necessary?
Smoked paprika adds a lovely depth of flavor but is optional. The dish is still delicious with just garlic, salt, and pepper if you prefer a milder taste.
Can I add other herbs besides parsley?
Absolutely! Fresh thyme, rosemary, or oregano work beautifully and bring their own unique notes to the dish. Feel free to experiment to find your favorite combination.
What is the best way to get cauliflower extra crispy?
Make sure your florets are thoroughly coated in oil and spaced out on the baking sheet, and roast in a hot oven. Flipping halfway through roasting also promotes even browning and maximum crispiness.
Final Thoughts
This Crispy Roasted Cauliflower with Garlic and Herbs Recipe is truly a kitchen gem that’s easy to whip up yet packed with flavor and texture that excite the palate. Whether you’re making it for a weeknight dinner, a casual gathering, or as a healthful snack, it never fails to delight. Give it a try, and I promise this simple, satisfying dish will soon earn a permanent spot in your regular rotation!
Print
Crispy Roasted Cauliflower with Garlic and Herbs Recipe
- Prep Time: 10 minutes
- Cook Time: 30 minutes
- Total Time: 40 minutes
- Yield: 4 servings
- Category: Side Dish
- Method: Roasting
- Cuisine: American
- Diet: Vegetarian
Description
This Crispy Roasted Cauliflower with Garlic and Herbs recipe features tender cauliflower florets roasted to golden perfection with olive oil, garlic, and aromatic herbs. Finished with fresh lemon juice and parsley, this dish offers a flavorful, healthy side or light main course that’s easy to prepare and perfect for any meal.
Ingredients
Vegetables
- 1 large head of cauliflower, cut into bite-sized florets
Seasonings & Oils
- 2 tablespoons olive oil
- 3 cloves garlic, minced
- 1 teaspoon sea salt
- 1/2 teaspoon freshly ground black pepper
- 1/2 teaspoon smoked paprika (optional)
Finishing Touches
- 1 tablespoon fresh lemon juice
- 2 tablespoons chopped fresh parsley
- Grated Parmesan or vegan Parmesan, for garnish (optional)
Instructions
- Preheat the oven: Preheat your oven to 425°F (220°C) and line a large baking sheet with parchment paper to prevent sticking and make cleanup easier.
- Toss the cauliflower: In a large bowl, combine the cauliflower florets with olive oil, minced garlic, sea salt, freshly ground black pepper, and smoked paprika if using. Toss well to ensure every floret is evenly coated with the seasoning mixture.
- Arrange on baking sheet: Spread the coated cauliflower in a single layer on the prepared baking sheet, making sure not to overcrowd the florets so they roast evenly and become crispy.
- Roast: Place the baking sheet in the oven and roast the cauliflower for 25 to 30 minutes. Flip the florets halfway through the cooking time to promote even browning and crispiness on all sides.
- Add lemon juice: Once the cauliflower is golden brown and crispy on the edges, remove it from the oven and immediately drizzle with fresh lemon juice to add brightness and enhance the flavors.
- Garnish and serve: Sprinkle the roasted cauliflower with chopped fresh parsley and grated Parmesan or vegan Parmesan if desired. Serve hot as a delicious side dish or a light main course.
Notes
- For extra crispiness, make sure to spread cauliflower florets in a single layer without overcrowding the baking sheet.
- Smoked paprika is optional but adds a nice smoky depth to the flavor.
- To keep it vegan, use vegan Parmesan or omit the cheese altogether.
- This dish pairs well with grilled meats, roasted chicken, or can be served as a healthy vegetarian meal with grains.
- Leftovers can be refrigerated and reheated in the oven to maintain crisp texture.


