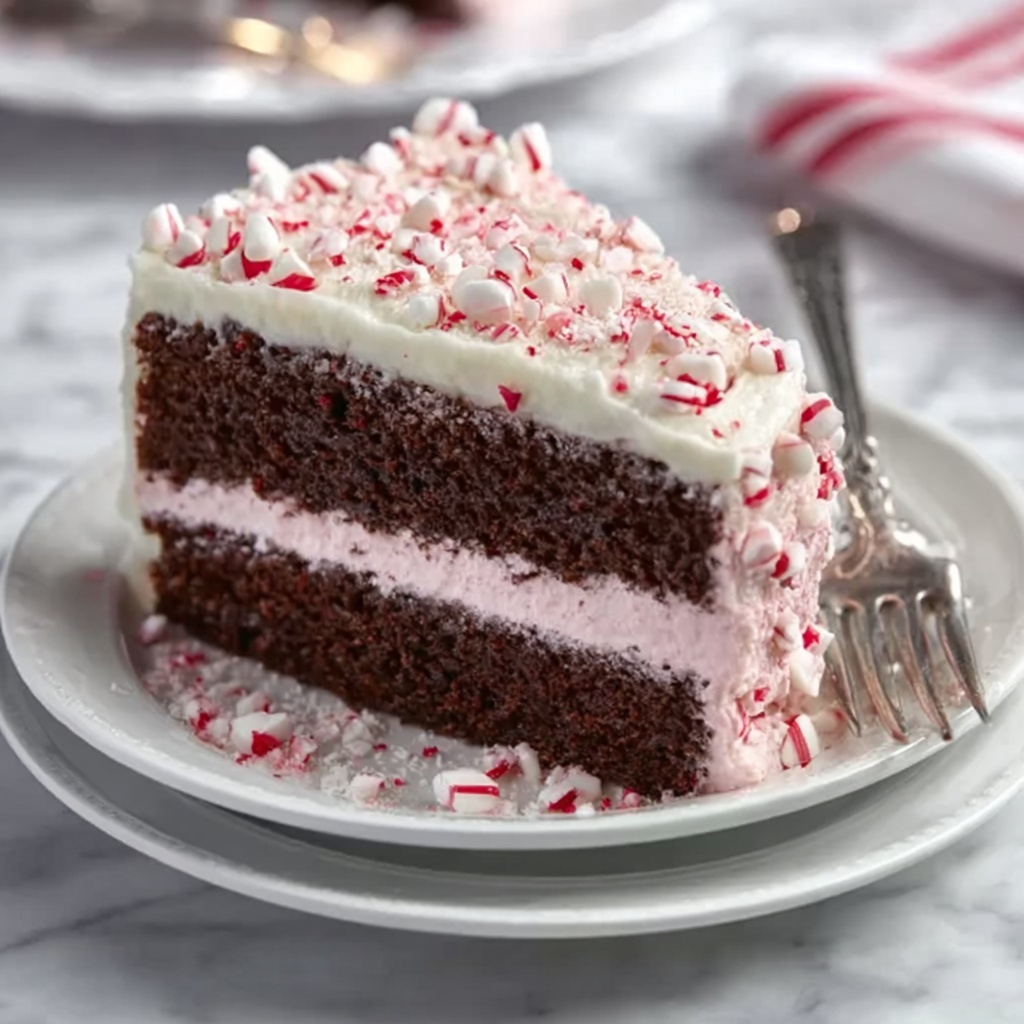
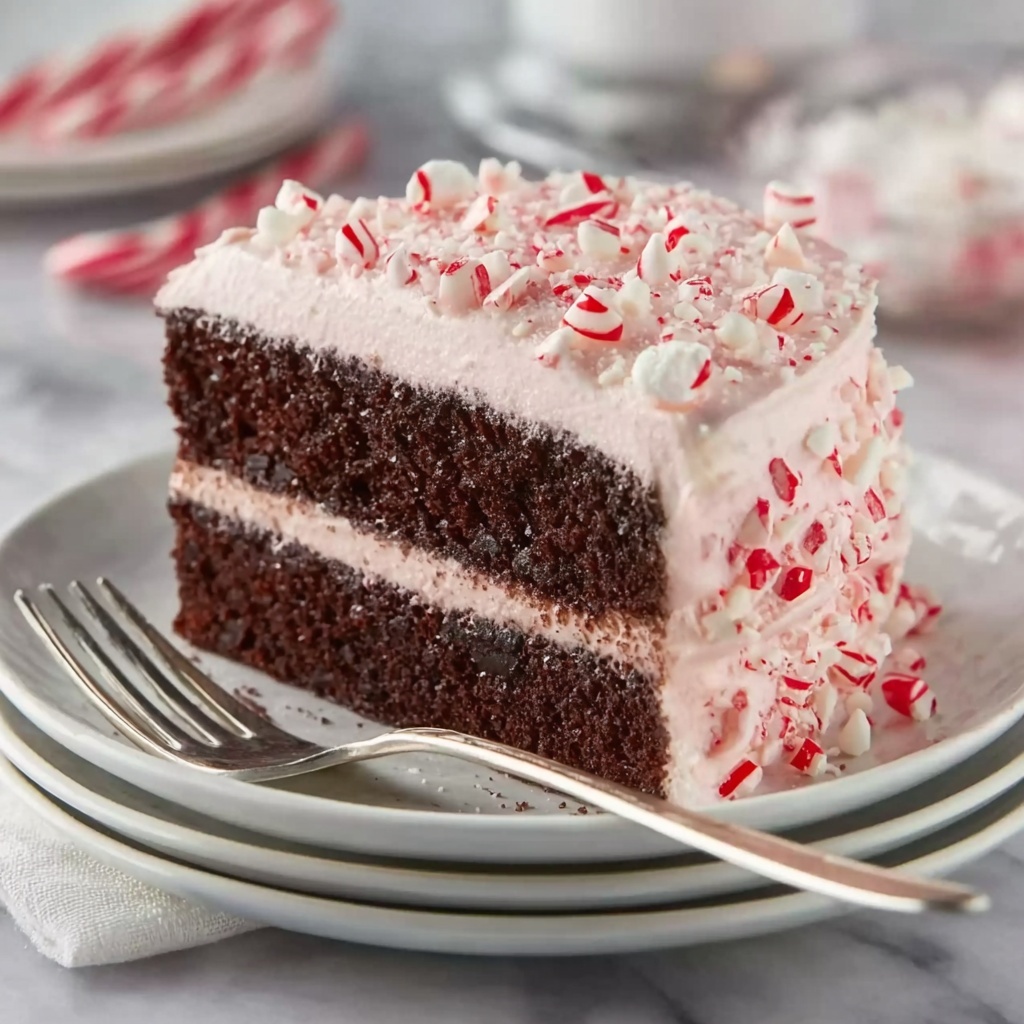
If you are looking to brighten up your holiday celebrations with something sweet, whimsical, and bursting with festive spirit, this delightful Festive Peppermint Cake Recipe is the perfect choice. Imagine layers of moist, fluffy cake infused with cooling peppermint, swirled with vibrant red tones for a cheerful marbled effect, all generously frosted with creamy peppermint icing and topped with crunchy crushed candy canes. This Festive Peppermint Cake Recipe captures the very essence of the season and quickly becomes a show-stopping centerpiece that everyone will love. Whether you’re baking for a family gathering or surprising friends, this cake will wrap your taste buds in holiday cheer and warmth.
Ingredients You’ll Need
The magic of this cake lies in its simple yet thoughtfully chosen ingredients. Each plays a crucial role in bringing out the perfect texture, flavor, and festive appearance of your cake. From buttery richness to seasonal peppermint freshness, these essentials come together seamlessly.
- 2 1/2 cups all-purpose flour: Provides a tender crumb that holds the cake’s structure beautifully.
- 2 1/2 teaspoons baking powder: Gives the cake its lovely rise and airy lightness.
- 1/2 teaspoon salt: Balances the sweetness and enhances the flavors.
- 1 cup unsalted butter, softened (plus 1 cup for frosting): Adds rich moisture and creaminess both in the cake and the frosting.
- 1 3/4 cups granulated sugar: Sweetens without overpowering and helps create a light texture.
- 4 large eggs, at room temperature: Bind ingredients together and add richness.
- 1 teaspoon vanilla extract: Adds warmth and depth to the flavor profile.
- 1 1/2 teaspoons peppermint extract: Brings out the refreshing, cooling notes that make this cake so special.
- 1 cup whole milk, at room temperature: Keeps the batter smooth and moist for tender slices.
- Red gel food coloring (optional): Creates a beautiful marbled visual that screams holiday joy.
- 4 cups powdered sugar: Essential for the smooth, fluffy, perfectly sweet frosting.
- 2-3 tablespoons milk for frosting: Adjusts the icing to the ideal consistency.
- Crushed candy canes (for topping): Adds festive crunch and a burst of peppermint flavor as a final touch.
How to Make Festive Peppermint Cake Recipe
Step 1: Prepare the Batter
Start by preheating your oven to 350°F (175°C) and preparing two 9-inch round cake pans by greasing and flouring them or lining them with parchment paper for easy removal. In a medium bowl, whisk together your dry ingredients: flour, baking powder, and salt. This ensures your cake will be evenly leavened and perfectly textured.
Step 2: Cream Butter and Sugar
In a large mixing bowl, beat the softened butter with granulated sugar until the mixture is light and fluffy, taking about 2 to 3 minutes. This step is essential for incorporating air, which helps your cake rise beautifully and develop a tender crumb.
Step 3: Add Eggs and Extracts
Next, add the eggs one at a time to maintain a smooth batter, beating well after each addition. Stir in the vanilla and peppermint extracts to infuse the entire cake with a cozy warmth and that unmistakably refreshing peppermint flavor.
Step 4: Combine Dry Ingredients and Milk
Alternate mixing the dry ingredients and milk into the batter, beginning and ending with the dry mix. This method ensures the batter remains smooth and well-incorporated without overmixing, keeping the cake moist and soft.
Step 5: Optional Marbled Effect
For a stunning appearance, divide your batter into two bowls. Add red gel food coloring to one half and gently swirl it into the plain batter after pouring into the prepared pans. This marbled effect adds a delightful holiday pop that’s as fun to look at as it is to eat.
Step 6: Bake the Cake
Pour or divide the batter evenly between the pans if not marbling, then bake for 28 to 32 minutes. You’ll know your cake is ready when a toothpick inserted into the center comes out clean or with just a few moist crumbs. Let the cakes cool in their pans for 10 minutes before transferring them to a wire rack to cool completely.
Step 7: Make the Peppermint Frosting
While the cake cools, prepare the frosting by beating the softened butter until creamy. Slowly incorporate powdered sugar, then add peppermint extract and milk, adjusting with milk as needed to reach a smooth, spreadable consistency that’s not too runny or stiff.
Step 8: Assemble and Decorate
Spread a generous layer of frosting on one cake layer, then top with the second layer and cover the entire cake with the remaining frosting. Finally, sprinkle crushed candy canes on top, giving your cake a festive crunch and an irresistible peppermint finish.
How to Serve Festive Peppermint Cake Recipe

Garnishes
Sprinkling crushed candy canes not only adds texture but elevates the peppermint experience. For an extra festive twist, consider adding small edible silver or red pearls. Fresh mint leaves or a light dusting of powdered sugar can also complement the cake beautifully.
Side Dishes
This cake pairs wonderfully with a scoop of vanilla bean ice cream or a simple drizzle of hot chocolate sauce. For those who want a beverage accompaniment, a peppermint mocha or a cup of rich, hot coffee can perfectly balance the sweet, minty flavors.
Creative Ways to Present
Try slicing your cake into thin layers and stacking it in clear dessert glasses for peppermint parfaits. You can also cut the cake into festive shapes using cookie cutters or serve as petite cupcakes with mini candy cane toppers for a party-ready presentation.
Make Ahead and Storage
Storing Leftovers
Keep your leftover cake fresh by storing it in an airtight container at room temperature for up to two days. The frosting will stay moist, and the peppermint flavor remains just as vibrant when properly covered.
Freezing
If you want to make your Festive Peppermint Cake Recipe ahead of time, wrap the frosted cake tightly in plastic wrap and aluminum foil, then freeze for up to three months. Thaw in the refrigerator overnight before serving to keep that fresh-baked texture and flavor.
Reheating
Because this is a cake best enjoyed chilled or at room temperature, reheating isn’t typically necessary. However, if you prefer a warmer slice, simply let the cake come to room temperature or gently warm individual slices in the microwave for 10-15 seconds, careful not to melt the frosting.
FAQs
Can I use different extracts if I don’t have peppermint extract?
Absolutely! While peppermint extract defines this recipe’s festive character, you can swap it for vanilla or almond extract for a different but delicious twist. Just remember it will change the signature mint flavor of the Festive Peppermint Cake Recipe.
Is it okay to make this cake without the marbled effect?
Yes! The marbling adds to the visual appeal, but the cake tastes wonderful even without it. You can keep the batter plain and still enjoy the moist texture and peppermint flavor that make this cake a holiday hit.
Can I substitute part of the all-purpose flour with whole wheat flour?
You can substitute up to half with whole wheat flour to add a nuttier flavor and extra fiber, but it may make the cake a bit denser. For the light, fluffy texture described in the Festive Peppermint Cake Recipe, all-purpose flour works best.
How do I prevent the crushed candy canes from getting soggy on the frosting?
To keep the candy canes crunchy longer, sprinkle them right before serving rather than too far in advance. The moisture from the frosting will soften them over time, so timing is key for that satisfying crunch at the party.
Can I make this cake gluten-free?
Yes! Use a 1-to-1 gluten-free baking flour blend that includes xanthan gum for structure. The baking time and texture might vary slightly, but the peppermint flavor and festive look will shine just as brightly in this Festive Peppermint Cake Recipe.
Final Thoughts
Baking and sharing this Festive Peppermint Cake Recipe is like giving a gift of joy and tradition wrapped in delicious form. Its vibrant flavor, charming colors, and refreshing peppermint essence make it a holiday classic worth adding to your seasonal repertoire. So why wait? Grab your ingredients, preheat that oven, and create a cake that will fill your kitchen with warmth, laughter, and unforgettable festive vibes.
Print
Festive Peppermint Cake Recipe
- Prep Time: 15 minutes
- Cook Time: 30 minutes
- Total Time: 45 minutes
- Yield: 12 servings
- Category: Dessert
- Method: Baking
- Cuisine: American
Description
This Festive Peppermint Cake is a delightful holiday dessert featuring a moist, fluffy cake infused with refreshing peppermint flavor. The cake layers can be optionally marbled with red gel food coloring for a festive look, and it is topped with a smooth peppermint buttercream frosting garnished with crushed candy canes. Perfect for Christmas celebrations and peppermint lovers!
Ingredients
Cake Batter
- 2 1/2 cups all-purpose flour
- 2 1/2 teaspoons baking powder
- 1/2 teaspoon salt
- 1 cup unsalted butter, softened
- 1 3/4 cups granulated sugar
- 4 large eggs, at room temperature
- 1 teaspoon vanilla extract
- 1 1/2 teaspoons peppermint extract
- 1 cup whole milk, at room temperature
- Red gel food coloring (optional, for marbled effect)
Frosting
- 1 cup unsalted butter, softened
- 4 cups powdered sugar
- 2–3 tablespoons milk
- 1 teaspoon peppermint extract
- Crushed candy canes (for topping)
Instructions
- Prepare the Cake Batter: Preheat your oven to 350°F (175°C). Grease and flour two 9-inch round cake pans or line them with parchment paper to prevent sticking.
- Mix Dry Ingredients: In a medium bowl, whisk together the all-purpose flour, baking powder, and salt until well combined.
- Cream Butter and Sugar: In a large mixing bowl, beat the softened butter and granulated sugar using an electric mixer for 2-3 minutes until the mixture is light, fluffy, and creamy.
- Add Eggs and Extracts: Add the eggs one at a time into the butter and sugar mixture, beating well after each addition. Then stir in the vanilla and peppermint extracts for fragrance and flavor.
- Combine Dry and Wet Ingredients: Alternately add the dry ingredient mix and milk to the wet ingredients, beginning and ending with the dry ingredients. Mix until the batter is smooth and homogenous.
- Optional Marbled Effect: If desired, divide the batter in half. Add red gel food coloring to one half and mix well. Pour both batters into the prepared pans, swirling the red batter into the plain batter to create a festive marbled look.
- Bake the Cake: Evenly divide the batter between the two cake pans. Bake in the preheated oven for 28-32 minutes, or until a toothpick inserted into the center comes out clean.
- Cool the Cakes: Let the cakes cool in the pans for 10 minutes. Then remove them from the pans and transfer to a wire rack to cool completely before frosting.
- Prepare the Frosting: Beat the softened butter until creamy. Gradually add powdered sugar, beating continuously. Mix in peppermint extract and milk, adjusting milk quantity to reach your desired frosting consistency.
- Assemble and Decorate: Spread a layer of frosting on one cake layer. Place the second cake layer on top, then frost the entire cake evenly. Finish by sprinkling crushed candy canes over the top for a festive and crunchy garnish.
Notes
- You can omit the red food coloring if you prefer a simple white peppermint cake.
- Ensure all ingredients like eggs and milk are at room temperature for best cake texture.
- The cake can be stored covered at room temperature for 2 days or refrigerated for up to 5 days.
- Use crushed candy canes of varying sizes for extra texture and decoration appeal.
- For a dairy-free option, substitute butter and milk with plant-based alternatives.


