
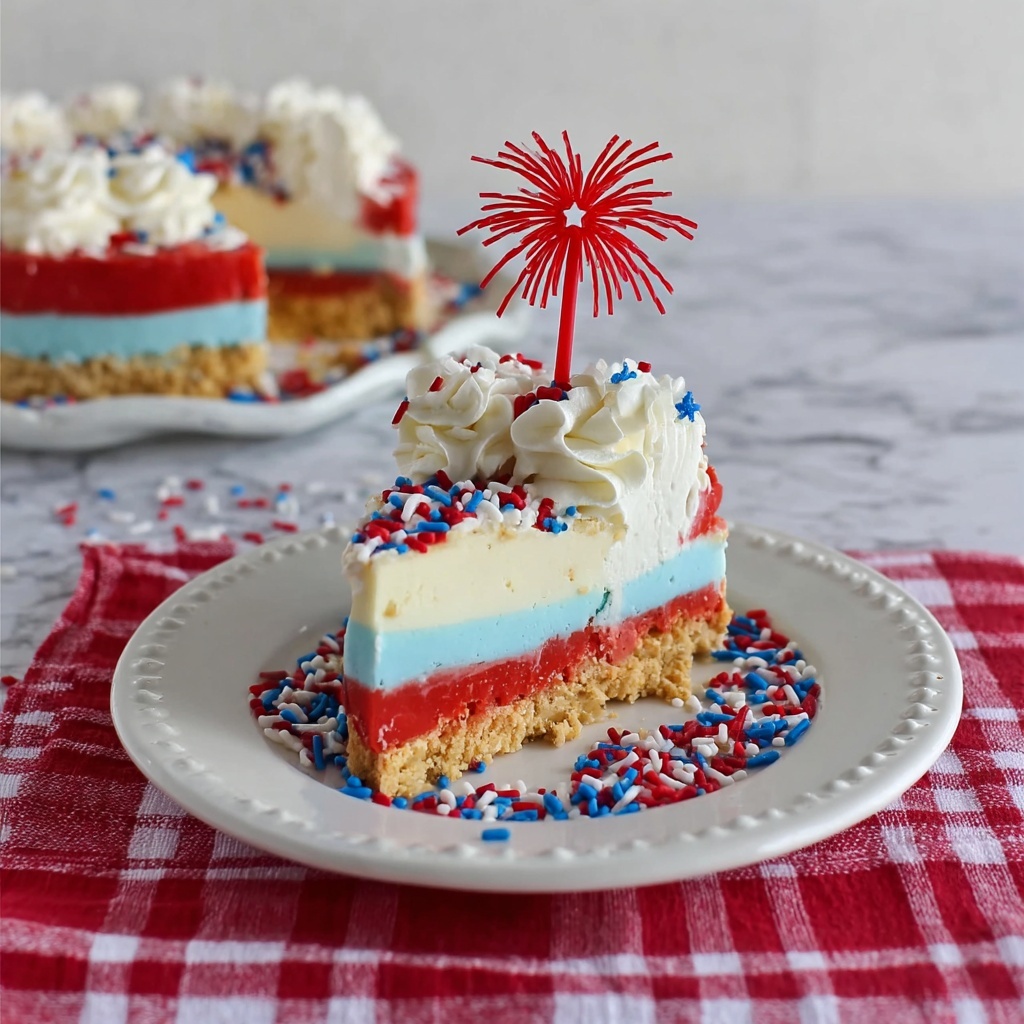
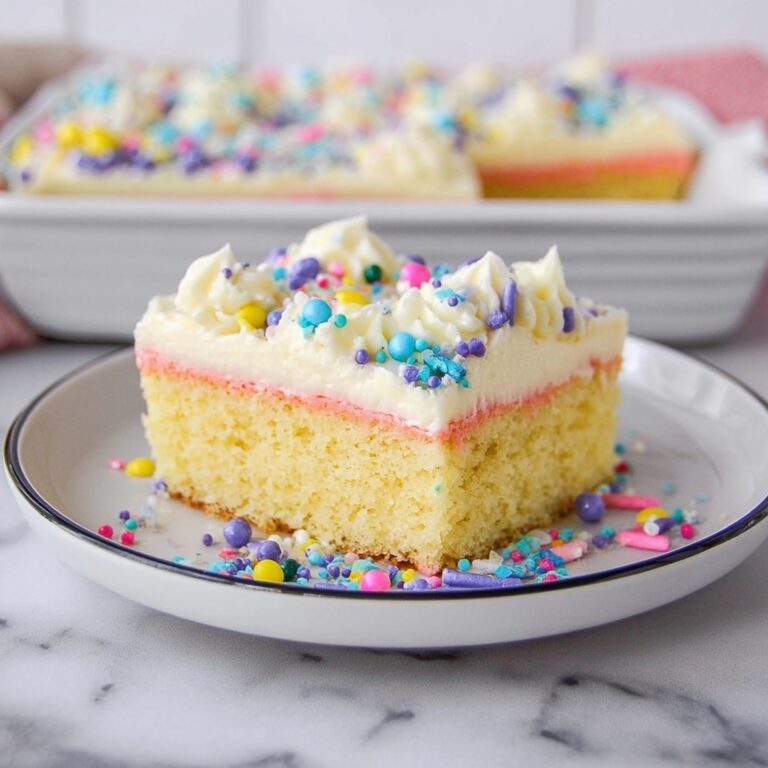
If you’re looking to wow your friends and family this summer, the Fourth of July No-Bake Cheesecake Recipe is your secret weapon. This vibrant and festive dessert combines the creamy richness of classic no-bake cheesecake with patriotic layers of red, white, and blue that’ll make your celebration sparkle. It’s simple enough for any home cook but impressive enough to be the centerpiece of your holiday table. Trust me, once you try this recipe, it’ll become a beloved tradition you look forward to each year.
Ingredients You’ll Need
Every ingredient in this Fourth of July No-Bake Cheesecake Recipe plays a crucial role in delivering that perfect balance of flavor, color, and texture. Whether it’s the buttery graham cracker crust or the bright Kool-Aid layers, each component brings something special to the dessert.
- Graham Cracker Crumbs: Provides a crunchy, buttery base that holds all the goodness together.
- Sugar: Essential for sweetness in both the crust and creamy layers; be sure to use the right amount for balance.
- Butter (melted): Binds the graham cracker crumbs, creating a sturdy crust that’s rich and flavorful.
- Heavy Cream (whipped): Adds airiness and a light texture to the cheesecake layers.
- Vanilla Extract: Elevates the taste of the cream cheese and adds a warm, comforting note.
- Cream Cheese (softened): The star of the show, delivering that smooth and tangy cheesecake flavor.
- Torani Vanilla Syrup: Enhances the white cheesecake layer with extra vanilla goodness.
- Wilton Red and Blue Food Coloring Gel: Gives the cheesecake its striking patriotic colors without overpowering the flavor.
- Cherry Kool-Aid Packet: Infuses the red layer with a sweet-tart cherry flavor and vivid color.
- Blue Raspberry Lemonade Kool-Aid Packet: Adds that zesty blue layer with a hint of citrus punch.
- Powdered Sugar: Used in the frosting to create a smooth, sweet finish perfect for decorating.
How to Make Fourth of July No-Bake Cheesecake Recipe
Step 1: Create the Perfect Crust
Start by melting butter and mixing it with graham cracker crumbs and sugar to form a deliciously rich base. Press this mixture firmly into the bottom of a springform pan lined with parchment paper. This step is crucial because a well-packed crust ensures every bite holds together beautifully and provides the perfect contrast to the creamy filling. Once pressed, pop the pan in the freezer so the crust can become solid and ready for the layers.
Step 2: Whip Up the Creamy Filling
Next, whip the heavy cream, sugar, and vanilla until you have stiff peaks that hold their shape with pride. Whipping this mixture adds lightness to the cheesecake layers so they won’t feel dense or heavy. Then blend in the softened cream cheese and sugar until the texture is smooth, fluffy, and utterly irresistible. This base mixture is where magic starts to happen!
Step 3: Divide and Color Your Cheesecake Batter
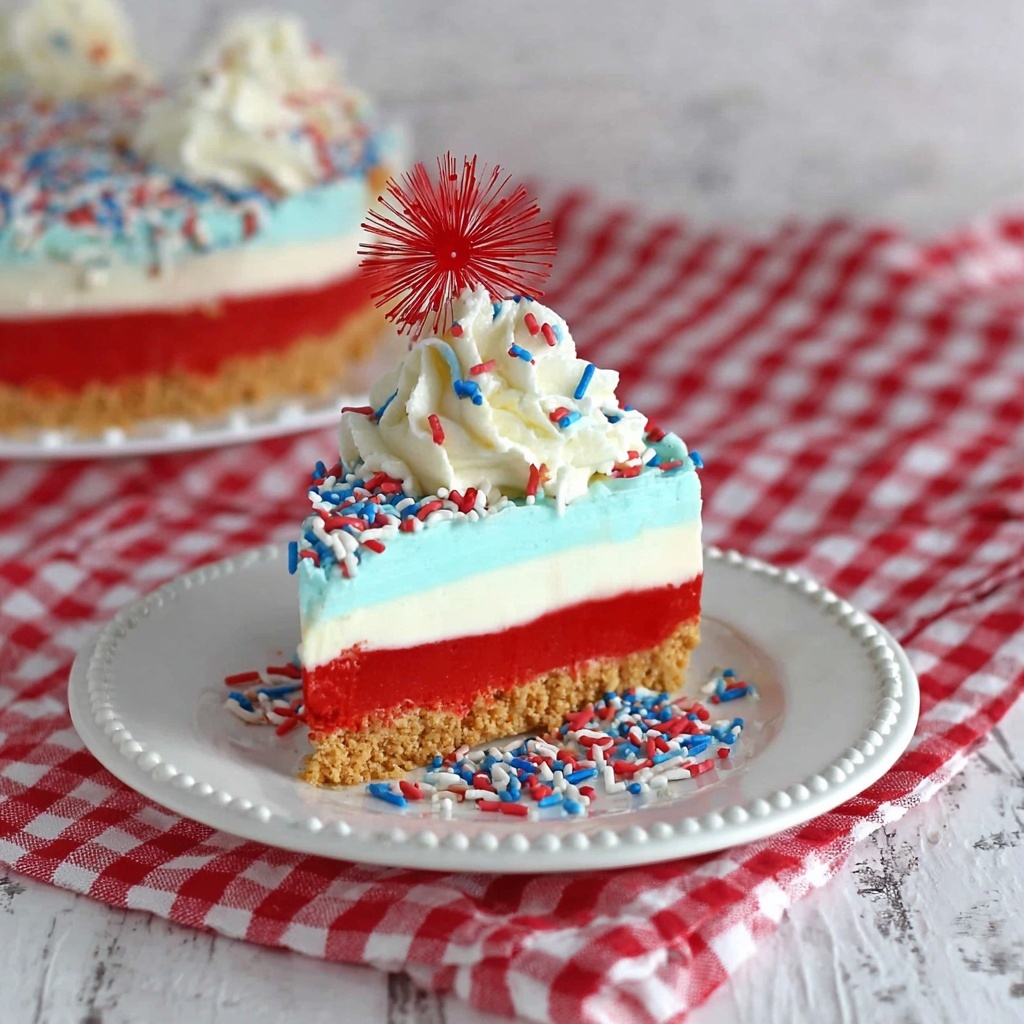
Split the fluffy cheesecake batter into three bowls, because now it’s time to add flavor and color. Stir cherry Kool-Aid powder and red food coloring into one bowl for a bright, fruity red layer. The second bowl stays classic, with vanilla syrup added to keep it pure and creamy white. The third bowl gets blue raspberry lemonade Kool-Aid alongside blue food coloring for that refreshing, zingy blue layer. These colors and flavors create the iconic Fourth of July trio in every slice.
Step 4: Layer the Cheesecake and Chill
Pour the red cheesecake batter over the firm crust and freeze until it’s set. Then layer on the white cheesecake mixture, allowing it to chill and solidify before topping with the blue mixture. This patient layering ensures clean, vibrant stripes that look as stunning as they taste. For best results, freeze overnight so the cheesecake can firm up completely. This slow set is the key to neat slices that show off each patriotic layer perfectly.
Step 5: Prepare and Add the Frosting
Before serving, make a luscious frosting by combining softened cream cheese, butter, vanilla, heavy cream, and powdered sugar. This frosting adds a sweet, creamy finish that balances the tang of the cheesecake layers. Use it to decorate the top—think stars, stripes, or simple swirls to keep your patriotic theme shining through. It’s the final touch that will wow your guests every time.
How to Serve Fourth of July No-Bake Cheesecake Recipe
Garnishes
Garnishing your Fourth of July No-Bake Cheesecake Recipe is the perfect way to add extra festivity and flavor. Fresh berries like strawberries, blueberries, and raspberries not only complement the colors but add juicy bursts of sweetness. A sprinkle of edible glitter or star-shaped sprinkles can also make your cheesecake look like a true celebration centerpiece.
Side Dishes
This cheesecake pairs beautifully with light, refreshing sides such as chilled fruit salads or a scoop of vanilla ice cream. Since the cheesecake is rich and creamy, balancing it with fresh fruits or a citrus sorbet brings brightness and contrast to your dessert course. It’s a simple way to keep the whole meal feeling light and perfectly summery.
Creative Ways to Present
Consider serving this cheesecake in individual mini springform pans for cute patriotic personal portions, or slice it into neat bars for easy serving at a casual backyard BBQ. You could also plate slices with a drizzle of berry coulis or a dollop of whipped cream for an elegant touch. Presentation is everything, and with this recipe, you have plenty of room to get creative!
Make Ahead and Storage
Storing Leftovers
If you happen to have any leftovers, store them in an airtight container in the refrigerator. The cheesecake will keep well for up to 4 days, allowing you to enjoy this delicious treat well beyond the holiday. Just be sure to cover the cheesecake tightly so it doesn’t absorb any fridge odors.
Freezing
The Fourth of July No-Bake Cheesecake Recipe freezes wonderfully, making it a great option for prepping ahead. Wrap it securely in plastic wrap and foil to prevent freezer burn, then freeze for up to 2 months. When you’re ready to indulge again, thaw the cheesecake in the fridge overnight for the best texture and flavor.
Reheating
This cheesecake is best served chilled, so reheating is not necessary or recommended. Just allow frozen cheesecake to thaw slowly in the refrigerator to maintain its creamy texture and avoid any watery layers. Serving it cold enhances the flavors and keeps its perfect, cool consistency.
FAQs
Can I make this cheesecake dairy-free?
While this recipe relies on cream cheese and heavy cream for its signature texture and flavor, you could experiment using dairy-free cream cheese and coconut cream. However, the taste and consistency might differ from the classic version.
Do I have to use Kool-Aid for coloring and flavor?
Kool-Aid adds both vibrant color and a fun fruity twist, but you can substitute with natural fruit purees or food coloring if you prefer. Just keep in mind that the fruity punch Kool-Aid provides is part of what makes this recipe unique.
Can I make this in a larger pan?
Absolutely! If you want to feed more guests, just double the ingredients and use a larger springform pan. Keep the same layering method and allow extra chilling time to ensure each layer sets properly.
Is this recipe kid-friendly?
Yes, it is! The bright colors and delicious flavors make it a hit with kids, and since it’s no-bake, it’s safer and easier for families to make together. Just make sure to supervise during melting the butter and pressing the crust.
How far ahead can I prepare this cheesecake?
You can prepare this cheesecake up to two days in advance. Just store it in the freezer until the day of your event, then thaw it overnight in the refrigerator for a stress-free celebration.
Final Thoughts
This Fourth of July No-Bake Cheesecake Recipe is a must-try for anyone wanting to add a splash of fun and flavor to their holiday spread. It’s festive, flavorful, and surprisingly simple to pull together, making it perfect for both first-time cheesecake makers and seasoned bakers alike. So grab your mixer, gather your ingredients, and get ready to serve up a dessert that’s as delightful as the fireworks in the sky!
Print
Fourth of July No-Bake Cheesecake Recipe
- Prep Time: 30 minutes
- Cook Time: 0 minutes
- Total Time: 12 hours (including freezing time)
- Yield: 10 servings
- Category: Dessert
- Method: No-Cook
- Cuisine: American
Description
Celebrate Independence Day with this festive 4th of July No-Bake Cheesecake featuring patriotic layers of red, white, and blue. This easy-to-make dessert combines a buttery graham cracker crust with creamy, colorful cheesecake layers flavored with cherry and blue raspberry Kool-Aid for a fun and flavorful twist. Perfect for summer parties and gatherings, this cheesecake requires no oven and sets beautifully in the freezer.
Ingredients
Crust
- 1 1/2 cups Graham Cracker Crumbs
- 2 Tablespoons Sugar
- 6 Tablespoons Butter (melted)
Cheesecake Layers
- 32 ounces Cream Cheese (softened)
- 1 1/2 cups Sugar
- 1 cup Heavy Cream (whipped)
- 2 Tablespoons Sugar (for whipping cream)
- 1 Teaspoon Vanilla Extract
- 2 Tablespoons Torani Vanilla Syrup
- 1 package Cherry Kool-Aid
- 1 package Blue Raspberry Lemonade Kool-Aid
- Wilton Red Food Coloring Gel (several drops)
- Wilton Blue Food Coloring Gel (several drops)
Frosting
- 4 ounces Cream Cheese
- 4 Tablespoons Butter
- 1/4 teaspoon Vanilla Extract
- 1 Tablespoon Heavy Cream
- 3 to 4 cups Powdered Sugar
Instructions
- Prepare the Crust: In a medium bowl, melt the butter in the microwave. Add the graham cracker crumbs and 2 tablespoons of sugar to the melted butter, mixing until the crumbs are well coated. Line the bottom of a 6-inch springform pan with parchment paper and press the crumb mixture evenly into the bottom. Smooth with a spoon and place the pan in the freezer to set.
- Whip the Cream: Using a stand mixer with the whisk attachment, whip 1 cup heavy cream, 2 tablespoons sugar, and 1 teaspoon vanilla extract until stiff peaks form. Set aside.
- Make Cheesecake Batter: In the mixer bowl, blend the softened cream cheese and 1 1/2 cups sugar until smooth and fluffy. Gently fold the whipped cream into the cream cheese mixture until well combined. Divide the cheesecake batter evenly into three separate bowls.
- Prepare Red Layer: To one bowl, add the cherry Kool-Aid packet and a few drops of Wilton red food coloring gel. Stir well to combine.
- Assemble Red Layer: Pour the red cheesecake batter over the chilled crust in the springform pan. Place the pan back in the freezer until the red layer is firm, approximately 2 hours.
- Prepare White Layer: To the second bowl, add 2 tablespoons Torani vanilla syrup and stir well. Place this bowl in the refrigerator to keep cool.
- Prepare Blue Layer: In the third bowl, add the blue raspberry lemonade Kool-Aid packet and 2 heaping tablespoons sugar. Stir to blend, then add several drops of Wilton blue food coloring gel and mix well. Refrigerate the blue batter.
- Assemble White Layer: Once the red layer is firm, pour the white cheesecake batter over it. Freeze again until the white layer is set to the touch, about 2 to 3 hours.
- Assemble Blue Layer: After the white layer firms, remove the blue cheesecake batter from the refrigerator and pour it on top of the white layer. Return the cheesecake to the freezer and chill overnight for best results.
- Make Frosting: Before serving, prepare the frosting by beating together 4 ounces cream cheese, 4 tablespoons butter, 1/4 teaspoon vanilla extract, and 1 tablespoon heavy cream until smooth. Gradually add 3 to 4 cups powdered sugar, beating until fluffy. Use this frosting to decorate the cheesecake as desired.
Notes
- Use a 6-inch springform pan for best results as it holds the layers well and makes removal easier.
- Ensure the cream cheese is softened to room temperature for smooth blending.
- The cheesecake layers need adequate freezing time to set properly between pours; rushing this can cause layers to mix.
- The powdered sugar amount for frosting can be adjusted to achieve desired consistency.
- For vibrant colors, use gel food coloring as liquid colors might dilute the cheesecake batter.
- Make sure to line the pan with parchment paper to prevent sticking and ease removal.


