Description
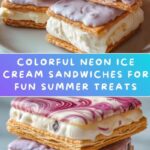
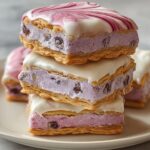
Glow Swirl Ice Cream Sandwiches are a fun and vibrant treat combining colorful, soft cookies with neon-hued ice cream swirls. Perfect for parties, these sandwiches are visually stunning under UV light and offer a delightful mix of creamy and chewy textures.
Ingredients
Scale
Cookies
- 1 1/2 cups all-purpose flour
- 1 teaspoon baking soda
- 1/2 teaspoon salt
- 1/2 cup unsalted butter, softened
- 1 cup granulated sugar
- 1 large egg
- 1 teaspoon vanilla extract
- 1 tablespoon milk (optional, for extra softness)
- Neon food coloring (red, blue, green, or your choice of colors)
Ice Cream
- 4 cups vanilla ice cream (or any ice cream of your choice, softened)
- Neon food coloring (same colors as the cookies or any desired shades)
- 1 tablespoon powdered sugar (optional, for stabilization)
Instructions
- Prepare the Cookie Dough: Preheat your oven to 350°F (175°C). Line a baking sheet with parchment paper.
- Mix Dry Ingredients: In a medium bowl, whisk together the flour, baking soda, and salt until evenly combined.
- Cream Butter and Sugar: In a separate large bowl, cream the softened butter and granulated sugar together until light and fluffy, which takes about 2-3 minutes.
- Add Egg and Vanilla: Beat in the egg and vanilla extract until the mixture is smooth and well incorporated.
- Combine Dough: Gradually add the dry ingredients to the wet mixture, mixing just until combined to keep the dough tender.
- Adjust Dough Softness: If the dough is too thick or stiff, add a tablespoon of milk to soften it slightly, ensuring easier color mixing.
- Divide and Color Dough: Divide the dough into 3-4 portions depending on your desired number of colors. Add a few drops of neon food coloring to each portion and knead it in until the color is evenly distributed, using gloves or covering your hands to avoid staining.
- Assemble Color Dough Balls: Roll small balls of each colored dough and place them together on the prepared baking sheet, ensuring the colors touch but do not blend.
- Form Cookies: Gently press the dough balls together and flatten slightly with your palm to create multi-colored dough mounds shaped like cookies.
- Bake Cookies: Bake in the preheated oven for 8-10 minutes, or until the edges turn lightly golden. Take care not to overbake, as the cookies should remain soft.
- Cool Cookies: Remove from oven and allow the cookies to cool completely on a wire rack before assembling the sandwiches.
- Prepare Neon Ice Cream: In a bowl, divide softened vanilla ice cream into separate smaller bowls, one for each color you want to create.
- Color Ice Cream: Add neon food coloring drops to each bowl of ice cream and stir well to reach your desired bright shades. Mix colors if you want a fun swirl effect.
- Stabilize Ice Cream (Optional): To help prevent melting, stir in a tablespoon of powdered sugar into the colored ice cream.
- Assemble Ice Cream Sandwiches: Place a generous scoop of neon-colored ice cream on the flat side of one cooled cookie.
- Sandwich the Ice Cream: Place a second cookie on top and press gently to seal the ice cream between the cookies.
- Repeat: Continue assembling all sandwiches in the same manner.
- Freeze Sandwiches: Place the sandwiches on a baking sheet lined with parchment paper and freeze for at least 1-2 hours to allow the ice cream to firm up properly.
- Serve: Once chilled and firm, serve the Glow Swirl Ice Cream Sandwiches. They look especially vibrant under UV light, making them ideal for glow-in-the-dark or neon-themed events!
Notes
- Use gloves when working with neon food coloring to avoid staining your hands.
- Be careful not to overbake cookies to maintain their softness for the sandwich.
- For best results, let the ice cream soften slightly before coloring and assembling.
- The powdered sugar helps stabilize the ice cream, extending the time before melting.
- These sandwiches are perfect for themed parties due to their bright, glowing appearance under UV light.