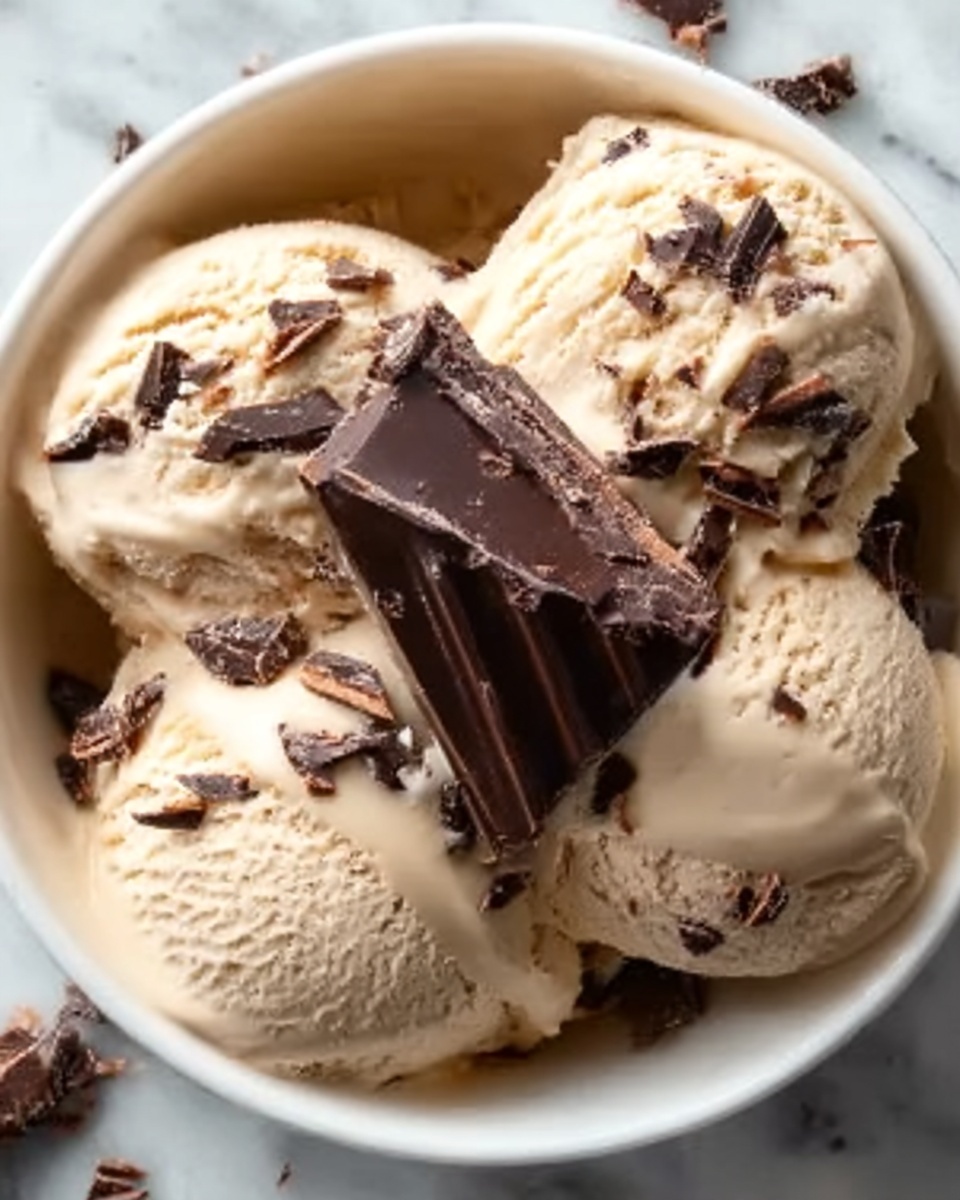
If you’ve been dreaming of the perfect cool treat that combines creamy richness with a decadent chocolate coating, you’re in for a real delight with this Homemade Chocolate Ice Cream Bars Recipe. These bars are not only luscious and creamy inside, but the crisp chocolate shell creates an irresistible contrast in texture. Combining simple ingredients with straightforward steps, this recipe brings an ice cream parlor favorite right into your own kitchen, making every bite a moment of pure joy.
Ingredients You’ll Need
The beauty of this recipe lies in its simplicity. Each ingredient plays a special role—from the heavy cream’s richness to the sweetened condensed milk’s creamy sweetness, and finally to the chocolate’s perfect snap. These essential components come together effortlessly to create a treat that feels both indulgent and homemade.
- Heavy cream (2 cups): Provides the lush, creamy texture that is the backbone of the ice cream bars.
- Sweetened condensed milk (1 cup): Adds the perfect amount of sweetness and smoothness without needing an ice cream machine.
- Vanilla extract (1 teaspoon, optional): Enhances the flavor complexity with a warm, aromatic hint.
- Dark or milk chocolate (300g): Your choice here—dark for a rich, slightly bitter contrast or milk for a creamier, sweeter shell.
- Coconut oil (2 tablespoons): Ensures the chocolate coating melts smoothly and hardens with a glossy finish.
- Chopped nuts (optional): For added crunch and an inviting textural contrast.
- Caramel sauce (optional): Drizzled over the bars for an extra layer of decadence.
- Crushed cookies (optional): Sprinkle on top for a delightful crunch and flavor boost.
- Sea salt (optional): Balances the sweetness with a subtle, savory note.
How to Make Homemade Chocolate Ice Cream Bars Recipe
Step 1: Make the Ice Cream Base
Start by pouring the heavy cream into a large bowl and whisk it until soft peaks form—this gives your ice cream bars a light and airy texture. Then, gently fold in the sweetened condensed milk and vanilla extract, mixing until just combined. This no-churn base ensures the perfect creamy consistency and sweet flavor that melts in your mouth.
Step 2: Freeze the Ice Cream
Pour the mixture into ice cream molds or a small loaf pan, then insert popsicle sticks for easy handling. Pop them into the freezer for at least 4 to 6 hours so the base sets completely firm and ready for dipping. This step is key to getting that perfect firm center that contrasts beautifully with the chocolate shell.
Step 3: Prepare the Chocolate Shell
While the ice cream sets, melt the dark or milk chocolate along with the coconut oil in a heatproof bowl over simmering water. Stir until smooth and glossy—your chocolate shell’s crispness depends on this silky finish. Let it cool just slightly so it’s still liquid but not too hot to melt the frozen bars on contact.
Step 4: Dip and Decorate
Remove your frozen ice cream bars from molds and dip each one swiftly into the melted chocolate, making sure to coat them entirely. For extra flair, drizzle caramel sauce or sprinkle chopped nuts, crushed cookies, or sea salt onto the wet chocolate before it hardens. This step ensures every bite surprises you with texture and flavor complexity.
Step 5: Final Freeze and Serve
After dipping and decorating, place the bars back in the freezer for a few more minutes to let the chocolate shell set and harden completely. Once ready, your delightful Homemade Chocolate Ice Cream Bars Recipe is ready to enjoy any time you crave a cool, chocolatey indulgence.
How to Serve Homemade Chocolate Ice Cream Bars Recipe

Garnishes
Enhance your ice cream bars with simple and elegant garnishes like a sprinkle of flaky sea salt to highlight the chocolate’s sweetness or a dusting of cocoa powder to deepen the chocolatey aroma. Fresh mint leaves can add a lovely pop of color and freshness, making your presentation both beautiful and appetizing.
Side Dishes
Pair these ice cream bars with fresh fruit such as strawberries, raspberries, or sliced bananas to balance the richness with natural sweetness and tartness. A small bowl of whipped cream or a scoop of vanilla ice cream alongside creates a wonderful contrast in temperature and texture for an extra special dessert experience.
Creative Ways to Present
For a party or fun gathering, serve your Homemade Chocolate Ice Cream Bars Recipe on a platter dusted with crushed cookies or toasted nuts. You can also create an interactive dessert bar where guests dip their own ice cream bars into various toppings like sprinkles, crushed candy, or chopped nuts, turning dessert into a delightful activity.
Make Ahead and Storage
Storing Leftovers
If you happen to have leftovers, wrap each ice cream bar tightly in parchment or wax paper and place them in an airtight container. Stored this way, they’ll keep their texture and prevent any freezer odors from sneaking in, ready for a quick treat whenever you want.
Freezing
This recipe is perfect for making in advance. Once the bars are dipped and fully set, place them in a single layer on a tray in the freezer until solid, then transfer to an airtight container to freeze for up to two weeks. This way, you always have ready-to-enjoy snacks on hand for hot days or unexpected guests.
Reheating
Since these are frozen treats, reheating is not recommended. However, if your ice cream bars get too hard in the freezer, simply let them sit at room temperature for 5 to 10 minutes before enjoying to soften slightly but still keep the perfect balance between creamy inside and crisp outside.
FAQs
Can I use a different type of milk instead of sweetened condensed milk?
Sweetened condensed milk is key for sweetness and creamy texture without churning, so substituting it may affect the creaminess and sweetness balance. However, you can experiment with evaporated milk mixed with sugar but results might vary.
Do I need special molds for making these ice cream bars?
Not necessarily! While ice cream molds make shaping easy and neat, you can use a small loaf pan and insert popsicle sticks once your base is semi-frozen, or even mold them by hand using parchment paper.
What if I don’t like coconut oil in the chocolate shell?
While coconut oil helps achieve a smooth, glossy coating that hardens nicely, you can reduce the quantity or substitute with vegetable shortening or cocoa butter. Just be mindful it may alter the texture slightly.
Can I add other flavors to the ice cream base?
Absolutely! Vanilla extract is optional, so feel free to infuse the base with espresso powder, mint extract, or even a splash of your favorite liqueur for a fun twist on the classic Homemade Chocolate Ice Cream Bars Recipe.
How long do these ice cream bars last in the freezer?
Properly wrapped and stored in an airtight container, your ice cream bars will stay delicious for up to two weeks. Beyond that, the texture and flavor might start to degrade, so it’s best to enjoy them sooner.
Final Thoughts
There’s something incredibly satisfying about creating these luscious, crunchy, homemade treats with your own hands. This Homemade Chocolate Ice Cream Bars Recipe is straightforward enough for a weekday indulgence yet impressive enough for parties and celebrations. I encourage you to try it, experiment with your favorite chocolate and toppings, and discover just how rewarding homemade frozen desserts can be. Once you do, I’m confident these bars will become a beloved staple in your kitchen and your heart!
Print
Homemade Chocolate Ice Cream Bars Recipe
- Prep Time: 15 minutes
- Cook Time: 0 minutes
- Total Time: 4 hours 15 minutes
- Yield: 6 servings
- Category: Dessert
- Method: No-Cook
- Cuisine: American
Description
Homemade delicious chocolate ice cream bars featuring a creamy ice cream base coated with a rich, glossy chocolate shell. Perfectly customizable with optional toppings like chopped nuts, caramel sauce, crushed cookies, or a sprinkle of sea salt for added texture and flavor.
Ingredients
Ice Cream Base
- 2 cups heavy cream
- 1 cup sweetened condensed milk
- 1 teaspoon vanilla extract (optional)
Chocolate Shell
- 300g dark or milk chocolate (your choice)
- 2 tablespoons coconut oil
Optional Toppings/Garnishes
- Chopped nuts (almonds, hazelnuts, etc.)
- Caramel sauce
- Crushed cookies
- Sea salt
Instructions
- Make the Ice Cream Base: Whip the heavy cream until stiff peaks form. Gently fold in the sweetened condensed milk and vanilla extract until fully combined, taking care not to deflate the cream.
- Freeze the Mixture: Pour the ice cream base into ice cream molds or a small loaf pan. Insert popsicle sticks into each mold or evenly spaced in the loaf pan. Place in the freezer and freeze for at least 4 to 6 hours, or until the ice cream is completely set.
- Prepare the Chocolate Shell: Melt the chocolate and coconut oil together in a heatproof bowl over a pan of simmering water or in short bursts in the microwave, stirring frequently. Allow the melted chocolate to cool slightly but remain liquid for dipping.
- Dip Ice Cream Bars: Remove the frozen ice cream bars from their molds. Quickly dip each bar into the melted chocolate, coating thoroughly. Before the chocolate hardens, optionally drizzle caramel sauce or sprinkle chopped nuts, crushed cookies, or sea salt on top for extra flavor and texture.
- Set the Chocolate Coating: Immediately place the dipped bars back into the freezer for a few minutes to allow the chocolate shell to harden and set properly.
- Serve and Enjoy: Once the chocolate has hardened, serve the ice cream bars immediately or keep them stored in the freezer until ready to enjoy.
Notes
- Ensure the ice cream base is well frozen before dipping to prevent melting during coating.
- Use good quality chocolate for a smooth and tasty shell.
- Add toppings quickly after dipping to ensure they stick before the chocolate sets.
- Storage: Keep the finished bars in an airtight container in the freezer for up to 1 week.
- You can customize the ice cream base by adding flavor extracts or mix-ins before freezing.

