If you’ve ever dreamed of crafting the perfect crust for your pies at home, then you’re in the right place. This Homemade Flaky Pie Crust Recipe is everything you want in a pie dough: tender, buttery, and delightfully flaky. It’s a game-changer that transforms ordinary pies into extraordinary homemade delights. With this method, you’ll learn how simple ingredients and a few expert techniques come together to create that golden, crispy crust that’s both sturdy enough to hold delicious fillings and tender enough to melt in your mouth.
Ingredients You’ll Need
The beauty of the Homemade Flaky Pie Crust Recipe lies in its simplicity. Each ingredient plays a key role in the texture and flavor, whether it’s the flour’s structure, the cold butter’s flakiness, or that pinch of salt to bring out the flavors.
- 2 1/2 cups all-purpose flour: Provides the perfect base structure; make sure to spoon and level it for accuracy.
- 2 tablespoons granulated sugar: Adds subtle sweetness, perfect for sweet pies (adjust for savory versions).
- 1 teaspoon kosher salt: Enhances the overall flavor profile of the crust.
- 8 tablespoons butter-flavored shortening (1/2 cup): Contributes to tenderness and flaky layers.
- 12 tablespoons cold butter (1 1/2 sticks): Essential for rich flavor and that wonderful flakiness when cold chunks melt during baking.
- 2 tablespoons beaten egg: Provides binding and aids in browning.
- 1/4 cup ice water: Hydrates the dough just enough without making it tough—add more sparingly as needed.
How to Make Homemade Flaky Pie Crust Recipe
Step 1: Prepare Your Ingredients and Workspace
Start by gathering your ingredients and ensuring your ice water is super cold. Keeping everything chilled is the secret to building flaky layers. Set your butter and shortening in the fridge while you measure out your dry ingredients. This attention to temperature creates those signature buttery pockets inside the crust.
Step 2: Mix Dry Ingredients
In a large bowl, whisk together the flour, sugar, and salt. This not only combines flavors but also evenly distributes the salt and sugar, which enhances the crust’s taste and texture uniformly.
Step 3: Cut in the Fats
Next, add your butter-flavored shortening and cold chunks of butter to the flour mixture. Use a pastry cutter to press them into the flour until the mixture resembles coarse crumbs with pea-sized pieces. These little buttery pockets are what give the crust its delicious flakiness.
Step 4: Combine Egg and Water
Whisk the egg until frothy and reserve half for brushing later. Mix the remaining beaten egg with ice water, combining them well. This mixture will hydrate the dough and help it hold together without becoming tough.
Step 5: Bring Dough Together
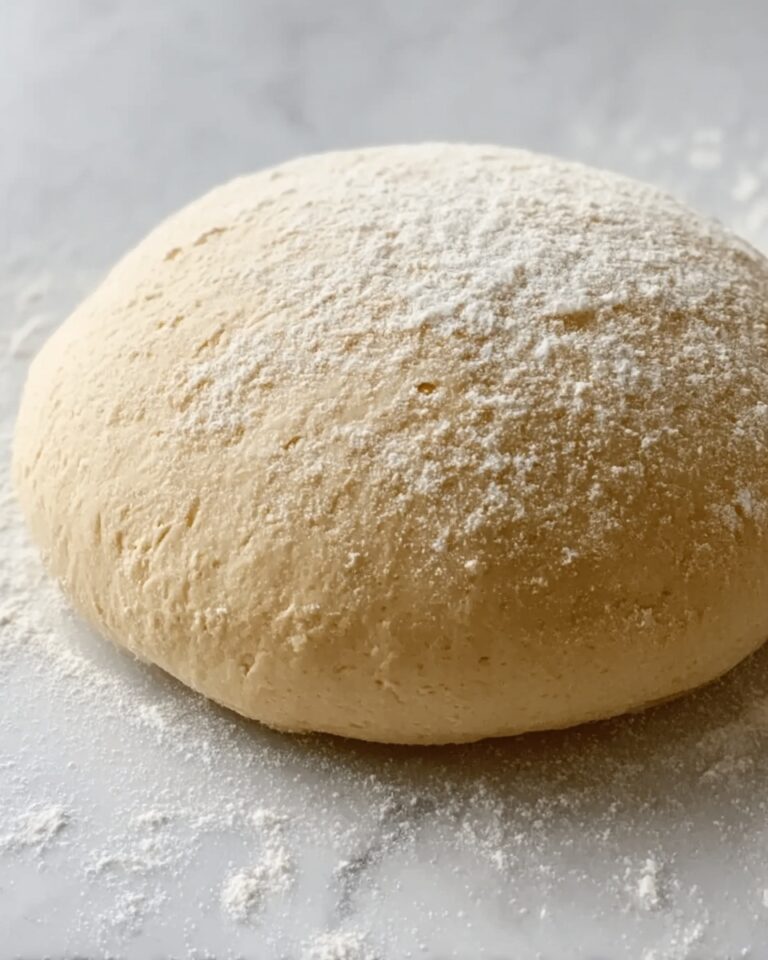
Add the egg-water blend to the flour and fat mixture. Use a rubber spatula and then your floured hands to gently knead the dough just until it forms a cohesive ball. Resist overworking the dough to keep the crust light and tender.
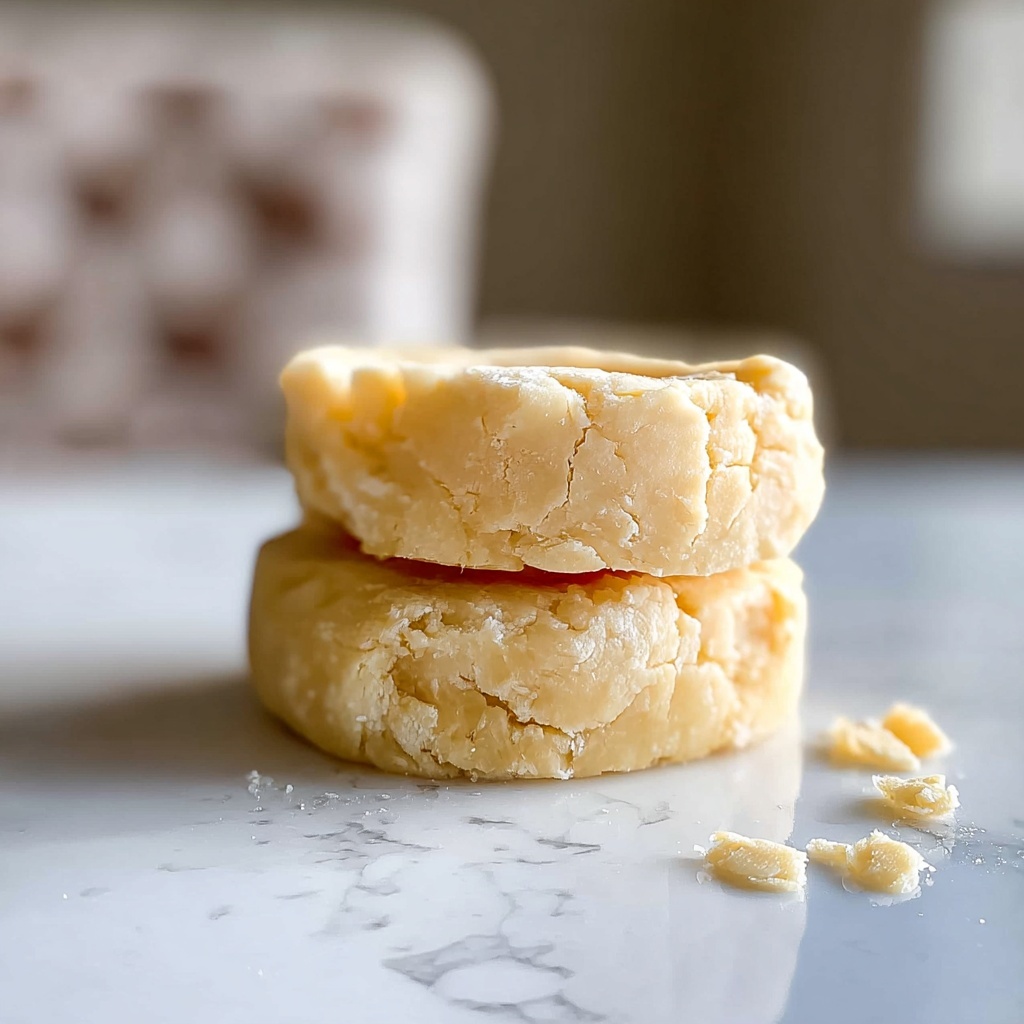
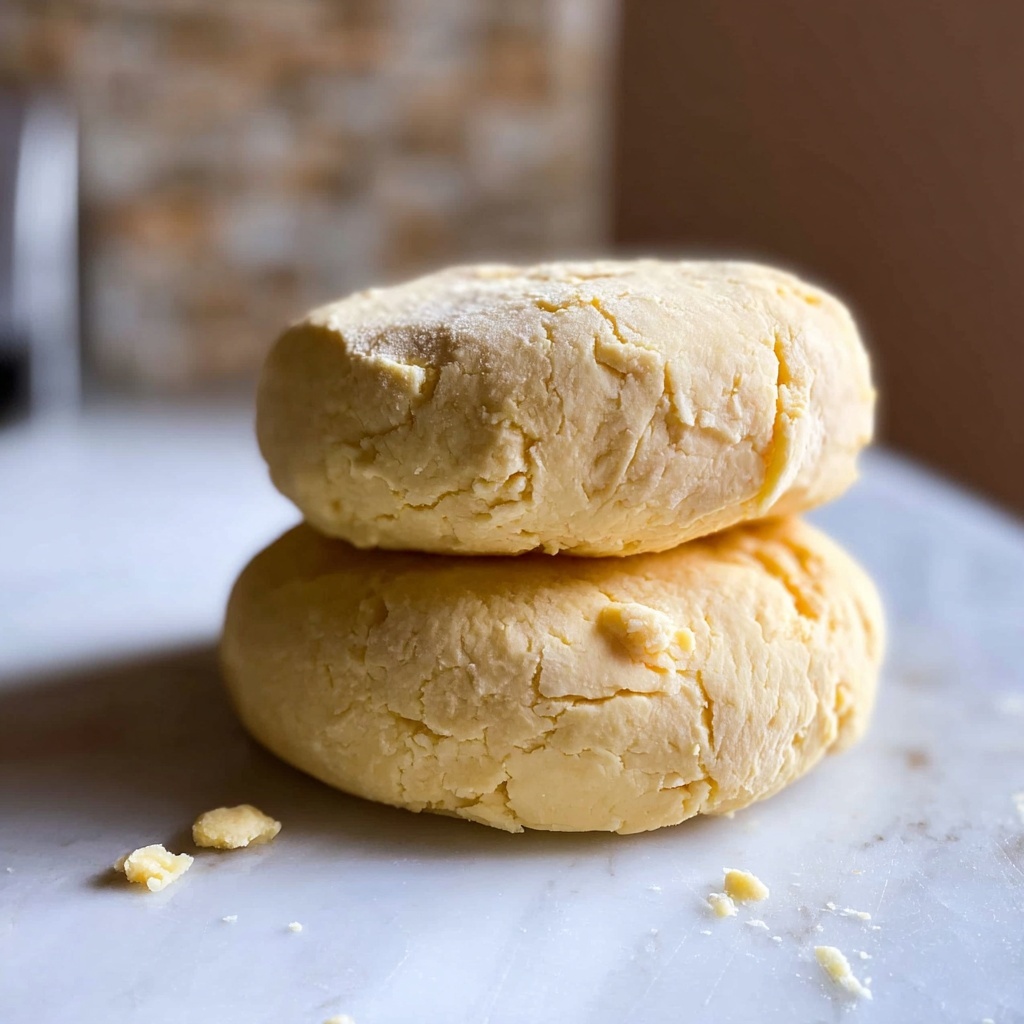
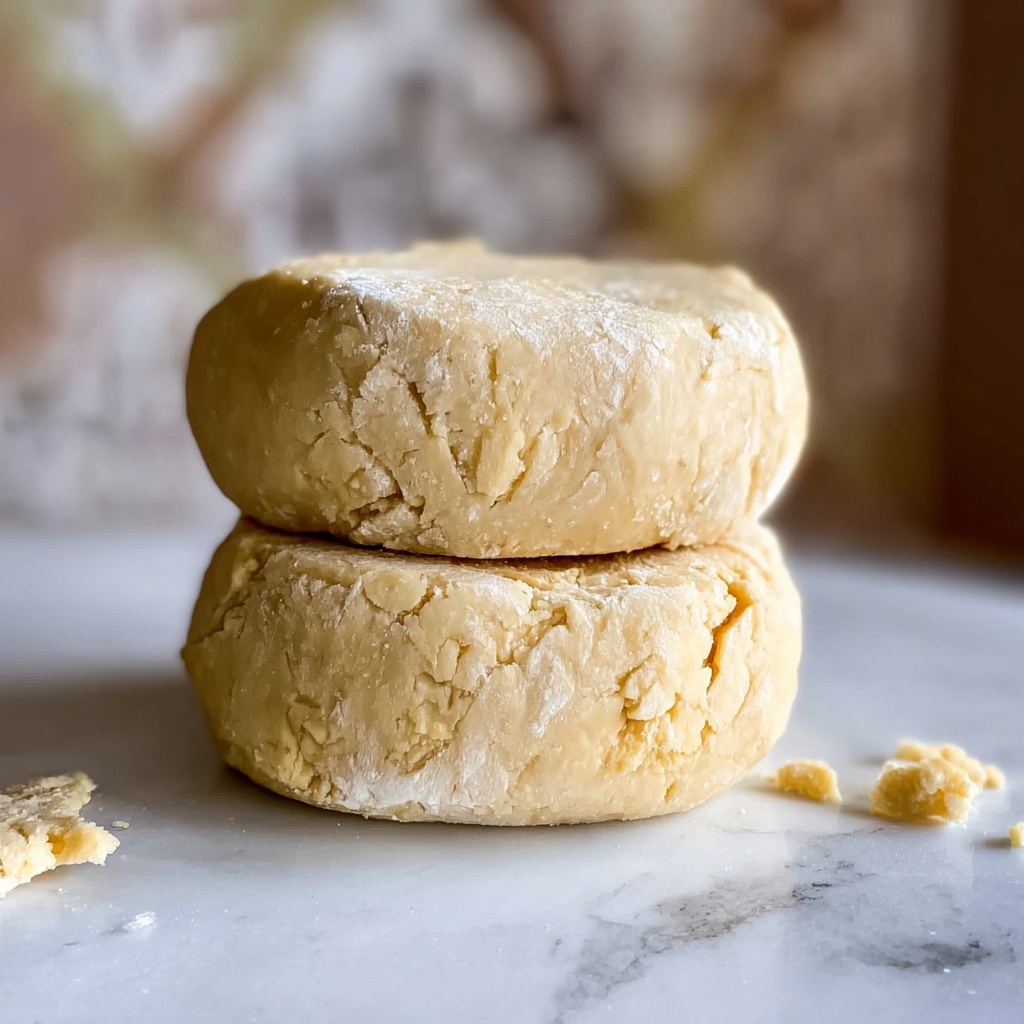
Step 6: Chill the Dough
Divide the dough into two equal parts, shape each into a disc, wrap in plastic wrap, and chill for at least 30 minutes. Chilling firms up the fats and relaxes the gluten, making rolling easier and enhancing flakiness.
Step 7: Roll Out the Dough
Generously flour your surface and rolling pin. Let the dough rest a bit at room temperature, then roll gently from the center outward, turning the dough frequently while dusting with flour. Aim for about a 13-inch circle for the bottom crust. Use the rolling pin to transfer dough carefully to your pie plate without tearing.
Step 8: Assemble Your Pie
Fit the dough into the pie pan, press gently to adhere to corners, and leave an overhang for your top crust. Fix any cracks by pinching with a touch of water. Roll out the second disc for the top crust, or use creatively for lattice or decorative shapes.
Step 9: Chill and Bake
Chill the assembled pie in the fridge for 30 minutes to keep the dough firm. Brush the crust with the reserved beaten egg (or egg mixed with milk) and sprinkle sugar if desired. Bake according to your pie filling recipe, usually starting at high heat to set the crust and then lowering to finish baking.
How to Serve Homemade Flaky Pie Crust Recipe
Garnishes
A lightly brushed egg wash gives the pie crust that irresistible golden shimmer. Sprinkle coarse sugar over sweet pies for an elegant sparkle and a slight crunch. Fresh herbs or edible flowers can adorn savory pies for a charming finishing touch.
Side Dishes
This flaky crust pairs beautifully with a scoop of vanilla ice cream, a dollop of whipped cream, or even a side of fresh fruit for sweeter pies. For savory pies, a crisp green salad or steamed vegetables balance the richness perfectly.
Creative Ways to Present
Don’t be shy about using cut-out shapes from scraps of dough as pie toppers—you can make leaves, hearts, or even letters to personalize your pie. For a fun twist, try lattice tops or braided edges that showcase your culinary creativity and wow your guests with a professional-looking finish.
Make Ahead and Storage
Storing Leftovers
Leftover pie crust can be wrapped tightly in plastic wrap and stored in the refrigerator for up to 3 days. If you have baked pie with crust leftover, cover it with foil and keep it refrigerated to maintain freshness.
Freezing
The beauty of this Homemade Flaky Pie Crust Recipe is that it freezes wonderfully. Wrap the dough discs tightly in plastic wrap and then foil for up to 3 months. When ready to use, thaw overnight in the refrigerator. You can also freeze assembled pies before baking for convenience.
Reheating
Warm leftover baked pies in a 350°F oven for 10-15 minutes to refresh that flaky texture. Avoid microwave reheating as it might make the crust soggy. For best results, reheat in a preheated oven on a baking sheet to keep the bottom crisp.
FAQs
Can I substitute butter with all shortening in the Homemade Flaky Pie Crust Recipe?
While you can use all shortening, combining butter and shortening gives the perfect balance of flavor and flakiness. Butter adds taste, while shortening helps keep the dough tender and workable.
Why is my pie crust tough instead of flaky?
Toughness usually comes from overworking the dough or adding too much water. Handle the dough minimally and add ice water sparingly to keep the crust tender and flaky.
Can I make this pie crust gluten-free?
For gluten-free options, you’ll need to substitute the flour with a gluten-free blend designed for baking pies and adjust hydration slightly. Keep the fats and chilling steps the same to maintain flakiness.
How do I prevent my crust from shrinking during baking?
Chill the dough thoroughly before baking and avoid stretching it when fitting it into the pie pan. Using pie weights during blind baking also helps keep the shape intact.
Is it necessary to use both egg and water in the dough?
The combination of beaten egg and ice water adds flavor and structure without making the dough too dense. The egg also helps with browning, making the crust visually appealing.
Final Thoughts
There is something truly magical about mastering your own flaky pie crust, and this Homemade Flaky Pie Crust Recipe is a reliable, approachable way to get there. Once you try it, you’ll never want to use store-bought crusts again. Whether you’re baking sweet or savory pies, this recipe will elevate your baking and fill your kitchen with comforting, irresistible aromas. So roll up your sleeves and treat yourself to the joy of homemade pie perfection!
Print
Homemade Flaky Pie Crust Recipe
- Prep Time: 50 minutes
- Cook Time: N/A
- Total Time: 50 minutes plus chilling and baking time
- Yield: 2 pie crusts
- Category: Dessert
- Method: No-Cook
- Cuisine: American
Description
This homemade flaky pie crust recipe produces tender, buttery, and perfectly textured crusts ideal for both sweet and savory pies. Made with a combination of butter and shortening, it yields two versatile pie crusts ready to be rolled out, filled, and baked to golden perfection. The detailed steps ensure a foolproof dough that is flaky and easy to handle, whether baking fruit pies, quiches, or any classic pie.
Ingredients
Dry Ingredients
- 2 & 1/2 cups all-purpose flour (spooned and leveled)
- 2 tablespoons granulated sugar (use 1 tablespoon for savory pies)
- 1 teaspoon kosher salt
Fat
- 8 tablespoons butter-flavored shortening (1/2 cup)
- 12 tablespoons cold butter (1 and 1/2 sticks)
Liquid Ingredients
- 2 tablespoons beaten egg (half a large egg)
- 1/4 cup ice water (plus more if necessary)
Instructions
- Prepare the ice water: Fill a small bowl with ice water and keep it very cold for use in the dough to ensure flakiness.
- Mix dry ingredients: In a large bowl, whisk together the flour, sugar (adjusting for sweet or savory pies), and kosher salt.
- Add shortening: Incorporate the butter-flavored shortening into the flour mixture; alternatives such as lard or butter can be used.
- Add cold butter chunks: Chop the cold butter into small pieces and add to the bowl.
- Cut in fats: Using a pastry cutter, cut the butter and shortening into the flour mixture until you have pea-sized pieces of fat throughout—larger chunks are acceptable for flakiness.
- Prepare egg wash: Whisk a whole egg lightly, then separate half into another bowl, saving it for brushing the finished pie.
- Mix egg with ice water: Combine 1/4 cup ice water with 2 tablespoons beaten egg, then mix thoroughly.
- Add liquid to dry mix: Pour the egg-water mixture into the flour and fat mixture, stirring with a rubber spatula to hydrate as much flour as possible.
- Knead dough carefully: Flour your hands and gently knead the dough in the bowl, pressing pieces together. Add extra ice water cautiously, 1-3 teaspoons at a time, just enough to bring the dough together without overworking it to prevent toughness.
- Divide and chill: Shape the dough into two equal discs, wrap with plastic, and chill for at least 30 minutes to firm up the fats and relax gluten.
- Roll out first disc: Dust work surface with flour, remove one disc from fridge and let it sit for 5 minutes. Roll gently from center outward, turning dough a quarter turn frequently, repairing cracks by pressing and moistening edges as needed.
- Prevent sticking: Continuously dust dough and surface with flour, lift and turn dough multiple times to avoid sticking.
- Roll to size: Continue rolling until dough is about 13 inches in diameter, ensuring it’s not sticking.
- Transfer to pie plate: Use rolling pin to lift dough and place over a 9-inch pie plate, fitting it into the corners carefully, repairing any tears, leaving an overhang around the edge.
- Prepare second disc: Chill pie plate with first crust, then roll out the second disc to about 11-12 inches while the first is chilling.
- Fill pie: Add filling as desired, dotting with butter if called for in your pie recipe.
- Lattice or top crust: Optionally create a lattice or lay rolled second crust over the pie filling.
- Seal edges: Press the two crusts together at edges, folding under to align with pie plate rim, then flute edges decoratively with fingers or knuckles.
- Chill before baking: Refrigerate the assembled pie for at least 30 minutes if dough feels soft to firm it up.
- Apply glaze: Just before baking, brush crust with a mix of 1 tablespoon beaten egg and 1 tablespoon milk, and sprinkle with sugar on sweet pies.
- Bake: Follow your pie recipe to bake. A recommended method is baking at 425°F for 15-20 minutes, then reducing to 350°F for 25-50 minutes, using a preheated baking sheet for a flaky bottom crust.
- Protect crust edge: Use a foil pie shield during the latter half of baking to prevent burning.
- Cool pie: Let sweet pies cool to room temperature for 2-4 hours to let juices set before slicing.
Notes
- Spoon and level flour rather than scooping to avoid dense dough.
- Use 1 tablespoon sugar instead of 2 for savory pies.
- Butter-flavored shortening can be substituted with lard or all butter, but a combination of butter and shortening gives optimum flakiness.
- Keep all fats cold for a tender, flaky crust.
- Be cautious adding water; too much makes dough tough.
- Rolling dough on parchment paper helps transfer the crust without tearing.
- Using a preheated baking sheet improves bottom crust flakiness.
- Letting the pie cool completely before slicing helps filling set properly.


