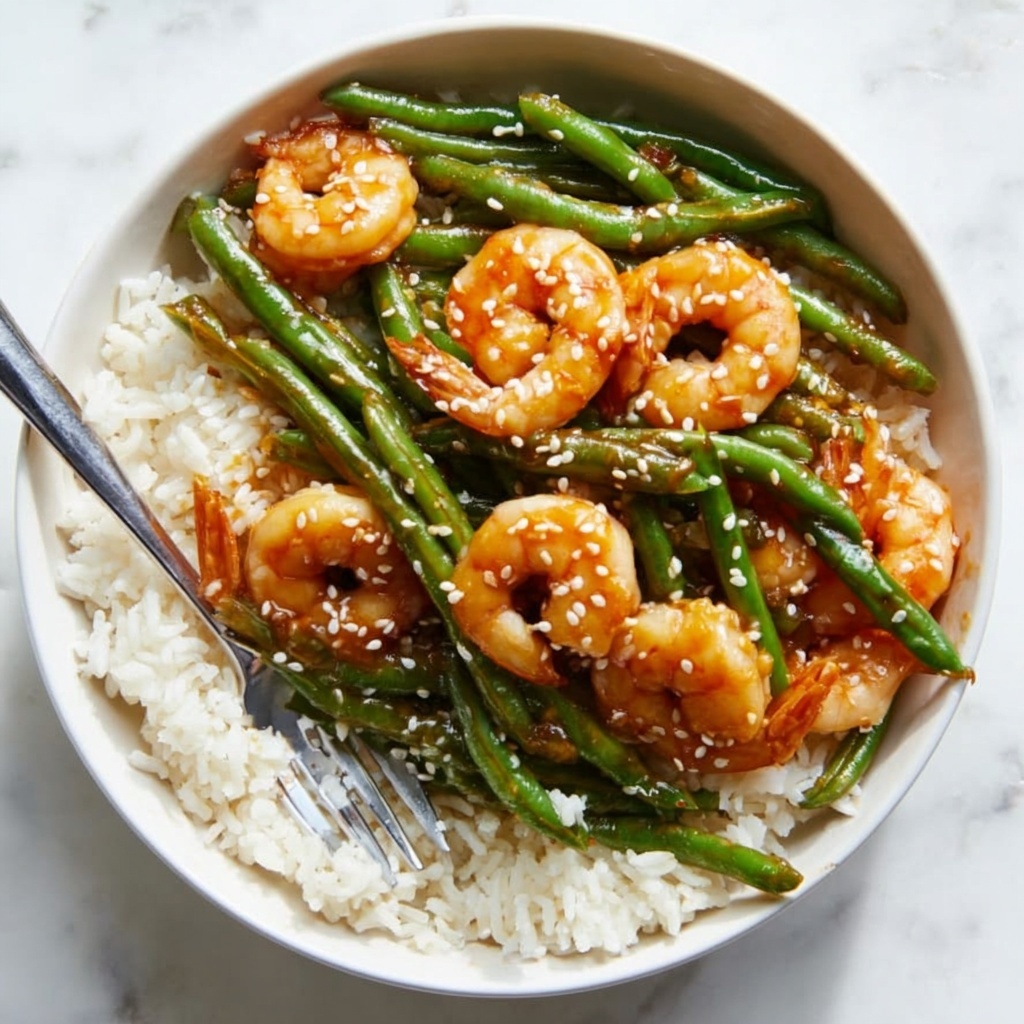
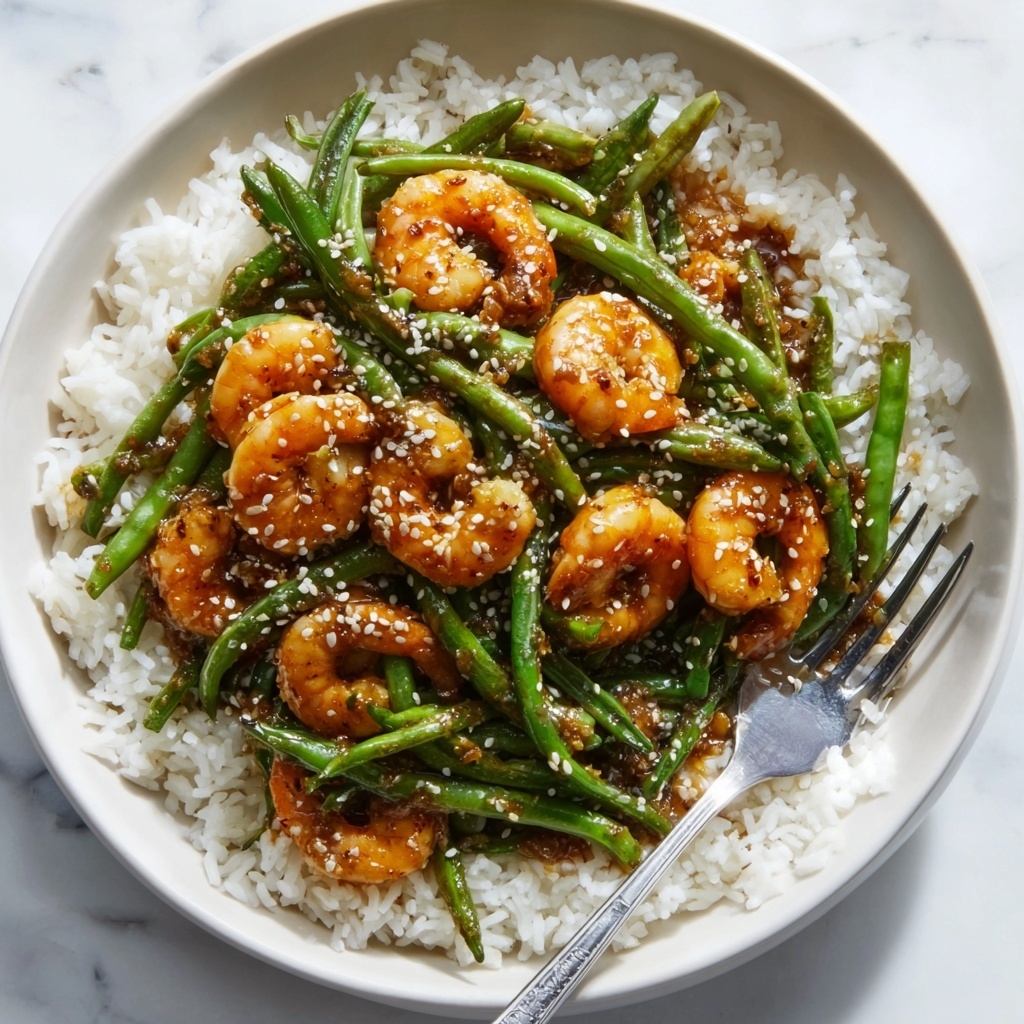
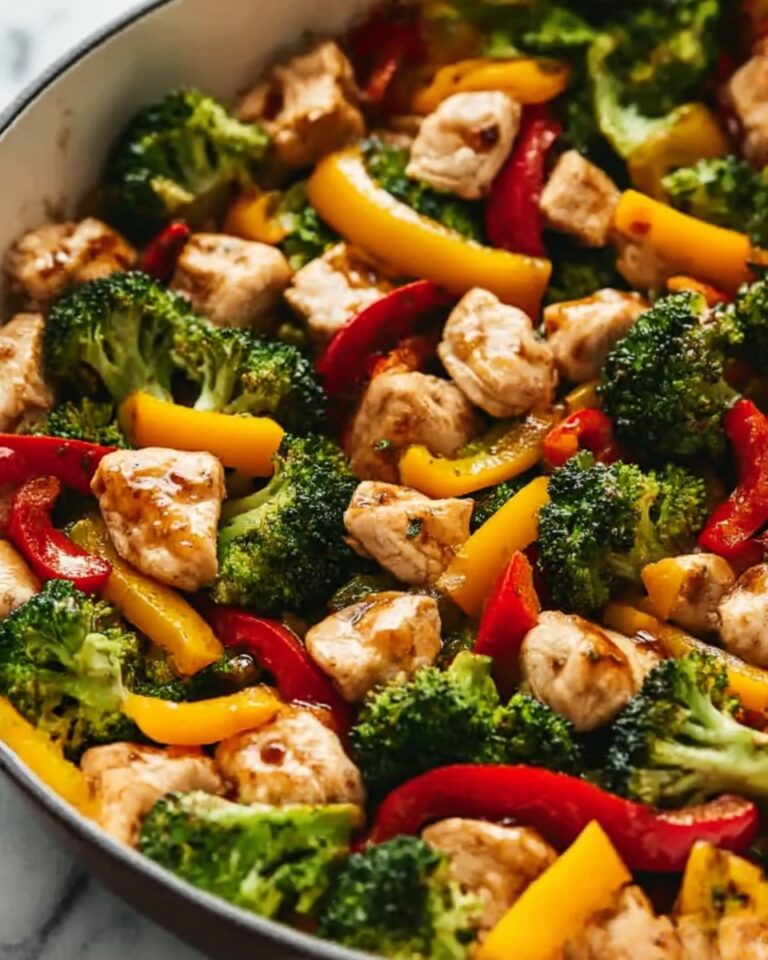
The Honey Garlic Shrimp Sheet Pan Recipe is an absolute game changer for busy weeknights when you crave something delicious, wholesome, and fuss-free. This vibrant dish combines succulent shrimp roasted to perfection with tender-crisp green beans all glazed in a luscious honey garlic sauce that brings just the right balance of sweet, savory, and zingy flavors. It’s a brilliant one-pan wonder that not only bursts with flavor but also makes cleanup a breeze—plus, it’s packed with bright, fresh ingredients that will brighten your dinner table and mood alike.
Ingredients You’ll Need
Each ingredient in this Honey Garlic Shrimp Sheet Pan Recipe is carefully chosen to deliver maximum flavor and texture with minimal effort. From the juicy shrimp to the fresh green beans and that incredible honey garlic sauce, they all come together beautifully to create a harmonious meal.
- 1 lb. fresh or frozen raw shrimp, peeled and deveined: Opt for medium-sized shrimp for quick roasting and perfect bite-sized pieces.
- ½ cup coconut aminos: A savory, slightly sweet alternative to soy sauce that adds rich umami without overpowering.
- ⅓ cup honey: Provides natural sweetness that balances the garlic and lemon perfectly.
- 6 garlic cloves, minced (2 tablespoons): Garlic bring the aromatic punch that’s signature to this recipe.
- Juice of ½ lemon (1½ tablespoons): Adds bright acidity to freshen up the overall flavor profile.
- ¾ lb. (12 oz) fresh green beans, ends trimmed: Gives crunch and color, making this a well-rounded dish.
- 1 tablespoon toasted sesame oil: Infuses a toasty, nutty note that complements the green beans beautifully.
- ¼ teaspoon coarse salt: Enhances all the flavors while seasoning the vegetables.
- ¼ teaspoon black pepper: Adds a gentle heat and earthiness.
- 2 tablespoons cornstarch: Vital for thickening the honey garlic sauce into a glossy glaze.
- 2 green onions, sliced on the bias (green parts only): For fresh, mild onion flavor and a pop of color as a garnish.
- Pinch of red pepper flakes (optional): For those who like a little heat to wake up their taste buds.
- Pinch of sesame seeds (optional): Adds extra texture and visual appeal when sprinkled on top.
How to Make Honey Garlic Shrimp Sheet Pan Recipe
Step 1: Preheat and Prepare the Baking Sheet
Start by setting your oven to 400℉ and lining a large baking sheet with parchment paper. This simple prep step prevents sticking and makes cleanup effortless, letting you focus on enjoying the cooking process instead of the mess afterwards.
Step 2: Make the Honey Garlic Sauce
Whisk together the coconut aminos, honey, minced garlic, and lemon juice in a bowl until the honey dissolves thoroughly. This mixture forms the heart of your dish—a glossy, fragrant marinade and sauce base that provides depth and richness to the shrimp.
Step 3: Marinate the Shrimp
Pour half of your prepared honey garlic sauce over the shrimp and toss until all pieces are well coated. If time allows, marinate the shrimp anywhere from 30 minutes to up to 24 hours in the fridge. The longer it marinates, the more those flavors infuse into the shrimp for maximum taste.
Step 4: Prepare and Roast Green Beans
Toss the trimmed green beans with toasted sesame oil, salt, and pepper then spread them out evenly on your baking sheet. Roast for 12 minutes to achieve a tender but still crisp texture—this gives a nice contrast when combined with the tender shrimp later.
Step 5: Add Shrimp to the Baking Sheet
Carefully remove the baking sheet and nudge the green beans to one side. Using a slotted spoon, transfer the marinated shrimp onto the empty side of the pan, leaving behind any excess marinade so your shrimp roasts perfectly without steaming.
Step 6: Roast Shrimp and Green Beans Together
Return the baking sheet to the oven and roast everything together for about 8 to 10 minutes. Adjust your time depending on the size of shrimp; smaller shrimp will cook quicker. This method lets flavors mingle while keeping the shrimp tender and juicy.
Step 7: Make the Sauce Glaze
While your shrimp and green beans finish roasting, pour the reserved sauce into a small saucepan and bring it to a simmer over medium-high heat. Whisk your cornstarch with 2 tablespoons of water to make a slurry, then slowly add it to the simmering sauce. Keep stirring and cooking for 2 to 3 minutes until the sauce thickens into a glossy glaze perfect for coating.
Step 8: Toss and Serve
Transfer the cooked shrimp and green beans to a large bowl. Pour the thick honey garlic glaze over everything and toss well to coat evenly. Finish with sliced green onions, and if you like, sprinkle red pepper flakes and sesame seeds to elevate the dish visually and flavor-wise. Serve immediately, ideally alongside steamed rice to soak up all that irresistible sauce.
How to Serve Honey Garlic Shrimp Sheet Pan Recipe

Garnishes
Green onions, red pepper flakes, and sesame seeds aren’t just pretty—they bring fresh, spicy, and nutty elements that complement the honey garlic glaze perfectly. They add layers of texture that make every bite exciting and crave-worthy.
Side Dishes
This Honey Garlic Shrimp Sheet Pan Recipe naturally pairs wonderfully with steamed jasmine or basmati rice, allowing the sauce to soak in beautifully. For extra veggies and fiber, a simple cucumber salad or quick pickled radishes provide a cool, crisp contrast.
Creative Ways to Present
For a fun twist, serve the shrimp and beans over rice noodles to create a light, noodle-based meal. You can also pile everything into lettuce wraps for a low-carb option that’s perfect for entertaining or casual dinners.
Make Ahead and Storage
Storing Leftovers
Keep any leftovers in an airtight container in the refrigerator for up to 3 days. The shrimp and green beans may lose some crispness, but the honey garlic flavor remains vibrant, making it ideal for quick next-day lunches or dinners.
Freezing
While you can freeze the cooked shrimp and green beans, it’s best to freeze the components separately if possible—raw shrimp and green beans separately frozen can preserve texture better. Use airtight containers or heavy-duty freezer bags and consume within 1 month for best quality.
Reheating
Reheat gently in a skillet over medium-low heat or in the oven at 300℉ until warmed through to avoid overcooking shrimp, which can get rubbery quickly. Adding a splash of water or a tiny drizzle of oil helps maintain moisture during reheating.
FAQs
Can I use frozen shrimp for this Honey Garlic Shrimp Sheet Pan Recipe?
Absolutely! Just make sure they’re fully thawed and patted dry before marinating and cooking. This helps the shrimp absorb the sauce flavors better and roast evenly.
Is coconut aminos interchangeable with soy sauce?
Yes, coconut aminos is a great soy-free alternative with a naturally sweet taste that works perfectly in this recipe, but you can substitute low-sodium soy sauce if preferred.
Can I make this recipe spicy?
Definitely! Adding red pepper flakes or a dash of cayenne pepper to the sauce or as a garnish gives it that pleasant kick without overpowering the honey garlic balance.
Can I swap green beans for other vegetables?
Feel free to experiment! Asparagus, snap peas, or broccoli florets roast beautifully and pair well with the honey garlic shrimp—just adjust roasting times based on the vegetable.
How long can I marinate the shrimp for best flavor?
While 30 minutes is enough to infuse great flavor, marinating up to 24 hours in the fridge lets the shrimp soak up even more deliciousness from the honey garlic marinade.
Final Thoughts
You really can’t go wrong with this Honey Garlic Shrimp Sheet Pan Recipe. It’s as straightforward as it is flavorful, leaving you with a bright, satisfying meal that feels special without the fuss. Once you try it, this will quickly become one of your go-to dishes for busy nights when you want something homemade yet effortless. So grab your ingredients, fire up the oven, and get ready for a delightful dinner everyone will ask you to make again.
Print
Honey Garlic Shrimp Sheet Pan Recipe
- Prep Time: 10 minutes
- Cook Time: 22 minutes
- Total Time: 32 minutes
- Yield: 4 servings
- Category: Main Course
- Method: Baking
- Cuisine: Asian-Inspired
- Diet: Gluten Free
Description
This Honey Garlic Shrimp Sheet Pan Recipe is a quick, flavorful, and easy-to-make meal perfect for busy weeknights. Featuring tender shrimp roasted alongside crisp green beans, coated in a sweet and savory honey garlic sauce, this dish offers a healthy balance of protein and veggies with minimal cleanup thanks to sheet pan cooking. The sauce glaze adds a glossy finish that enhances every bite, complemented by optional garnishes like green onions, red pepper flakes, and sesame seeds.
Ingredients
Shrimp and Marinade
- 1 lb. fresh or frozen raw shrimp, peeled and deveined (thawed if frozen)
- ½ cup coconut aminos
- ⅓ cup honey
- 6 garlic cloves, minced (about 2 tablespoons)
- Juice of ½ lemon (about 1½ tablespoons)
Vegetables and Seasoning
- ¾ lb. (12 oz) fresh green beans, ends trimmed
- 1 tablespoon toasted sesame oil
- ¼ teaspoon coarse salt
- ¼ teaspoon black pepper
Sauce Glaze
- 2 tablespoons cornstarch
- 2 tablespoons water (for cornstarch slurry)
Garnishes (Optional)
- 2 green onions, sliced on the bias (green parts only)
- Pinch of red pepper flakes
- Pinch of sesame seeds
Instructions
- Preheat and Prepare Baking Sheet: Preheat your oven to 400℉ (204℃). Line a large baking sheet with parchment paper to prevent sticking and enable easy cleanup.
- Make the Honey Garlic Sauce: In a bowl, whisk together the coconut aminos, honey, minced garlic, and lemon juice until the honey is completely dissolved, forming a smooth marinade and sauce base.
- Marinate the Shrimp: Pour half of the prepared sauce over the shrimp and toss well to coat evenly. For deeper flavor, marinate the shrimp in the refrigerator for 30 minutes up to 24 hours.
- Prepare and Roast Green Beans: Toss the trimmed green beans with toasted sesame oil, coarse salt, and black pepper. Spread the green beans evenly on the prepared baking sheet and roast in the preheated oven for 12 minutes until tender but still crisp.
- Add Shrimp to the Baking Sheet: Remove the baking sheet from the oven and push the roasted green beans to one side. Using a slotted spoon, add the marinated shrimp to the other side, discarding any excess marinade to avoid sogginess.
- Roast Shrimp and Green Beans Together: Return the baking sheet to the oven and roast for an additional 8–10 minutes, depending on shrimp size; smaller shrimp will cook faster. Cook until shrimp are opaque and cooked through.
- Make the Sauce Glaze: Meanwhile, pour the reserved half of the sauce into a small saucepan and heat over medium-high heat until it starts to simmer. In a small bowl, whisk the cornstarch with 2 tablespoons of water to make a slurry, then slowly whisk it into the simmering sauce. Stir occasionally and continue cooking for 2–3 minutes until the sauce thickens to a glaze consistency.
- Toss and Serve: Transfer the cooked shrimp and green beans to a large serving bowl. Pour the thickened honey garlic glaze over the top and toss well to coat evenly. Garnish with sliced green onions, red pepper flakes, and sesame seeds as desired. Serve immediately with rice for a complete, satisfying meal.
Notes
- Marinating shrimp longer (up to 24 hours) intensifies flavor but can also affect texture; avoid over-marinating.
- Use parchment paper or a silicone baking mat to avoid sticking and speed cleanup.
- Adjust red pepper flakes to your preferred spice level or omit for a milder dish.
- Serve with steamed rice, quinoa, or cauliflower rice to make it a full meal.
- Use fresh shrimp if possible; thaw frozen shrimp completely for even cooking.


