
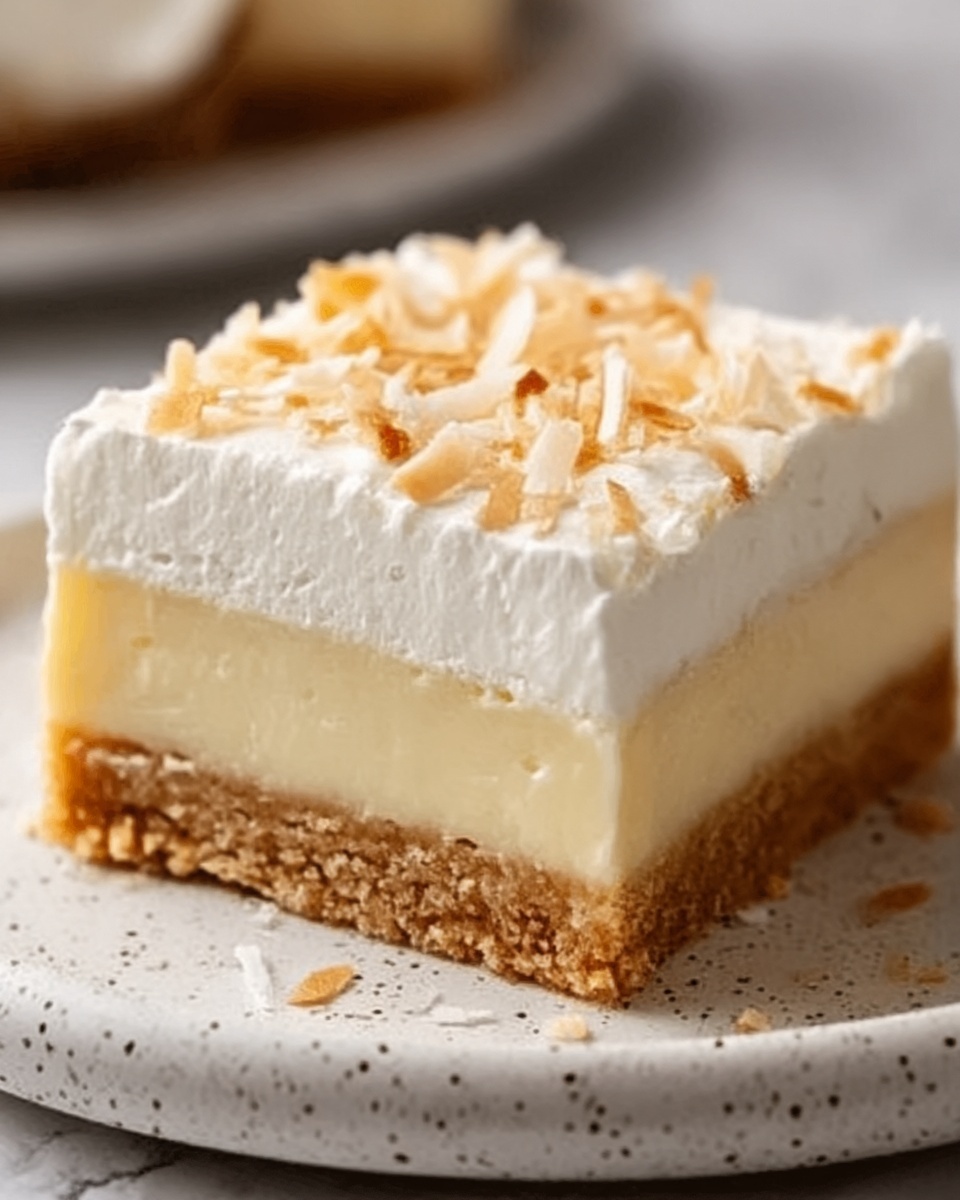
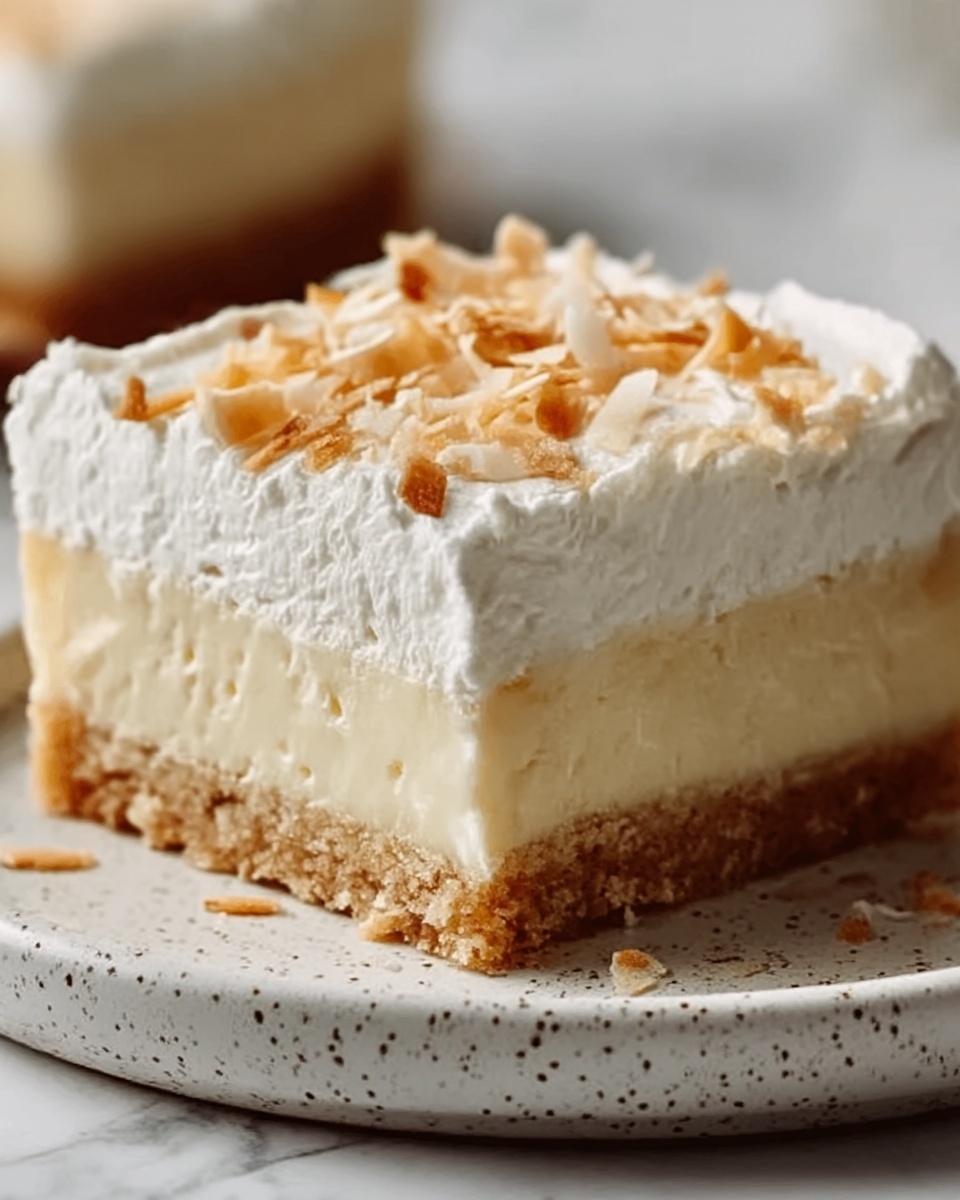
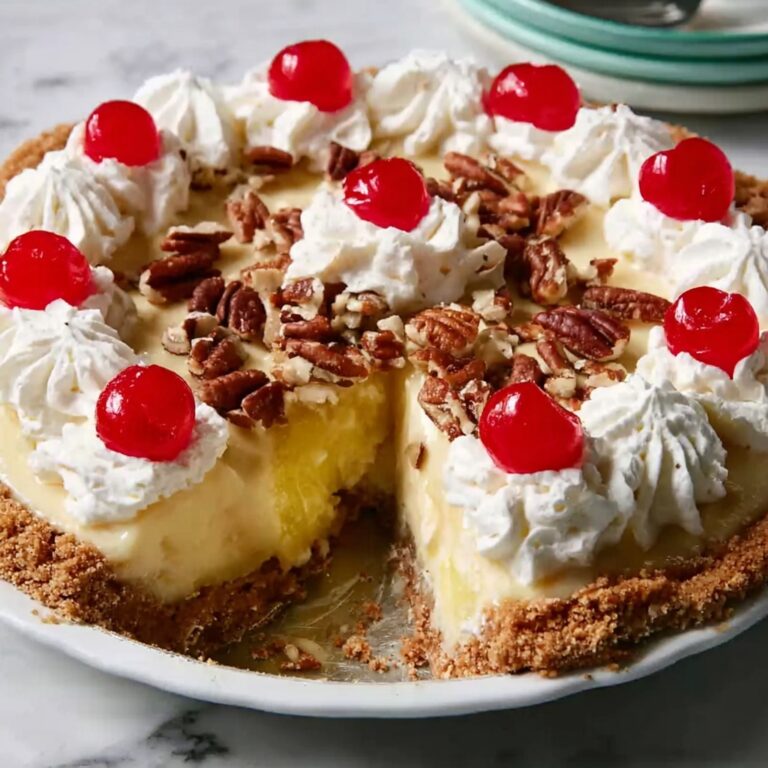
If you’re craving a luscious, tropical treat that feels like a mini getaway, you have to try the Island Dream Coconut Cream Bars Recipe. This divine dessert captures the essence of creamy coconut bliss wrapped in a tender, buttery crust, all topped with a cloud of whipped cream and a sprinkle of toasted coconut for that perfect crunch. It’s an easy-to-make recipe that brings island vibes straight to your kitchen, making every bite a dreamy escape.
Ingredients You’ll Need
Gathering the right ingredients is the first step to creating these delightful bars. Each one plays its part perfectly — from the rich, buttery crust to the silky coconut cream filling that melts in your mouth.
- All-purpose flour: The foundation for our buttery crust that provides structure and a tender bite.
- Unsalted butter: Gives the crust its rich, melt-in-your-mouth quality without overpowering the coconut flavors.
- Granulated sugar: Adds just the right amount of sweetness to both the crust and filling for balanced flavor.
- Sweetened shredded coconut: Brings that unmistakable coconut texture and a subtle chewiness to the filling.
- Coconut milk: The star of the show, lending a smooth, tropical creaminess that makes these bars sing.
- Large eggs: Help set the coconut cream filling so it’s perfectly firm yet silky.
- Cornstarch: Thickens the coconut filling to that ideal creamy consistency without any graininess.
- Vanilla extract: Adds warmth and depth, rounding out the flavors beautifully.
- Whipped topping: A light and airy layer that balances the richness below, whether homemade or store-bought.
- Toasted coconut: The finishing touch, adding texture and a toasty note that makes each bite unforgettable.
How to Make Island Dream Coconut Cream Bars Recipe
Step 1: Preheat and Prepare
Start by preheating your oven to 350°F (175°C). Prepare your 9×9-inch baking pan by greasing it generously or lining it with parchment paper. This makes sure your bars come out cleanly and retain their beautiful shape.
Step 2: Create the Crust
In a medium bowl, mix the all-purpose flour, sugar, and softened butter together until a soft dough forms. Use your hands or a pastry cutter to combine them well. Then press this dough evenly into the bottom of your prepared pan, covering it completely to form that buttery base everyone loves.
Step 3: Bake the Crust
Bake the crust for about 10 to 12 minutes, or until it develops a gorgeous golden brown color. This step ensures your crust is crisp and sturdy enough to hold the luscious coconut filling without getting soggy. Once baked, set it aside to cool slightly while you prepare the filling.
Step 4: Make the Coconut Cream Filling
In a medium saucepan, whisk together the coconut milk, sweetened shredded coconut, sugar, and cornstarch over medium heat. Keep whisking continuously for 5 to 7 minutes until the mixture thickens beautifully. After removing from the heat, whisk in the eggs and vanilla extract to create a luscious, creamy filling that will set just right in the oven.
Step 5: Assemble and Bake the Bars
Pour the thickened coconut cream filling over your pre-baked crust, spreading it into an even layer. Return the pan to the oven and bake for an additional 15 to 20 minutes, until the filling is set but still creamy in the center. Remove the pan and let it cool to room temperature — trust me, the aroma alone is pure happiness.
Step 6: Chill the Bars
For the best texture and flavor, refrigerate the bars for at least 2 hours. This chilling step allows the coconut cream to firm up perfectly, making your bars easy to cut and delightfully refreshing to eat.
Step 7: Add the Whipped Topping and Toasted Coconut
When you’re ready to serve, spread a generous layer of whipped topping over the chilled bars. Then sprinkle with toasted coconut to add a toasty crunch and that irresistible island flair. This final step elevates the bars from lovely to downright show-stopping.
Step 8: Serve and Enjoy
Cut your Island Dream Coconut Cream Bars into 12 to 16 squares, depending on your preferred portion size. Serve chilled and watch how quickly these dreamy bars disappear at your next gathering!
How to Serve Island Dream Coconut Cream Bars Recipe
Garnishes
Enhance your bars with extra toasted coconut or even a light dusting of powdered sugar. For a fun surprise, add a drizzle of chocolate or a few tropical fruit slices like mango or pineapple on the side for that vacation feel in every bite.
Side Dishes
These bars pair wonderfully with a fresh tropical fruit salad or a scoop of vanilla bean ice cream. The contrast between creamy, crunchy, and fruity textures makes each bite a new experience.
Creative Ways to Present
Serve the bars on a beautiful wooden board lined with banana leaves for an authentic island vibe. You can also layer them in a clear glass trifle dish to showcase the layers, perfect for making a dessert centerpiece at parties.
Make Ahead and Storage
Storing Leftovers
Keep leftovers in an airtight container in the refrigerator to maintain freshness. The flavors actually deepen nicely after a day or two, so they make a fantastic make-ahead treat.
Freezing
If you want to stash some bars for later, freeze them in a single layer wrapped tightly with plastic wrap and then foil. Thaw in the fridge overnight before serving to keep the creamy texture intact.
Reheating
These coconut cream bars are best enjoyed cold or at room temperature. If you prefer them slightly warmed, a few seconds in the microwave is all it takes — just be careful not to melt the whipped topping!
FAQs
Can I use unsweetened shredded coconut?
Yes, but keep in mind it will reduce the overall sweetness and alter the flavor slightly. If you prefer less sugar, unsweetened coconut is a great choice, just consider adjusting the sugar in the filling accordingly.
Is coconut milk necessary for this recipe?
Absolutely. Coconut milk provides the rich creaminess and authentic coconut flavor that’s essential to achieving the dreamy texture and taste of these bars.
Can I make the crust gluten-free?
Definitely! Substitute all-purpose flour with a gluten-free blend suitable for baking. Just make sure it has a similar texture to maintain the crust’s structure and tenderness.
How long do these bars last in the fridge?
Stored properly in an airtight container, these bars stay fresh for up to 4 days. They’re perfect for making ahead to impress guests or treat yourself throughout the week.
Can I use homemade whipped topping?
Yes! Freshly whipped cream adds an extra touch of luxury and freshness, but store-bought whipped topping works just as well for convenience. Either way, it’s a delicious finishing touch.
Final Thoughts
If you’re looking for a dessert that’s more than just sweet — something that transports you to warm island shores with each bite — you must try the Island Dream Coconut Cream Bars Recipe. It’s a perfect blend of textures and tropical flavors that’s as simple to make as it is delightful to share. Trust me, once you savor these bars, they’ll become your new go-to summer treat or anytime indulgence. Happy baking and even happier tasting!
Print
Island Dream Coconut Cream Bars Recipe
- Prep Time: 15 minutes
- Cook Time: 30 minutes
- Total Time: 2 hours 45 minutes
- Yield: 12 servings
- Category: Dessert
- Method: Baking
- Cuisine: American
Description
Island Dream Coconut Cream Bars are a delicious tropical treat featuring a buttery baked crust topped with a rich and creamy coconut filling. Finished with a fluffy whipped topping and toasted coconut garnish, these bars offer a perfect balance of sweet and creamy textures ideal for dessert or a special snack.
Ingredients
For the Crust:
- 1 ½ cups all-purpose flour
- ½ cup unsalted butter, softened
- ¼ cup granulated sugar
For the Coconut Cream Filling:
- 1 cup sweetened shredded coconut
- 1 cup coconut milk
- 2 large eggs
- ½ cup granulated sugar
- 2 tablespoons cornstarch
- 1 teaspoon vanilla extract
For the Topping:
- 1 cup whipped topping (store-bought or homemade)
- ½ cup toasted coconut (for garnish)
Instructions
- Preheat the Oven: Preheat your oven to 350°F (175°C). Grease and line a 9×9-inch baking pan with parchment paper or spray with non-stick cooking spray.
- Prepare the Crust: In a medium bowl, mix the flour, sugar, and softened butter until the mixture forms a dough. Press the dough evenly into the prepared pan, covering the bottom completely.
- Bake the Crust: Bake the crust in the preheated oven for 10-12 minutes, or until golden brown. Remove from the oven and set aside to cool slightly.
- Make the Coconut Cream Filling: In a medium saucepan, combine coconut milk, sweetened shredded coconut, sugar, and cornstarch. Cook over medium heat, whisking constantly, until the mixture thickens, about 5-7 minutes. Remove from heat and quickly stir in the eggs and vanilla extract until smooth and well combined.
- Assemble the Bars: Pour the coconut filling over the baked crust and spread evenly. Return the pan to the oven and bake for an additional 15-20 minutes, or until the filling is set and slightly firm to the touch. Remove from oven and let cool to room temperature.
- Chill: Once cooled, refrigerate the bars for at least 2 hours to allow the coconut cream to fully firm up.
- Top with Whipped Topping and Toasted Coconut: After chilling, spread the whipped topping evenly over the coconut filling. Sprinkle toasted coconut on top as a garnish for added flavor and texture.
- Serve and Enjoy: Cut the bars into 12-16 squares and serve chilled for the best taste and texture.
Notes
- For best results, use unsalted butter to control the salt content in the crust.
- Make sure to whisk constantly when cooking the filling to prevent lumps and avoid burning.
- You can toast the coconut by spreading it on a baking sheet and baking at 350°F for 5-7 minutes or until golden brown, stirring occasionally.
- Store any leftovers covered in the refrigerator for up to 4 days.
- These bars can be made ahead and kept chilled until ready to serve.


