
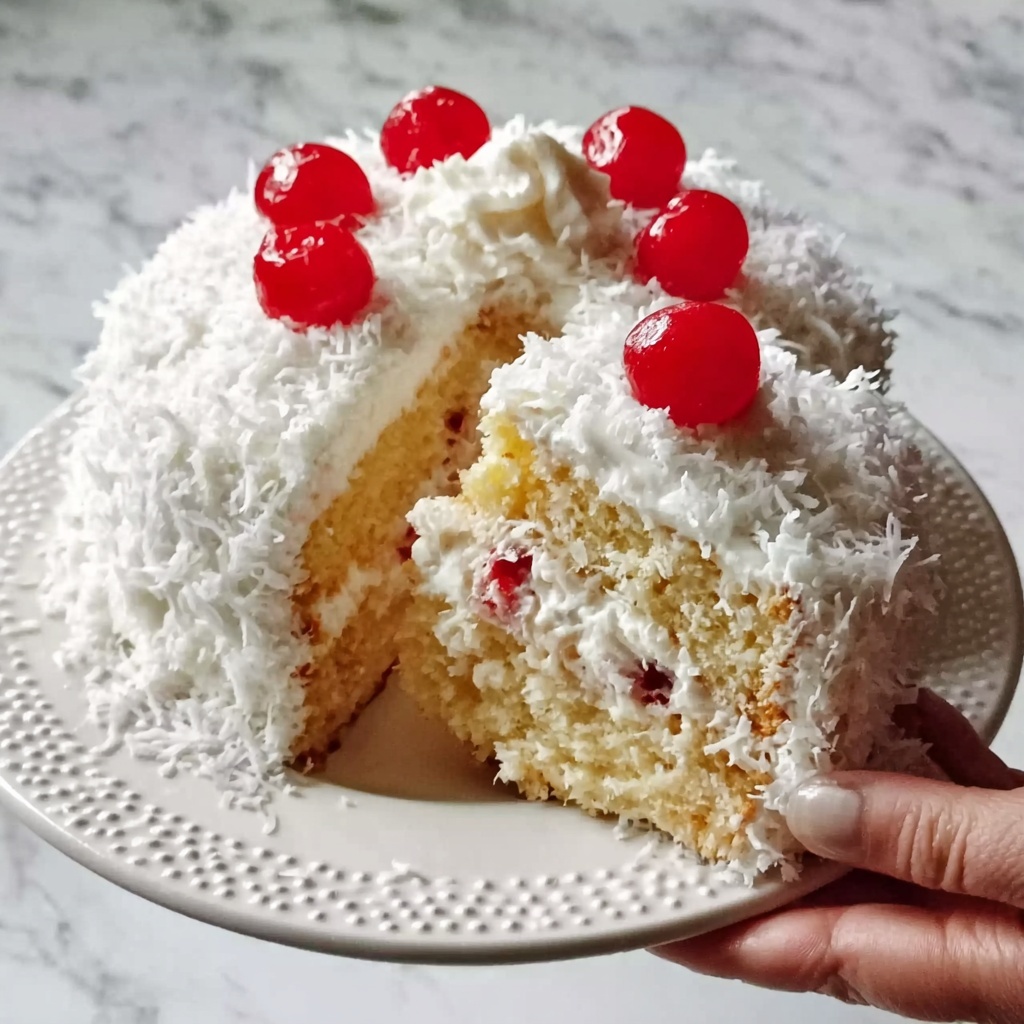
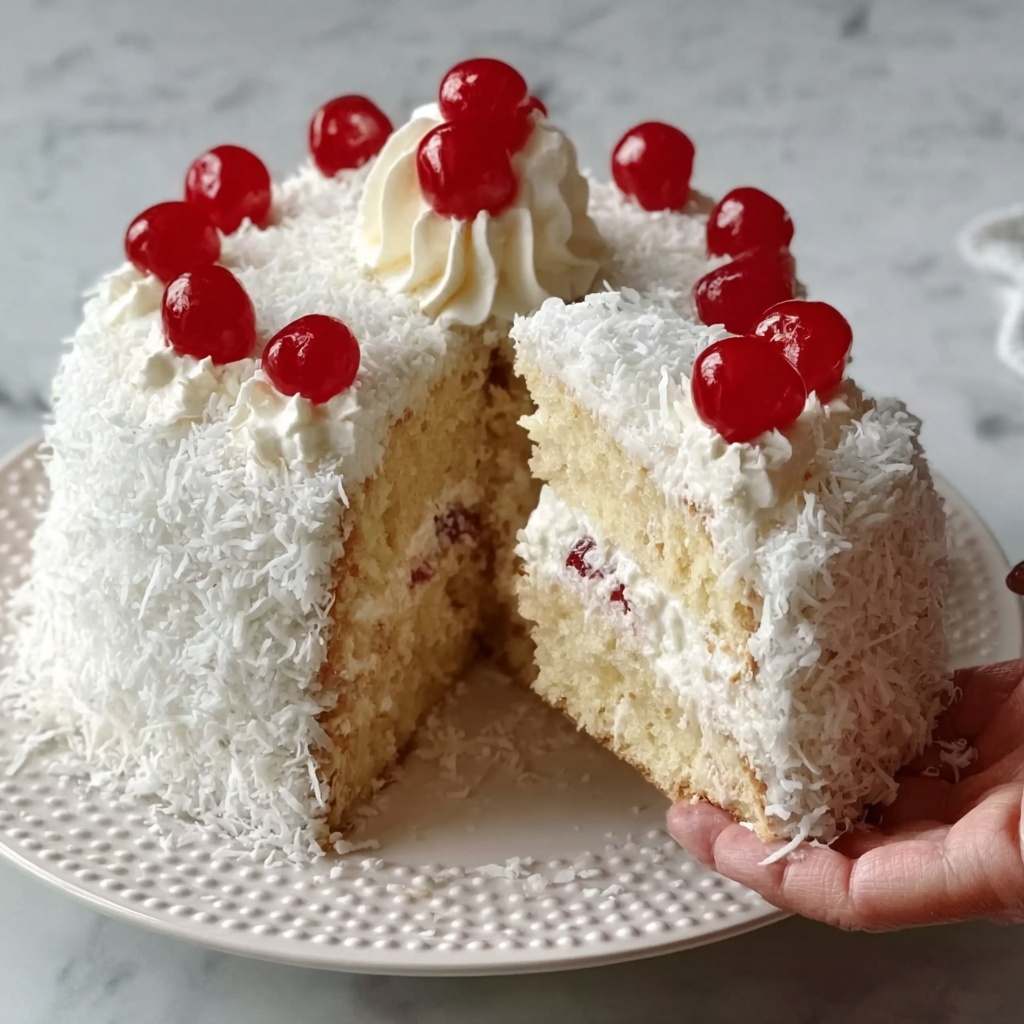
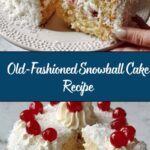
If you’re on the hunt for a nostalgic dessert that feels like a warm hug from the past, this Old-Fashioned Snowball Cake Recipe is exactly what you need. Fluffy layers of vanilla almond cake are smothered in luscious whipped cream and coated with a snowy blanket of sweet shredded coconut, creating a light yet indulgent treat that’s perfect for any occasion. It’s that delightful balance of simple ingredients coming together to make an unforgettable classic that never goes out of style.
Ingredients You’ll Need
The magic of this Old-Fashioned Snowball Cake Recipe lies in its straightforward, comforting ingredients. Each component plays a crucial role in crafting that soft texture, subtle sweetness, and the iconic “snowball” look that makes this cake so charming.
- All-purpose flour: Provides the structure, ensuring the cake is tender but sturdy enough to hold all that fluffy frosting.
- Baking powder: The leavening agent that lifts your cake up nice and light with a perfect crumb.
- Salt: Enhances the sweetness and balances flavors beautifully.
- Unsalted butter, softened: Adds richness and moisture for a melt-in-your-mouth texture.
- Granulated sugar: Sweetens the cake just right without overpowering the almond and vanilla notes.
- Large eggs, room temperature: Key for binding ingredients and contributing to the cake’s tender crumb.
- Vanilla extract: Gives that warm, inviting flavor—a true bakery classic.
- Almond extract: Introduces a subtle nutty aroma that pairs beautifully with the coconut topping.
- Whole milk: Keeps the batter smooth and moist for a soft cake.
- Heavy whipping cream: The star of the frosting, whipped into perfection—light, airy, and downright dreamy.
- Powdered sugar: Sweetens the whipped cream and helps it set beautifully.
- Sweetened shredded coconut: Creates the signature snowy exterior that makes this cake truly unforgettable.
How to Make Old-Fashioned Snowball Cake Recipe
Step 1: Prepare Your Pans and Oven
Begin by preheating your oven to 350°F (175°C). This ensures the perfect baking environment right from the start. Grease and flour two 9-inch round cake pans, then line the bottoms with parchment paper. These small prep details guarantee your cake layers come out clean and intact every time, making assembly a breeze.
Step 2: Mix Dry Ingredients
Whisk together the all-purpose flour, baking powder, and salt in a medium bowl. This step is crucial to evenly distribute the leavening agent and salt, setting the foundation for an even rise and balanced flavor throughout your cake layers.
Step 3: Cream Butter and Sugar
In a large bowl, beat the softened butter and granulated sugar until the mixture is light and fluffy, about 3 to 4 minutes. This aeration process is what contributes to the tender crumb and slight fluffiness of the final cake.
Step 4: Add Eggs and Extracts
Add the eggs one at a time, beating well after each addition to ensure each is fully incorporated. Then stir in the vanilla and almond extracts for that classic aroma and subtle nutty sweetness that make this Old-Fashioned Snowball Cake Recipe stand out.
Step 5: Combine Dry Ingredients and Milk Alternately
Alternately add the dry ingredients and whole milk to the butter mixture, starting and ending with the dry ingredients. Mix gently until just combined—overmixing can make the cake tough, so aim for a smooth, well-blended batter without lumps.
Step 6: Bake the Cake Layers
Divide the batter evenly between the prepared pans and smooth the tops with a spatula. Bake for 25 to 30 minutes or until a toothpick inserted in the center comes out clean. This timing helps the layers cook through without drying out, resulting in soft, tender cakes that hold their shape well.
Step 7: Cool the Cake
Let the cakes cool in their pans for 10 minutes before turning them out onto a wire rack to cool completely. Proper cooling prevents your whipped cream frosting from melting when you assemble the cake.
Step 8: Whip the Cream Frosting
Beat the heavy whipping cream, powdered sugar, and vanilla extract until stiff peaks form. This whipped cream frosting is luxuriously light and sweet, perfectly complementing the delicate almond-vanilla flavor of the cake itself.
Step 9: Assemble and Frost
Place one cooled cake layer on your serving plate and spread a generous layer of whipped cream on top. Gently add the second layer, then coat the entire cake with the remaining whipped cream to create an even, fluffy frosting surface.
Step 10: Apply the Coconut “Snow”
Press sweetened shredded coconut all over the frosted cake, covering the top and sides completely. This “snowball” effect not only provides delightful texture but also gives the cake its signature wintry look. Chill the cake in the refrigerator for at least an hour before serving to set everything beautifully.
How to Serve Old-Fashioned Snowball Cake Recipe
Garnishes
While the coconut “snow” gives this cake its iconic appearance, you can add a few fresh raspberries or a sprinkle of toasted coconut flakes for contrast and a little extra flair. If you want to elevate it seasonally, tiny edible silver or white sprinkles can mimic sparkling snow crystals, making it even more festive and charming.
Side Dishes
This snowball cake pairs wonderfully with a cup of freshly brewed coffee or a hot cup of Earl Grey tea. For gatherings, you might also serve it with a light fruit compote or a fresh citrus salad to balance the richness of the whipped cream and butter in the cake.
Creative Ways to Present
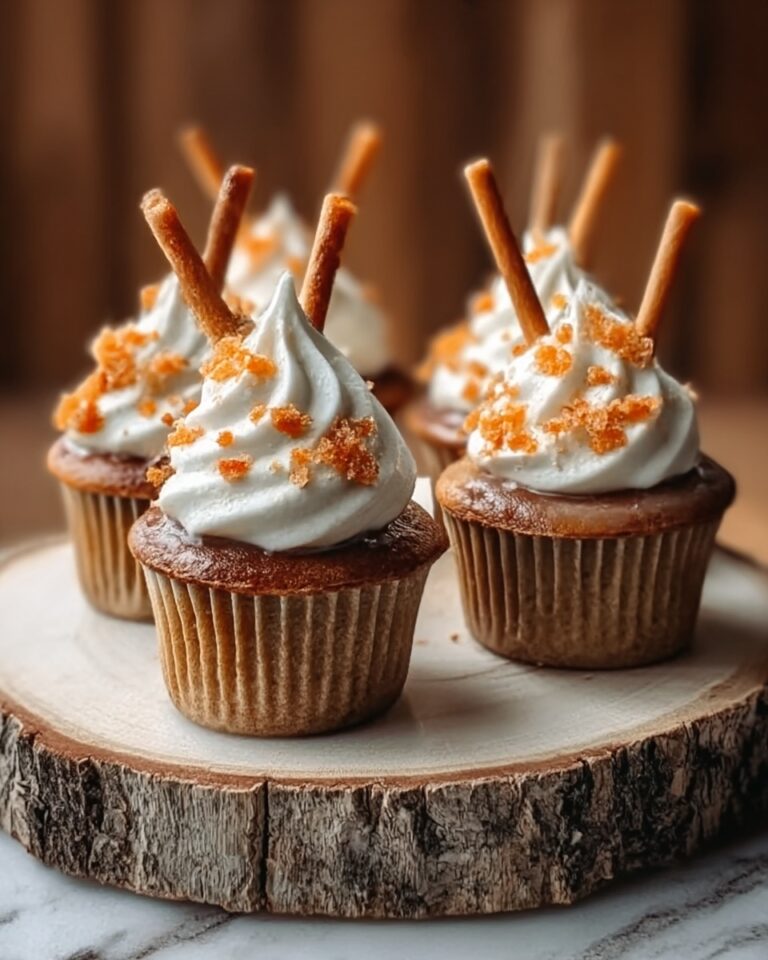
Channel your inner baker by serving the Old-Fashioned Snowball Cake Recipe in individual portions: think mini snowball cupcakes or layered parfaits using cake crumbs mixed with whipped cream and coconut. Another playful twist is to pipe rosettes of whipped cream around the base for a more elegant vibe that will wow your guests.
Make Ahead and Storage
Storing Leftovers
This cake keeps wonderfully in the fridge, covered tightly with plastic wrap or stored in an airtight container. The whipped cream will maintain its fluffiness, and the coconut stays fresh for up to 3 days, allowing you to enjoy those snowy layers long after the party is over.
Freezing
If you want to freeze the cake, wrap it securely in plastic wrap and then aluminum foil before placing it in the freezer. This helps protect the delicate whipped cream and coconut coating. When you want to enjoy it, thaw overnight in the fridge to preserve the cake’s moist texture and creamy frosting.
Reheating
Cakes like this are best enjoyed chilled, so there’s no need to reheat. However, if you prefer a softer cake texture, bring slices to room temperature for about 15-20 minutes before serving. This small step softens the whipped cream slightly without melting it completely, ensuring each bite is heavenly.
FAQs
Can I use different extracts in this Old-Fashioned Snowball Cake Recipe?
Absolutely! While vanilla and almond extracts are classic here, you can experiment with coconut extract for an even more intense coconut flavor or swap almond for a touch of lemon zest for a citrus twist. Just be mindful of the quantities so you don’t overpower the delicate balance.
Is it possible to make this cake gluten-free?
Yes, you can substitute the all-purpose flour with a gluten-free baking blend, but make sure it contains xanthan gum for proper texture. The cake’s tender crumb and rise may vary slightly, but it will still be delicious and maintain the signature look of the Old-Fashioned Snowball Cake Recipe.
Can I prepare the cake layers in advance?
Definitely! Bake the layers a day ahead and store them wrapped tightly at room temperature or in the fridge. Assemble and frost on the day you plan to serve to keep the whipped cream fresh and fluffy.
What’s the best way to whip the cream for frosting?
Use cold heavy cream and chill your mixing bowl and beaters beforehand. Whip on medium-high speed until soft peaks form, then add powdered sugar and vanilla and continue whipping until stiff peaks form. Be careful not to overbeat, or it will turn grainy and eventually turn to butter.
Can I use sweetened or unsweetened shredded coconut?
For this recipe, sweetened shredded coconut is preferred as it complements the lightly sweet whipped cream and cake. Unsweetened coconut will work, but expect a less sweet, nuttier flavor which may change the overall taste experience.
Final Thoughts
I can’t recommend this Old-Fashioned Snowball Cake Recipe highly enough if you’re craving a dessert that’s as inviting to make as it is to eat. Its simplicity, nostalgic charm, and that fluffy coconut “snow” make it a standout for holidays, family gatherings, or whenever you want to bring a little joyful tradition to your table. Trust me, once you take a bite, this cake will quickly become a beloved favorite worth sharing time and time again.
Print
Old-Fashioned Snowball Cake Recipe
- Prep Time: 20 minutes
- Cook Time: 30 minutes
- Total Time: 1 hour 10 minutes
- Yield: 12 servings
- Category: Dessert
- Method: Baking
- Cuisine: American
- Diet: Vegetarian
Description
This Old-Fashioned Snowball Cake is a delightful classic dessert featuring light, fluffy vanilla-almond cake layers generously frosted with sweet whipped cream and coated with shredded coconut, reminiscent of snowy winter treats. Perfect for celebrations or cozy gatherings, this cake combines tender crumb and creamy frosting for a truly festive experience.
Ingredients
Cake
- 2 ½ cups all-purpose flour
- 2 ½ teaspoons baking powder
- ½ teaspoon salt
- 1 cup unsalted butter, softened
- 2 cups granulated sugar
- 4 large eggs, room temperature
- 1 teaspoon vanilla extract
- 1 teaspoon almond extract
- 1 cup whole milk
Whipped Cream Frosting
- 3 cups heavy whipping cream
- ⅓ cup powdered sugar
- 1 teaspoon vanilla extract
Decoration
- 2 ½ cups sweetened shredded coconut
Instructions
- Preheat and Prepare Pans: Preheat your oven to 350°F (175°C). Grease and flour two 9-inch round cake pans, then line the bottoms with parchment paper to ensure easy release after baking.
- Mix Dry Ingredients: In a medium mixing bowl, whisk together the flour, baking powder, and salt until evenly combined; set aside.
- Cream Butter and Sugar: In a large bowl, beat the softened butter and granulated sugar together until the mixture is light and fluffy, about 3 to 4 minutes, creating a smooth base for the batter.
- Add Eggs and Flavorings: Add the eggs one at a time, beating well after each addition. Then, mix in the vanilla and almond extracts to infuse the batter with classic flavors.
- Combine Ingredients: Alternately add the dry ingredients and milk to the butter mixture, starting and ending with the dry ingredients. Mix just until combined to avoid overmixing and maintain cake tenderness.
- Divide and Bake: Evenly divide the batter between the prepared pans and smooth the tops. Bake in the preheated oven for 25 to 30 minutes, or until a toothpick inserted into the center comes out clean.
- Cool Cakes: Allow the cakes to cool in their pans for 10 minutes before transferring them to a wire rack to cool completely, ensuring the frosting adheres properly.
- Make Whipped Cream Frosting: In a chilled bowl, whip the heavy cream with powdered sugar and vanilla extract until stiff peaks form, creating a stable and fluffy frosting.
- Assemble the Cake: Place one cake layer on a serving plate and spread a generous layer of whipped cream on top. Add the second cake layer and cover the top and sides fully with the whipped cream frosting.
- Add Coconut Coating and Chill: Press the sweetened shredded coconut onto the frosting all around the cake to mimic a snowy appearance. Chill the cake in the refrigerator for at least 1 hour before serving to allow flavors to meld and frosting to set.
Notes
- For best results, use room temperature eggs and softened butter to ensure proper emulsification and a tender cake.
- Chilling the cake before serving helps the whipped cream frosting hold its shape and intensifies flavor blending.
- You can toast the shredded coconut slightly if you prefer a toasted flavor and texture on top.
- Store any leftovers covered in the refrigerator and consume within 3 days for optimal freshness.
- To make slicing easier, dip your knife in hot water and wipe dry before each cut.

