
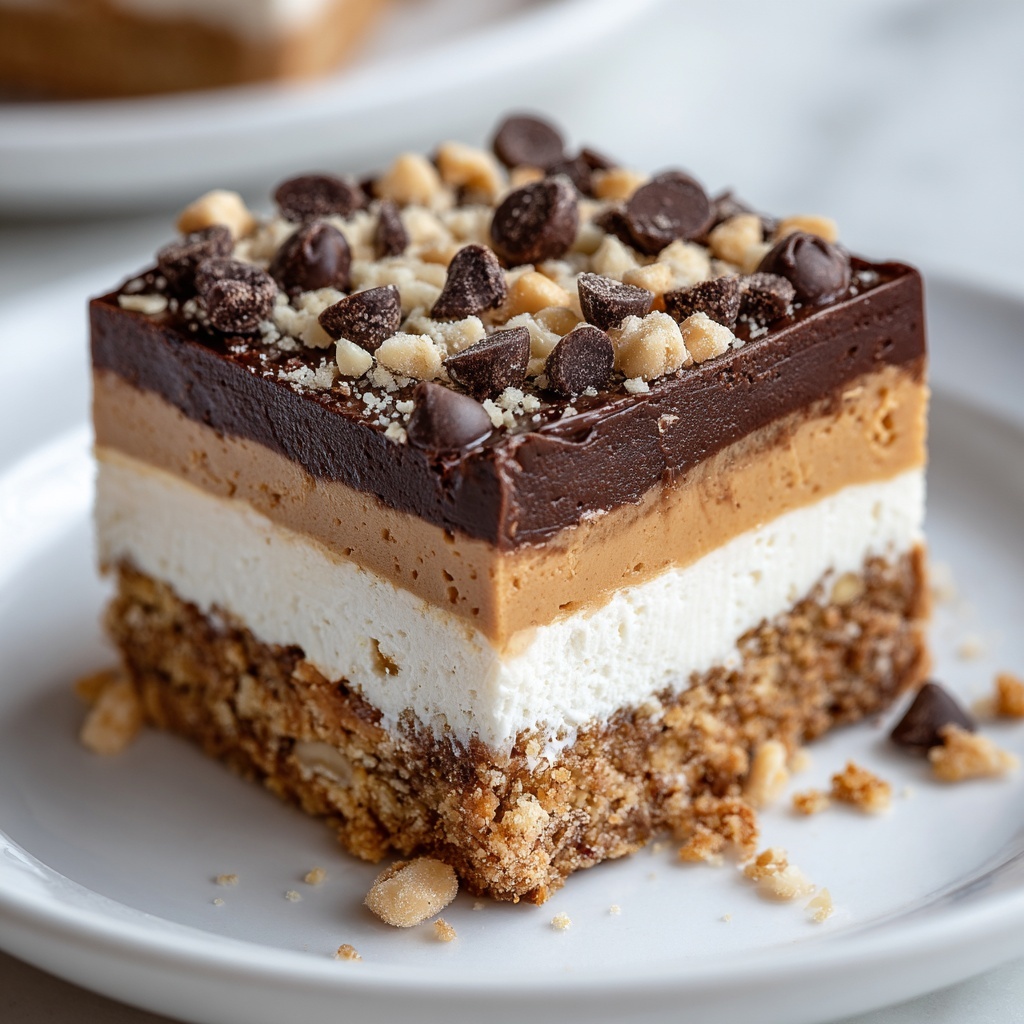
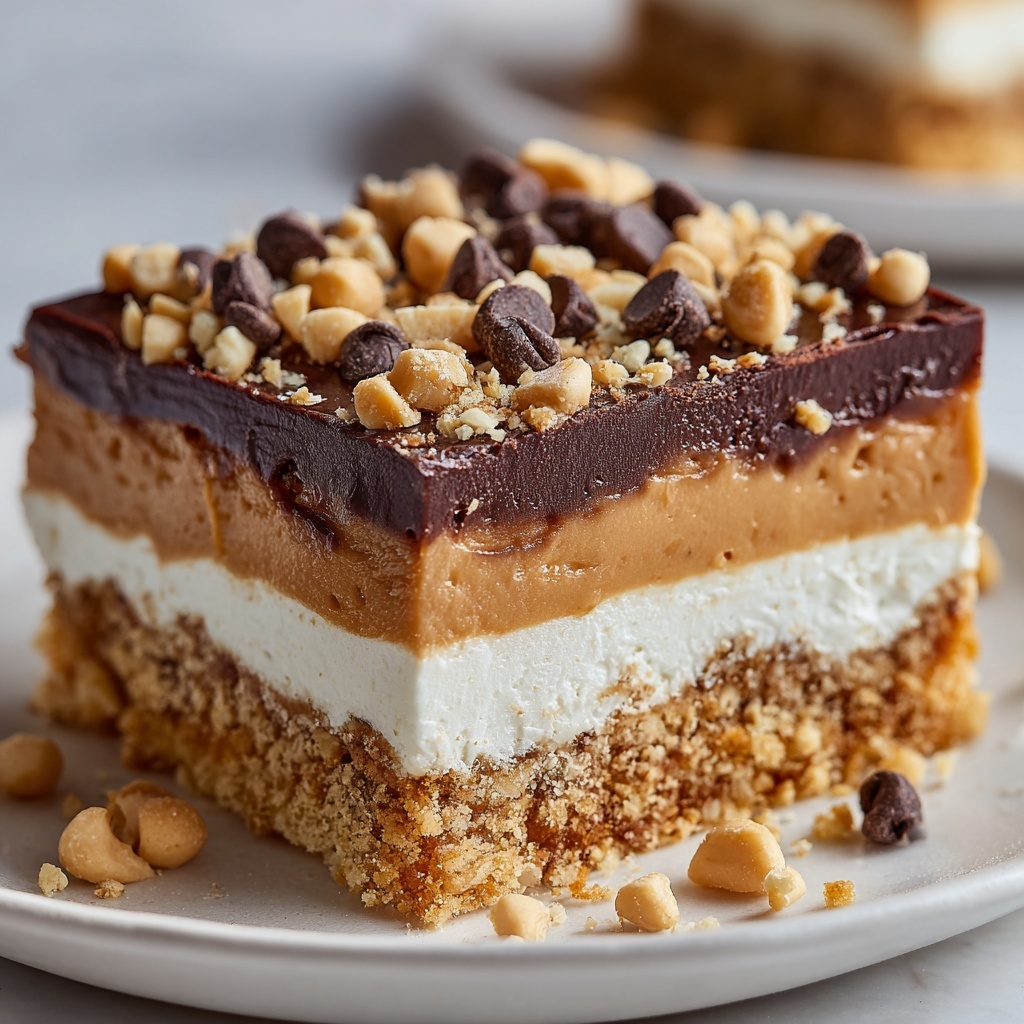
Let me introduce you to a total game-changer in the dessert world: Peanut Butter Dream Bars: No-Bake Chocolate & Peanut Butter Dessert Recipe. This luscious treat layers crunchy peanut butter sandwich cookie crust, silky chocolate pudding, creamy peanut butter filling, and fluffy whipped topping, all topped with melty chocolate and peanut butter chips. It brings together classic flavors with zero baking involved, making it perfect for anyone craving a rich, indulgent dessert without heating up the kitchen. Once you take a bite, you’ll understand why these bars are an absolute dream come true.
Ingredients You’ll Need
These ingredients are wonderfully straightforward but each one plays an essential role in creating the perfect harmony of textures and flavors. From crispy cookie crust to creamy fillings and delightful chocolate chips on top, every component elevates this dessert.
- Peanut Butter Sandwich Cookies: Using about 40–45 cookies provides a sturdy yet flavorful crust that crunches beautifully.
- Unsalted Butter: Melted to bind the cookie crumbs perfectly, adding richness without overpowering.
- Cold Milk: Required to whisk into the instant pudding mix for that smooth, thick chocolate layer.
- Instant Chocolate Pudding: Delivers deep chocolate flavor with minimal effort and no baking time.
- Cream Cheese: Softened to create a dreamy, smooth peanut butter filling that’s downright irresistible.
- Powdered Sugar: Adds just the right amount of sweetness and helps stabilize the peanut butter layer.
- Creamy Peanut Butter: The star taste that brings the classic peanut butter essence into every bite.
- Cool Whip (or whipped topping): Provides a light, airy texture that contrasts beautifully with the dense layers beneath.
- Milk Chocolate Chips: For that melty, sweet chocolate finish on top.
- Peanut Butter Chips: Adds that extra peanut buttery crunch and richness on the surface.
- Optional Toppings: Crushed pretzels, caramel drizzle, and sea salt flakes contribute fun textures and flavor twists if you want to get fancy.
How to Make Peanut Butter Dream Bars: No-Bake Chocolate & Peanut Butter Dessert Recipe
Step 1: Prepare the Crust
Start by crushing those peanut butter sandwich cookies into fine crumbs, almost like sand. Mixing these crumbs with the melted unsalted butter brings everything together into a moldable base. Press this mixture firmly into a 9×13-inch pan to make sure the crust holds well. After that, pop it into the fridge for about 15 minutes to firm up. This step sets the perfect foundation for your dream bars.
Step 2: Create the Chocolate Pudding Layer
Whisk the instant chocolate pudding mix with cold milk for around 2 minutes. It thickens quickly and becomes silky smooth. Once ready, spread this luscious chocolate layer evenly over the chilled cookie crust. Refrigerate again to keep things cool and let the pudding layer firm up just right—this will ensure clean, neat slices later.
Step 3: Whip Up the Peanut Butter Layer
In a mixing bowl, beat softened cream cheese, powdered sugar, and creamy peanut butter until the mixture is completely smooth and velvety. Gently fold in half of the Cool Whip to add lightness without losing that rich peanut butter punch. Spread this dreamy layer evenly over the chocolate pudding, being careful not to disturb the layer beneath.
Step 4: Add the Topping
Now, spread the remaining Cool Whip over the peanut butter layer, creating a fluffy, cloud-like topping. Shower the surface generously with milk chocolate chips and peanut butter chips for sweetness and texture. If you’re feeling adventurous, sprinkle optional toppings like crushed pretzels, caramel drizzle, or sea salt flakes to add exciting contrasts that will wow everyone.
Step 5: Set and Slice
Return the assembled bars to the refrigerator for at least 2 hours. This chilling time lets all those layers meld beautifully and gives you bars that slice cleanly without any mess. When you cut into these bars, you’ll reveal gorgeous layers that are just begging to be devoured.
How to Serve Peanut Butter Dream Bars: No-Bake Chocolate & Peanut Butter Dessert Recipe
Garnishes
Enhance your Peanut Butter Dream Bars with a sprinkle of sea salt flakes or a drizzle of caramel for a gourmet touch that balances the sweet and salty flavors wonderfully. Fresh mint leaves or even a dusting of cocoa powder can add a pop of color and freshness, making your dessert feel extra special.
Side Dishes
These bars stand beautifully on their own, but pairing them with a scoop of vanilla ice cream or a dollop of fresh whipped cream can elevate your dessert experience. For a fruity contrast, fresh berries or a simple berry compote bring brightness that cuts through the richness of peanut butter and chocolate.
Creative Ways to Present
For parties, serve your Peanut Butter Dream Bars in individual clear glasses layered with extra Cool Whip and some chocolate chips on top for that wow factor. You can also create mini versions in cupcake liners for bite-sized indulgences. Presentation matters, and these ideas will make your guests swoon before even taking a bite.
Make Ahead and Storage
Storing Leftovers
Store leftover bars tightly covered in the refrigerator for up to 4 days. Keep them chilled to maintain the texture, especially the whipped topping and pudding layer, which can become soggy if left out too long. Using an airtight container helps prevent fridge odors from affecting the delicate flavor.
Freezing
You can freeze the bars for up to 1 month. Wrap them tightly in plastic wrap, then foil, or place in a freezer-safe container. Thaw in the refrigerator overnight before serving to keep their texture intact. While freezing might slightly soften the whipped topping, the flavors will still be as dreamy as ever.
Reheating
This no-bake dessert is best enjoyed cold, so reheating isn’t recommended. Instead, allow frozen bars to thaw completely in the refrigerator before serving to preserve the luscious layering and creamy textures. No warming needed for such a perfect peanut butter and chocolate harmony.
FAQs
Can I use crunchy peanut butter instead of creamy?
Absolutely! Using crunchy peanut butter will add a delightful texture to your peanut butter layer. Just keep in mind it may slightly alter the smoothness, but the flavor remains deliciously intact.
Is there a substitute for Cool Whip?
If you prefer to avoid Cool Whip, you can use homemade whipped cream or any other whipped topping alternative. Just make sure it’s stable enough to hold the layers together without melting quickly.
Can I make these bars gluten-free?
To make them gluten-free, simply swap the peanut butter sandwich cookies for a gluten-free alternative with similar flavor and texture. Ensure all other ingredients are gluten-free as well to keep everyone happy and safe.
How long do the bars last in the fridge?
Stored properly in an airtight container, these Peanut Butter Dream Bars will stay fresh and tasty for up to 4 days. Beyond that, the texture might start to change as the layers absorb moisture.
Can I add nuts or other mix-ins?
Definitely! Chopped peanuts, pretzels, or even toffee bits make fantastic additions. Add them to the peanut butter layer or sprinkle on top to customize your bars and add more crunch.
Final Thoughts
There’s something utterly magical about the combination of chocolate and peanut butter, and the Peanut Butter Dream Bars: No-Bake Chocolate & Peanut Butter Dessert Recipe captures this flavor duo effortlessly while keeping things simple and stress-free. Whether you’re feeding a crowd or treating yourself to a delicious snack, this recipe promises comfort and indulgence in every bite. I can’t wait for you to try these bars—you might just find your new favorite dessert for every occasion!
Print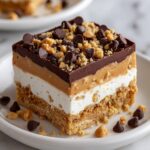
Peanut Butter Dream Bars: No-Bake Chocolate & Peanut Butter Dessert Recipe
- Prep Time: 2 hours 25 minutes
- Cook Time: 0 minutes
- Total Time: 2 hours 25 minutes
- Yield: 16 generous squares
- Category: Dessert
- Method: No-Cook
- Cuisine: American
Description
Peanut Butter Dream Bars are a luscious no-bake dessert featuring layers of chocolate pudding and creamy peanut butter atop a buttery cookie crust, topped with fluffy whipped topping and chocolate-peanut butter chips for a perfect sweet and salty indulgence.
Ingredients
Crust
- 2 packages peanut butter sandwich cookies (about 40–45 cookies)
- 12 tablespoons unsalted butter, melted
Chocolate Layer
- 3 cups cold milk
- 2 (5.1 oz) boxes instant chocolate pudding mix
Peanut Butter Layer
- 8 ounces cream cheese, softened
- 1 cup powdered sugar
- 1 cup creamy peanut butter
- 16 ounces Cool Whip (or whipped topping), divided
Topping
- 1 cup milk chocolate chips
- 1 cup peanut butter chips
- Optional toppings: crushed pretzels, caramel drizzle, sea salt flakes
Instructions
- Prepare the crust: Crush the peanut butter sandwich cookies into fine crumbs either using a food processor or by hand in a zip-top bag. Mix the crumbs thoroughly with the melted butter until evenly combined. Press this mixture firmly into the bottom of a 9×13-inch pan to form an even crust. Chill the crust in the refrigerator for 15 minutes to set.
- Make the chocolate layer: In a large bowl, whisk together the instant chocolate pudding mix and cold milk for about 2 minutes until the mixture thickens. Immediately spread this thickened pudding evenly over the chilled cookie crust. Place back in the refrigerator to chill while you prepare the next layer.
- Prepare the peanut butter layer: In a separate bowl, beat the softened cream cheese, powdered sugar, and creamy peanut butter together until smooth and creamy. Gently fold in half of the Cool Whip to lighten the mixture. Carefully spread this peanut butter mixture evenly over the chocolate pudding layer.
- Add the topping: Spread the remaining Cool Whip evenly over the peanut butter layer for a light and airy top. Sprinkle the surface generously with milk chocolate chips and peanut butter chips. Optionally add crushed pretzels, a drizzle of caramel, or sea salt flakes for extra texture and flavor contrast.
- Set the bars: Refrigerate the assembled dessert for at least 2 hours to allow all the layers to set firmly. Once set, slice into 16 generous squares and serve chilled for best texture and flavor.
Notes
- For easier cookie crushing, place cookies in a sturdy zip-top bag and crush with a rolling pin or use a food processor.
- Use full-fat cream cheese for richest flavor and texture.
- Ensure the milk is cold to help pudding set properly and quickly.
- The dessert is best served chilled but can be stored covered in the refrigerator for up to 3 days.
- Optional toppings like crushed pretzels add a nice crunch and balance the sweetness.


